US
12 13
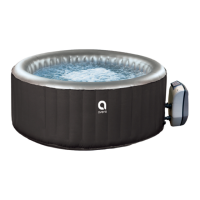
5.1. Water maintenance
WARNING : Bad spa water quality can harm your health.
CAUTION: Please use chemicals properly. Quality problems caused by overuse
and improper use do not apply to our warranty.
Depending on the frequency and conditions of use:
- The lter cartridge should be regularly cleaned (150 hours max.).
- The lter cartridge should be replaced every 1 to 2 month.
- The spa water should be changed every 15 to 30 days.
Use a water test kit to control the parameters of the water before using the spa, or at
least once a week.
Use disinfection products for the spa. The treatment products should be used with
caution and it is imperative to refer to their instructions.
Damage resulting from improper use of treatment products is not covered by warranty
(overdose, shock treatment, ...).
1. Water balance
The water balance (pH) must be maintain between 7 and 7.4.
2. Water Sanitation
To sanitize the spa water, we suggest using an active oxygen-based
treatment or bromine placed in a oating dispenser. (Dispenser sold
separately).
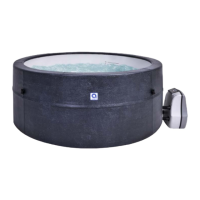
5. MAINTENANCE
5.2. Cleaning and replacing lter cartridge
Dirty lter cartridge may contaminate the spa water and cause damage to the heating
function.
1. Unscrew the lter case by turning it counter-clockwise. Take out the lter cartridge
from the case.
2. Rinse off the lter cartridge with a garden hose. If the lter cartridge remains dirty
and discoloured, the lter cartridge should be replaced.
3. Put back the cleaned lter cartridge into his case and screw it to the spa.
5.2a Disinfection
Water Sanitation:
To sanitize the spa water, we suggest using an active oxygen-based treatment or bro-
mine placed in a oating dispenser. (Dispenser sold separately)
If water is heavily polluted you should not use spa.
Clean spa with with specialist UV lighting equipment.
Seek professional advice and guidance before doing this.
Attention:
Detergent residues and dissolved solids from bathing suits and chemicals may build
up on the spa walls, Use soap and water to clean the walls and rinse thoroughly with a
garden hose using a direct powerful waterspray.
5.3. Drainage and storage
Drainage
1
Check the stopper on the bottom of the spa and the drain cap.
2
Unscrew the drain cap.
3
Remove the stopper on the bottom of the spa. Completely drain all water from the
spa.
Once empty, the spa can be cleaned with soap and water.
Storage
5
Press the bubbling button to blow out the water inside the jet holes. Unplug the
pump, remove the lter cartridge from the inner wall of the spa.
6
Use a towel to wipe off the spa, dry 24 hours.
7
Unscrew the valves to deate the spa.
8
Fold the spa.
It is recommended that store the SPA in its original package in a warm dry place.
5.4. Repair kit
Little holes or puncture can be repaired with the repair kit included and glue reserved to
spa liner.
1. Find the leak.
2. Thoroughly clean the area surrounding the leak.
3. Cut a piece of repair material in round shape, which should be larger than the dam-
aged area.
4. Apply adhesive to the underneath side of the patch and around the area to be re-
paired.
5. Put the patch on the damaged area and press down rmly. Allow 12 hours for repair
to dry. After patch has dried, apply glue around the edges for a complete seal (dry 4
hours).Ensure NO bubbles are left under the patch.
1
5
2
6
3
7 8