D - CONFIGURATION
2 - ACCESS TO ALL SETTINGS
2.1 - Configuration
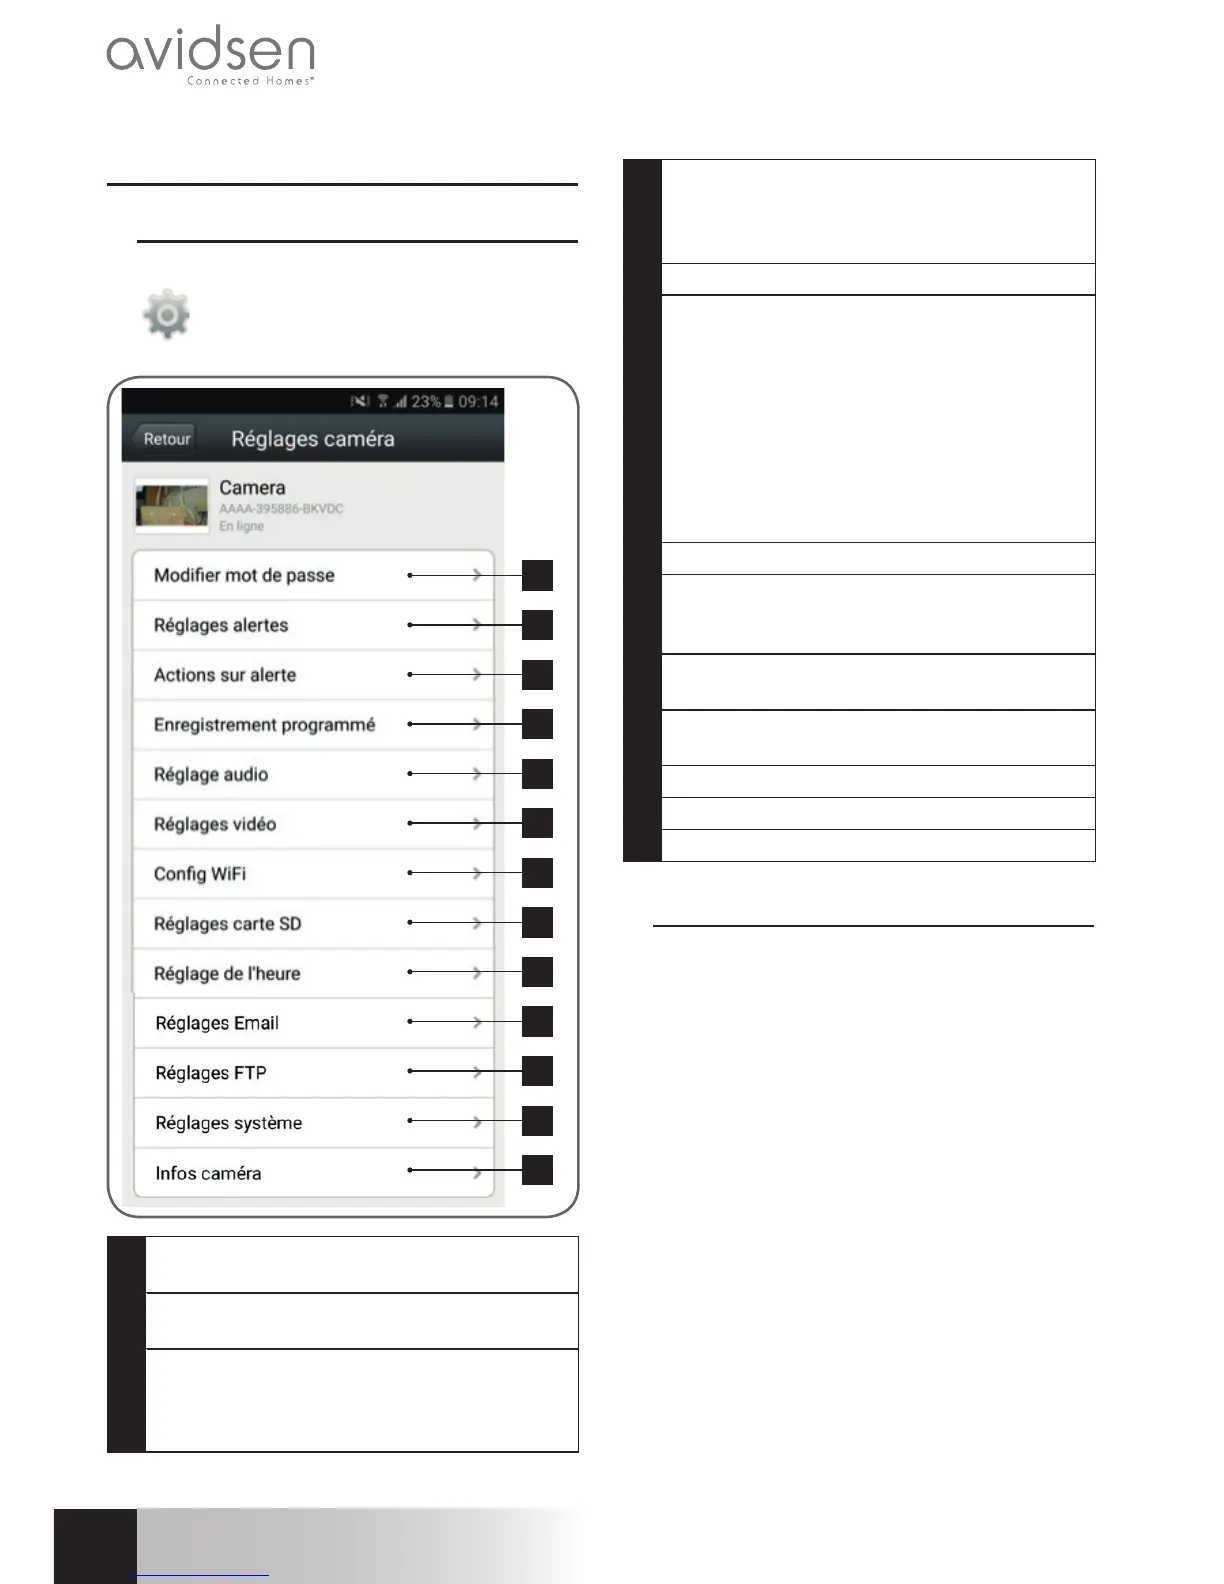
From the camera list, click on the icon
to the right of your camera's name to
display the configuration menus:
1
2
3
4
5
6
7
8
9
10
11
12
13
1
Changing the password to log in to the camera
(“admin”, by default)
2
Activation/deactivation and sensitivity of the
motion detector
3
Actions to take if motion is detected:
notification, send an email, saving a file to the
memory card (requires a micro SD card [not
included] to be inserted into the camera)
4
Activation/deactivation of continuous
recording to the microSD card and the length
of videos (requires a micro SD card [not
included] to be inserted into the camera)
5
Volume of the microphone and speaker
6
Video quality settings and number of frames per
second. Warning: if you set the video quality to
high with respect to the quality of the internet
connection of your camera and smartphone
or tablet, you may experience choppy video
or loss of connection. Two streams can be
adjusted: they correspond with the maximum
resolution = “résolution Max”, and low
resolution = “résolution faible”, which you
can select from the live video display.
7
Configure the Camera‘s current WiFi settings
8
If a microSD card has been inserted into the
camera, you can reformat it and display its
total and free memory
9
Setting the date and time stamps on the
camera’s video
10
Settings for sending emails in the event of an
alert (see the below example)
11
Settings for saving to an FTP server
12
Remote camera restart
13
Camera network information
2.2 - Example: programming an email alert to be
sent when motion is detected
To program an alert to be sent when motion
is detected, you need 2 email addresses: the
address of the sender which will be used by
the camera, and the address which will receive
the alerts. The camera uses the username and
password of the sender address to connect and
send the email. Configuration depends on the
chosen email provider's settings.
Note: the 2 email addresses can be the same
(you will simply be sending an email to yourself).
In our example, we use
www.gmail.com:
sender-address@gmail.com sends the alerts,
recipient@gmail.com receives the alerts.
Both addresses need to have been created
beforehand.
First, go to “Réglages Email” (Email settings):
 Loading...