Do you have a question about the Avigilon 1.0-H3-D1 and is the answer not in the manual?
| Brand | Avigilon |
|---|---|
| Model | 1.0-H3-D1 |
| Category | Security Camera |
| Language | English |
Details compliance with FCC rules for Class B digital apparatus and potential interference issues.
Guidelines for environmentally responsible disposal of the product at its end of life.
Information regarding the manual's compilation, publication, and potential for changes.
Details regarding licenses, patents, copyrights, and trademarks associated with the product.
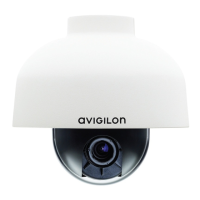
Diagram and description of the camera's exterior features including the dome cover and cable entry.
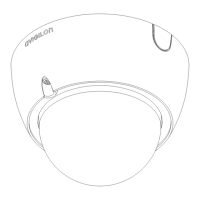
Diagram and description of the camera's bottom features including mounting holes and serial number tag.
Diagram and description of the camera's front features including control knobs, ports, and LEDs.
Diagram and description of the camera's rear features, highlighting the SD card slot.
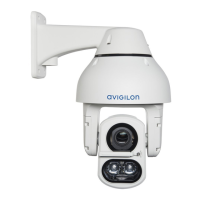
Diagram and description of the camera's IR illuminator ring feature for low-light conditions.
Lists essential tools and materials needed for the camera installation process.
Details the items included in the camera package to ensure all components are present.
Provides a sequential guide to the overall installation procedure for the dome camera.
Instructions for safely removing the camera's tamper-resistant dome cover.
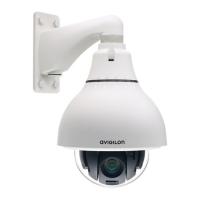
Steps for securely mounting the dome camera to a ceiling or wall using provided hardware.
Guide on connecting network, power, and external device cables to the dome camera.
Methods for automatically or manually assigning an IP address to the camera for network connectivity.
Instructions on how to view the live video feed from the camera using various software applications.
Procedure for adjusting the camera's pan, tilt, and azimuth to achieve the desired viewing angle.
Steps for inserting and configuring an SD card for local video storage on the camera.
Instructions for reattaching the dome cover after installation and focusing procedures.
Guide on adjusting the camera lens for optimal focus, utilizing auto-focus or manual controls.
Detailed steps for connecting an external AC or DC power source to the camera when PoE is not used.
Information on connecting external input/output devices using the camera's I/O terminal, including pinout details.
Instructions for connecting audio and video peripherals using the camera's mini-jack connector, including pinout.