Do you have a question about the Avigilon H5SL Series and is the answer not in the manual?
Step-by-step instructions for physically attaching the camera to a surface.
Procedure for accessing the camera's internal configuration panel.
Guide for setting initial user credentials for camera access.
How the device obtains or can be assigned an IP address on the network.
Methods for viewing the live video feed from the camera.
This document provides an installation guide for the Avigilon H5SL Bullet Camera models, including 1.3C-H5SL-BO1-IR, 3.0C-H5SL-BO2-IR, 2.0C-H5SL-BO1-IR, 5.0C-H5SL-BO1-IR, 3.0C-H5SL-BO1-IR, and 5.0C-H5SL-BO2-IR. It outlines the necessary steps for installation, configuration, and troubleshooting, ensuring proper and safe operation of the device.
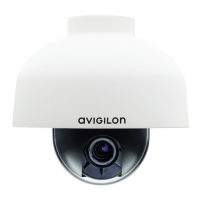
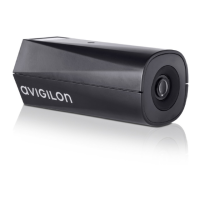
The Avigilon H5SL Bullet Camera is a surveillance device designed for capturing video footage. Its primary function is to provide scene illumination in the IR spectrum through its IR illuminator, enabling clear imaging even in low-light conditions. The camera is powered by Power over Ethernet (PoE), which simplifies installation by allowing both power and data transmission over a single Ethernet cable. This connection also facilitates server communication and image data transmission to the network. The camera includes a microSD card slot for onboard storage, allowing for local recording of footage. It also features external I/O and audio cables, enabling connection to external audio and I/O devices such as microphones, speakers, door contacts, and relays, expanding its functionality beyond basic video capture. The camera is designed to be robust, with a sun shroud that helps protect the lens from glare, ensuring optimal image quality.
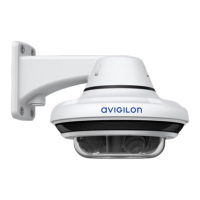
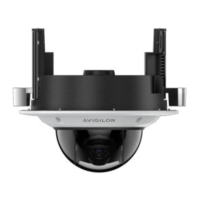
The Avigilon H5SL Bullet Camera offers several features to facilitate its usage and integration into a surveillance system. The camera is designed for easy mounting, with a mounting bracket that includes camera mounts, mounting hook slots, and mounting holes for secure attachment to a surface. The mounting hook slots allow the camera to be temporarily held while connecting cables, simplifying the installation process. The camera's mount arm is adjustable, providing flexibility in positioning the camera to achieve the desired field of view. Adjustment screws are provided to lock the mount arm in place, ensuring the camera maintains its aimed position.
For initial setup and configuration, the camera requires the creation of an administrator username and password, especially for models manufactured after January 1, 2020, which do not have default credentials. This can be done through various methods: the camera's web interface, the Avigilon Camera Configuration Tool, the USB Wi-Fi Adapter, Avigilon Control Center software (version 7.4 or later, or 6.14.12 or later), or Avigilon Cloud Services (ACS) v3.0 or later. For cameras manufactured before January 1, 2020, the default username is "administrator" with no password, though changing it after the first login is recommended for security.
The camera automatically obtains an IP address when connected to a network, typically using DHCP or Zero Configuration Networking (Zeroconf) if a DHCP server is unavailable. The IP address settings can be modified via the mobile web interface (using the USB Wi-Fi Adapter), the device's web browser interface, Network Video Management software, or the ARP/Ping method.
Live video streams from the camera can be accessed through the mobile web interface (with the USB Wi-Fi Adapter), a web browser interface, or Network Video Management software. Aiming the camera involves loosening adjustment screws to rotate and tilt the camera arm and body, with the live stream serving as a reference. Zooming and focusing are managed through the camera's web browser interface or Avigilon Control Center software, offering options for auto-focus, manual focus adjustment, and zoom in/out.
The optional USB Wi-Fi Adapter (H4-AC-WIFI) allows access to the camera's mobile web interface from any mobile device via http://camera.lan, providing convenient remote configuration. When the USB Wi-Fi Adapter is plugged in, the camera reserves a specific subnet (10.11.22.32/28) for internal use.
The manual emphasizes several maintenance and safety features to ensure the longevity and proper functioning of the Avigilon H5SL Bullet Camera. It highlights the importance of professional installation by qualified personnel to conform to local codes and prevent unexpected faults.
For environmental protection, the document includes disposal and recycling information, indicating that the product should be disposed of separately from household waste at designated collection points. This ensures natural resource conservation and environmentally sound recycling.
The camera's connection status is indicated by an LED, which provides visual cues about its operational state:
Troubleshooting network connections and LED behavior is simplified by these indicators. If the green LED is off and the amber LED is on, or if both LEDs are off and the camera is not connected or streaming video, a factory reset using the physical firmware revert button is suggested. This physical reset is crucial as resetting through the camera's web interface may not produce the desired result for these specific issues. If both LEDs are blinking several times simultaneously, then pausing and repeating, or if there's a different blinking pattern, a physical firmware revert button reset is also recommended. Before attempting any other solutions, it's advised to ensure the camera is receiving power and using a good network cable.
For situations where the device no longer functions as expected, a factory reset option is available. This involves gently pressing and holding the firmware revert button (located in the configuration panel) for three seconds while the device is powered on. A caution is provided against applying excessive force to avoid damaging the camera.
The manual also stresses the importance of protecting cable connections from moisture and corrosion, recommending the installation of a protective cable boot over the Ethernet port to shield it from dust and moisture. This proactive measure helps prevent damage and ensures reliable connectivity. Regular cleaning of the device body with mild detergents is recommended, with a warning against using strong or abrasive cleaners. All device servicing, especially in cases of damage (e.g., liquid spills, fallen objects, exposure to rain/moisture, or abnormal operation), should be referred to qualified personnel, as there are no user-serviceable parts.
| Ingress Protection | IP66 |
|---|---|
| Impact Rating | IK10 |
| Day/Night | Yes, with IR cut filter |
| Wide Dynamic Range (WDR) | Yes, up to 120 dB |
| Video Compression | H.264, H.265, MJPEG |
| Ethernet | 10/100BASE-T |
| Resolution | 5 MP |
| IR Illumination | Yes |
| Operating Temperature | -40°C to 50°C (-40°F to 122°F) |
| Power | PoE, 12V DC |
| Sensor Type | CMOS |
| Lens Type | Fixed or varifocal |
| Iris | P-Iris |
| IR Distance | Up to 30m (98ft) |
| Frame Rate | Up to 30 fps |
| Analytics | Yes |
| Aperture | F1.6 |
| Minimum Illumination | 0 lux (IR on) |