Do you have a question about the Avigilon H5A-PTZ and is the answer not in the manual?
Details the bottom view of the pendant-mounted camera, highlighting key components like card slots and lens.
Illustrates the bottom view of the in-ceiling mounted camera, showing slots and clamps.
Shows the bottom view identifying the connection status and link LEDs and their functions.
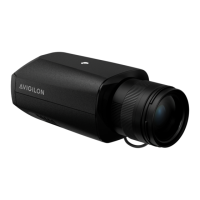
Details the top view of the camera, including lanyard anchor, Ethernet port, and I/O connector block.
Describes the vandal-resistant dome cover and the tamper-resistant screws used to secure it.
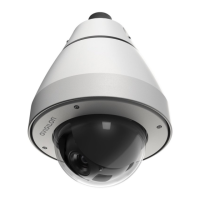
Illustrates the camera mounted via a pendant wall mount, showing the mount and entry hole.
Details the camera's view when attached to an NPT pipe mount adapter.
Lists the items included in the Avigilon H5A-PTZ In-Ceiling Camera package.
Explains options for retrofitting older H4 PTZ models to the new H5A PTZ.
Steps to prepare the camera, including removing the dome cover and inserting SD cards.
Instructions for cutting a mounting hole in the ceiling surface using a template.
Guide to connecting the necessary Ethernet, power, and I/O cables to the camera.
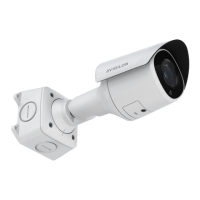
Procedures for physically mounting the camera into the ceiling hole using clamps.
Steps for reattaching the dome cover securely to the camera base.
Lists items included for pendant mount installations, including camera and mounts.
Steps to prepare the camera, including dome cover removal and SD card insertion.
Instructions for installing the camera's pendant wall or NPT mount adapter.
Details on how to mount the camera to a vertical surface using the pendant wall mount.
Guide for mounting the camera to an NPT pipe using the appropriate adapter.
Final steps to secure the camera to the mount adapter, including tightening screws.
Steps to create initial administrator user credentials for the camera.
How the camera obtains an IP address via DHCP or Zeroconf and configuration options.
Instructions on how to manually return the PTZ camera to its configured home position.
Configuring the camera to automatically return to its home position after idle time.
Guidance on diagnosing network issues and interpreting LED behavior for troubleshooting.
Instructions for cleaning the camera's dome bubble using mild soap and a microfiber cloth.
Guidance on cleaning the camera body using a dry or lightly dampened cloth.
| Sensor Type | CMOS |
|---|---|
| Digital Zoom | 12x |
| Pan Range | 360° continuous |
| Ingress Protection | IP66 |
| Vandal Resistance | IK10 |
| Camera Type | PTZ |
| Minimum Illumination | Color: 0.05 lux |
| Day/Night | Yes, with IR cut filter |
| Audio Support | Yes |
| Audio | Built-in microphone |
| Alarm I/O | 1 input/1 output |
| Compression | H.264, MJPEG |
| Video Compression | H.264 |
| Local Storage | MicroSD card slot |
| Power Supply | 24 VAC |
| Operating Temperature | -40°C |
| Weather Resistance | Yes |