ADVANCED OPERATION
16
3) AREA
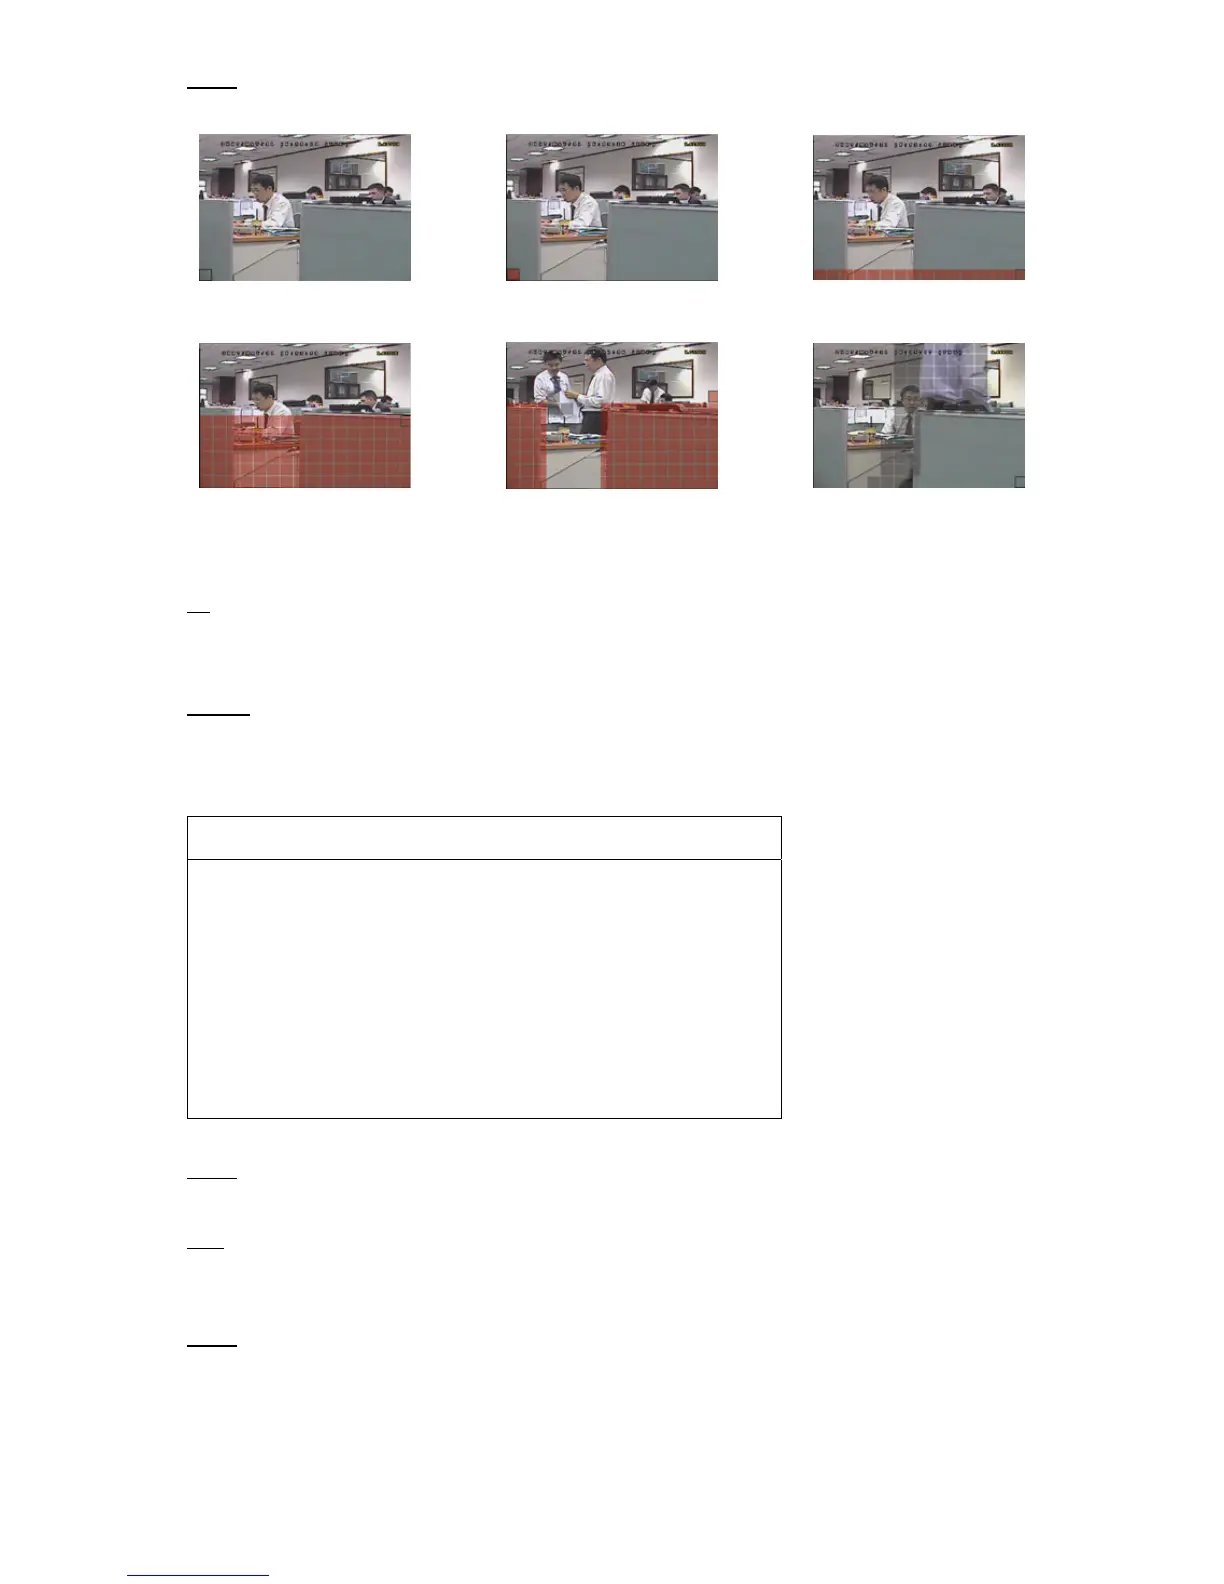
Press “ENTER” to set the detection area. You will see similar screens as the following:
Transparent blocks are the area under
detection.
Press “ENTER” to confirm the start area. Press W / X to choose the width of the
detection area.
Press S / T to choose the height of the
area.
You can also set up multi-detection area. When any movement is detected, you will
see the grids are flashing.
*Pink blocks represent the area that is not being detected while the transparent blocks are the area under detection.
4) TS (Time of Sensitivity)
“TS” is to set the sensitivity regarding how long one object stays in the detection area and triggers the recording.
There are three level of sensitivity for motion detection. (HIGH / NORMAL / LOW)
5) ALARM
Select N.C. (Normally Closed) / N.O. (Normally open) / OFF for the alarm polarity. The default alarm value is OFF.
5.4.2 For Model 2 & 4
DETECTION
(Take Model 4 as an example)
TITLE DET AREA
CH1 HIGH SETUP
CH2 OFF SETUP
CH3 OFF SETUP
CH4 OFF SETUP
CH5 OFF SETUP
CH6 OFF SETUP
CH7 OFF SETUP
CH8 OFF SETUP
PLEASE CONSULT YOUR INSTALLER FOR ADVANCE SETTING
uv SELECT s BACK t NEXT ENTER
1) TITLE
Show the camera title of each channel set in “CAMERA”.
2) DET
Select HIGH / NORMAL / LOW to activate the motion detection function with different sensitivity for the selected
channel, or select OFF to disable this function.
3) AREA
Press “ENTER” to set the detection area. You will see similar screens as the following:
 Loading...