18.4 USING AXEL WOLF ADDRESS MANAGER FOR THE FIRST TIME
As explained in the previous section, Wolf Address Manager "guides" the machine through UECP and/or IP and SNMP
and NTP encoding identifiers. First of all, you have to install the applications supplied with the Wolf device on your PC.
They are contained on a CD-ROM and the installation procedure is outlined below:
1. Insert the CD-ROM into your PC.
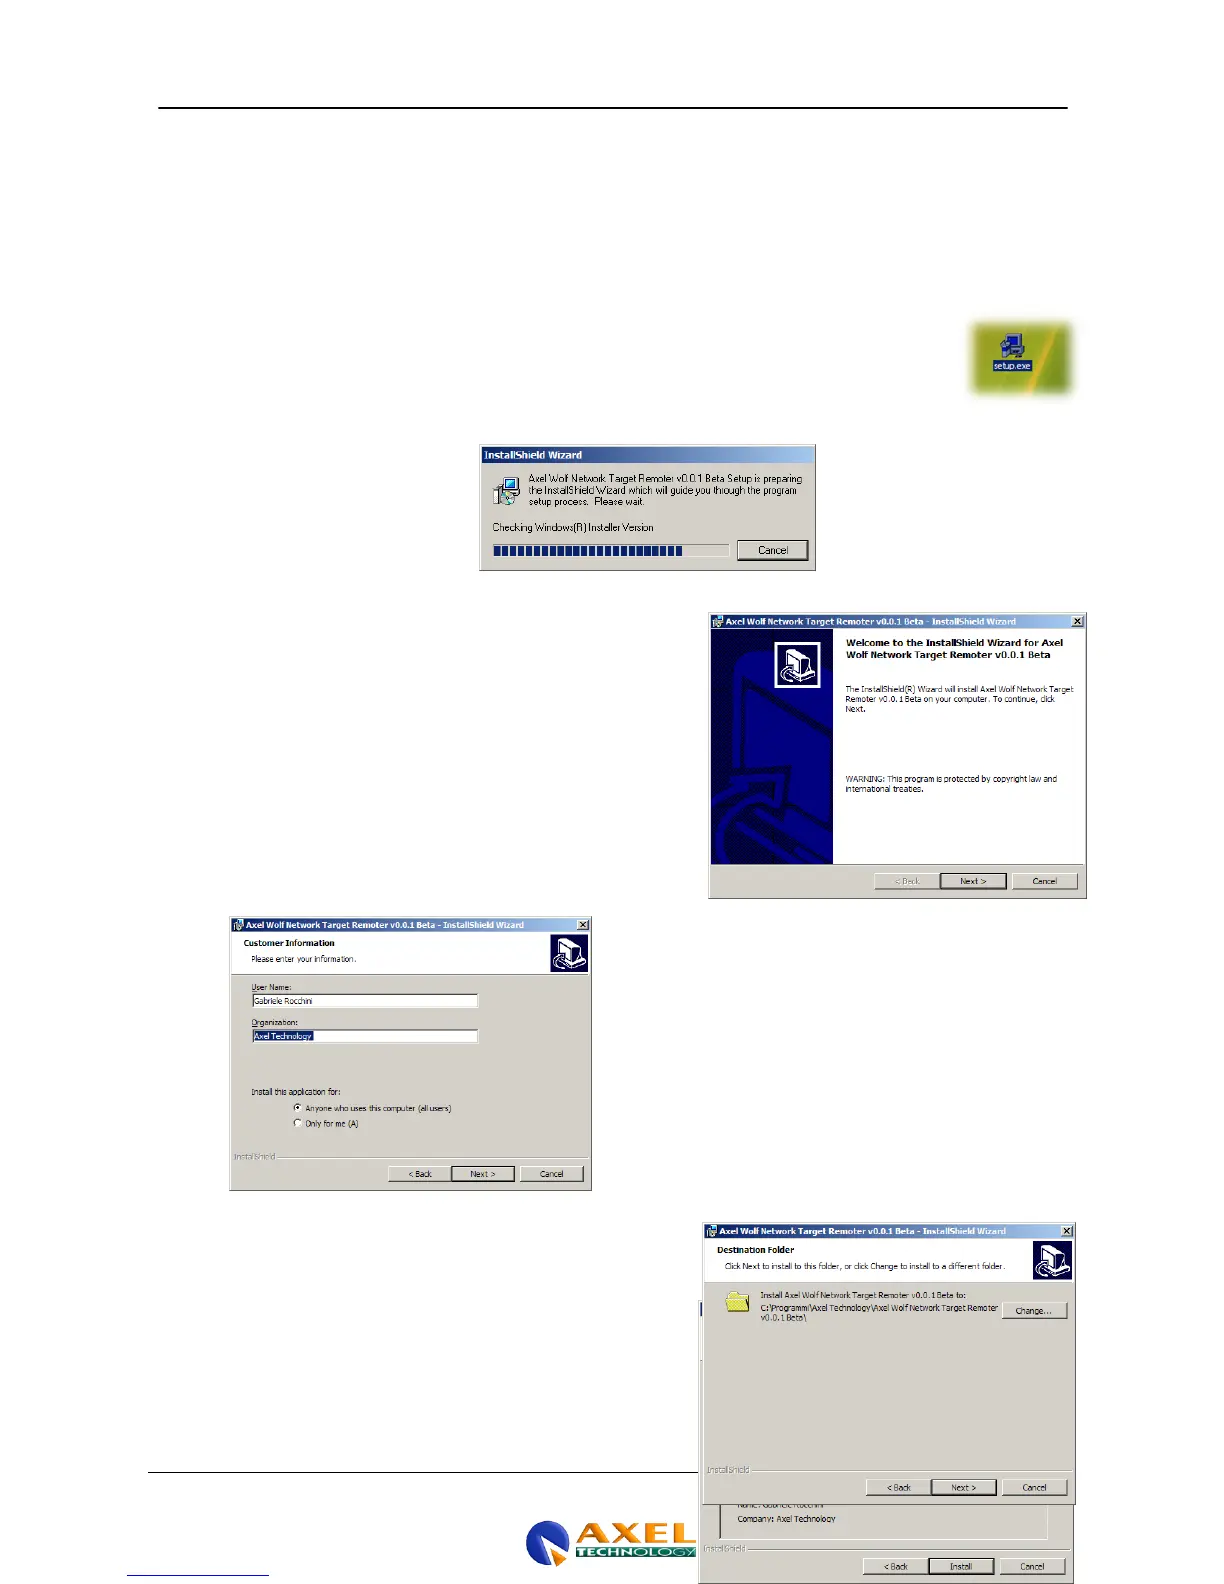
2. Run the auto-install file "Setup.exe”
3. Connect the Wolf Network device to the power supply and switch it on. This is the screen that
appears when you run setup.exe. The file may also be obtained directly from Axel Technology
s.r.l. or another retailer, in which case it may be provided in a . rar or other compressed format.
In this case, you should decompress the file and save it on your PC's system disk before
carrying out the installation.
4. Once you have launched Setup.exe and obtained the
necessary information from the operating system, the
following screen will appear. Press the NEXT button to
proceed with the installation of the executable contents for
the Wolf Network.
5. When the NEXT button is pressed, the Customer Information
window appears, where you will have to set the "Username"
and "Organization" and whether or not the application needs
to be installed for and used by a single user or "all users"
6. Clicking NEXT takes you on to the following step, which is
the selection of the application installation path. Generally
speaking, you should adopt the standard pathway proposed
by the operating system. However, the target location can
be altered by clicking Change in the right-hand central
section of the page.
7. When the Next button is pressed again, a quick summary of
the installation settings is displayed or a "Ready to Install