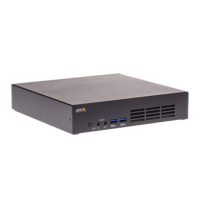
AXISAudioManagerPro
Setuppaging
7.8Selectapriority.
8.Startpagingalivemessage:
8.1Presstheconguredbuttononthe2NSIPMic.
8.2Startspeaking.
8.3Tostoppaging,pressthesamebuttonagain.
9.Startpaginganannouncement:
9.1Presstheconguredbuttononthe2NSIPMic.Theplaylistisplayedonce.
PagingwithSIPtrunk
YoucanpagebycallinganumberthatisredirectedbyaPBXtoAXISAudioManagerPro,whichwillforwardtheaudiotoadestination.
Beforeyoustart,youneedtohaveaconguredPBXenvironment,suchasCisco.InAXISAudioManagerPro,youmusthavecreateda
destinationthattheaudiowillbesentto.Formoreinformationaboutdestinations,seeSchedulecontentonpage10.
1.AddaSIPserver:
1.1Goto
SIPsettings.
1.2Click+SERVER.
1.3NametheSIPserver.
1.4EnterthedomainnameorIPaddressoryourserver.
1.5Enterportnumber.
1.6ClickCREATE.
2.AddaSIPtrunktotheSIPserver:
2.1ClickthepeniconforyourSIPserver.
2.2GotoTRUNKS.
2.3Click+TRUNK.
2.4NametheSIPtrunk.
2.5EnterthedomainnameorIPaddressofyourPBXasremoteaddress.
2.6EntertheSIPportusedinthePBXasremoteport.
2.7Selectatransporttypedependingonyournetworkrequirements.
2.8IfthePBXrequiresidentication,enterthecredentials.
Note
IfyourPBXdoesn’trequireidentication,thengoto
SIPsettings>ADVANCEDtodisableit.
2.9IfyourPBXserverrequiresregistration,selectUseregistrationandenterthedetails.
2.10ClickCREATE.
3.Addapagingsource:
17