AXISP13-ESeries
2
ScrewT20(4x)
3
Wallbracket
4
BracketadjustmentscrewT30
ConnecttheCamera
1.Ifapplicable,connectexternalI/Odevicesoraudiodevicestothecamera.Itmaybe
necessarytodisconnecttheintrusionalarmswitchrst.
2.Connecttheheatercabletotheheaterconnectorinthebottomcover.
3.IfusinganSDcardforlocalstorage,insertthecardintothecamera’sSDcardslot.
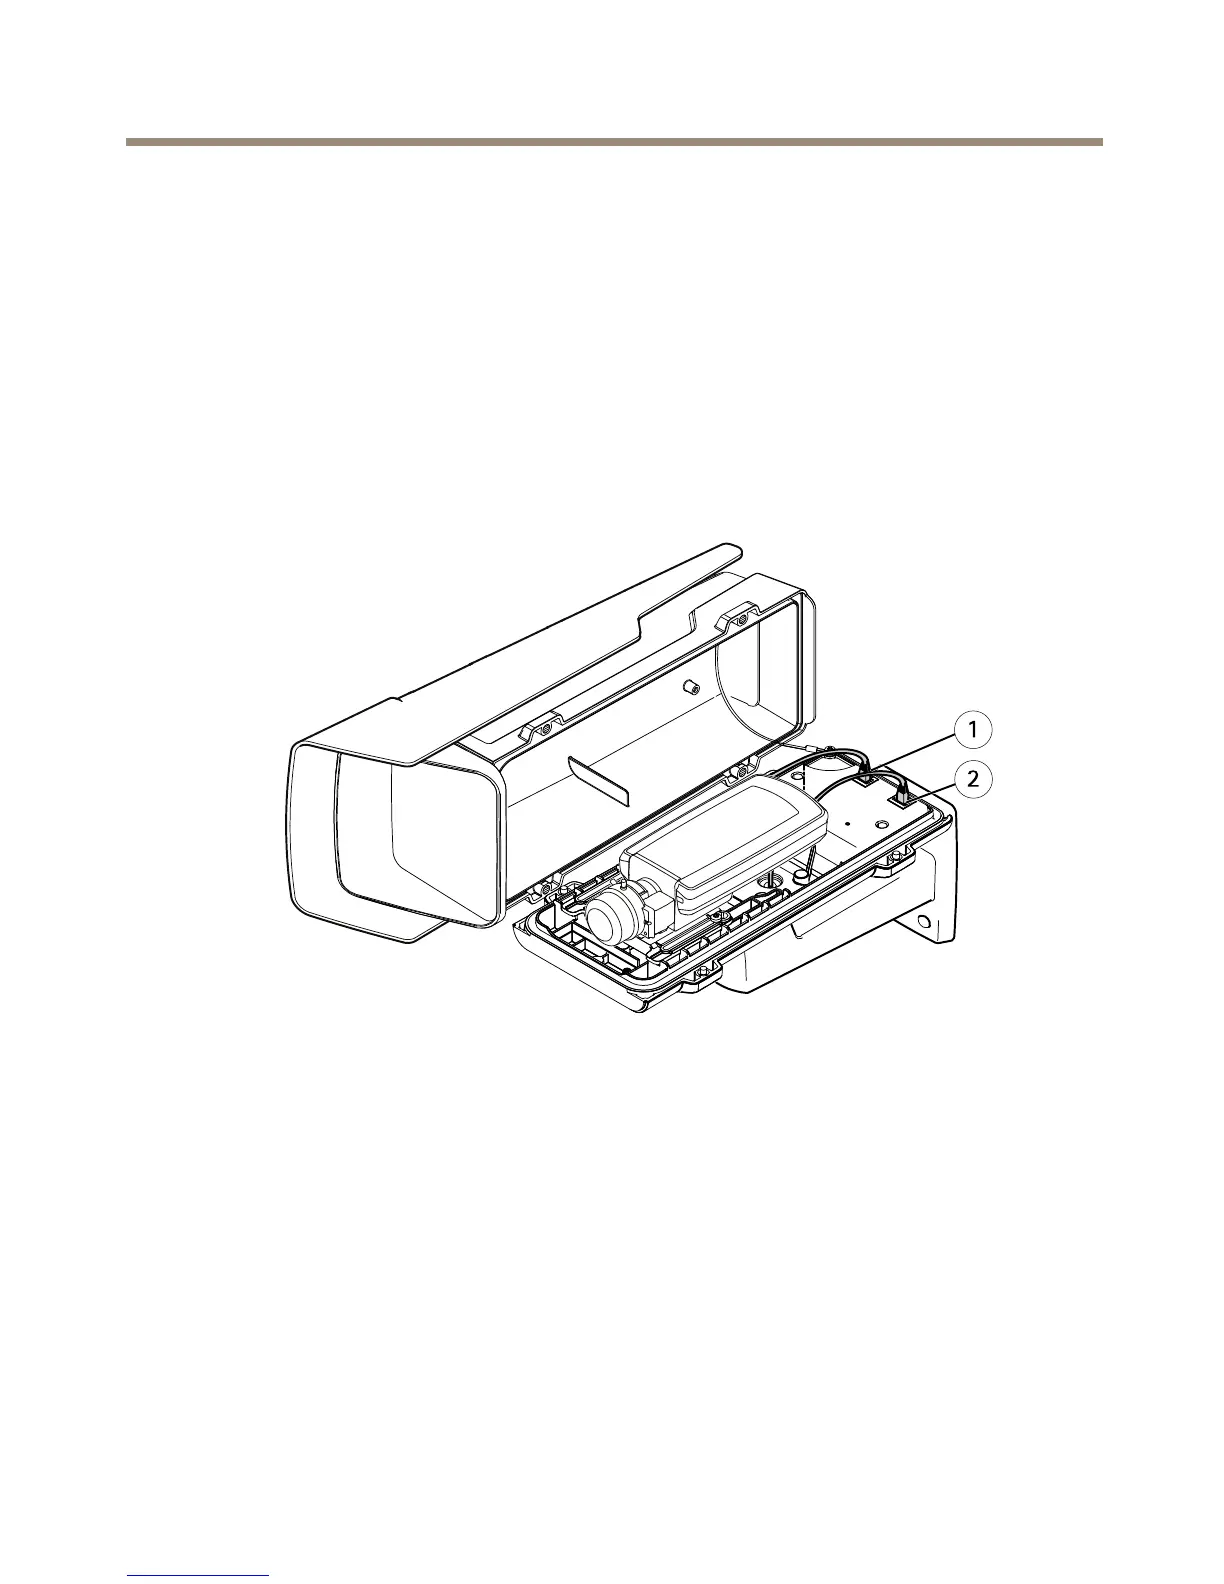
4.Connectthehousingtothenetwork(PoEIN)andthecameratothehousing(PoEOUT).
1
Networkconnector(PoEOUT)
2
Networkconnector(PoEIN)
5.MakesurethatthecameraandhousingLEDsindicatethecorrectcondition.SeeLED
Indicatorsonpage13.
6.Loosenthebracketadjustmentscrewtoaimthecameratothepointofinterest.For
informationabouthowtoviewthevideostream,seeAccesstheProductonpage24
7.Removetheplasticwrapperfromthedesiccantbagandputthedesiccantbagbelow
thelens.
23
 Loading...