STAND ASSEMBLY
Overview
The stand is rectangular in shape. The Bench Top Thicknesser sits on the stand with
the front of the machine above the narrower side of the rectangle.
Assembling the stand
Locate and identify the 4 legs, the rails (A) and the stretchers for the stand, (B) and the
packet containing the coach bolts, washers and nuts.
The rails are almost symmetrical angle strips, the rails have 4 holes punched in one
face (2 at each end) and are slightly shorter than the corresponding stretchers. The
rails also have 2 holes (one at each end) in the adjacent face to accept the bolts for
mounting the machine. The stretchers are almost asymmetric angle strips, both the
long and the short stretchers have 4 holes punched in one face (two each end).
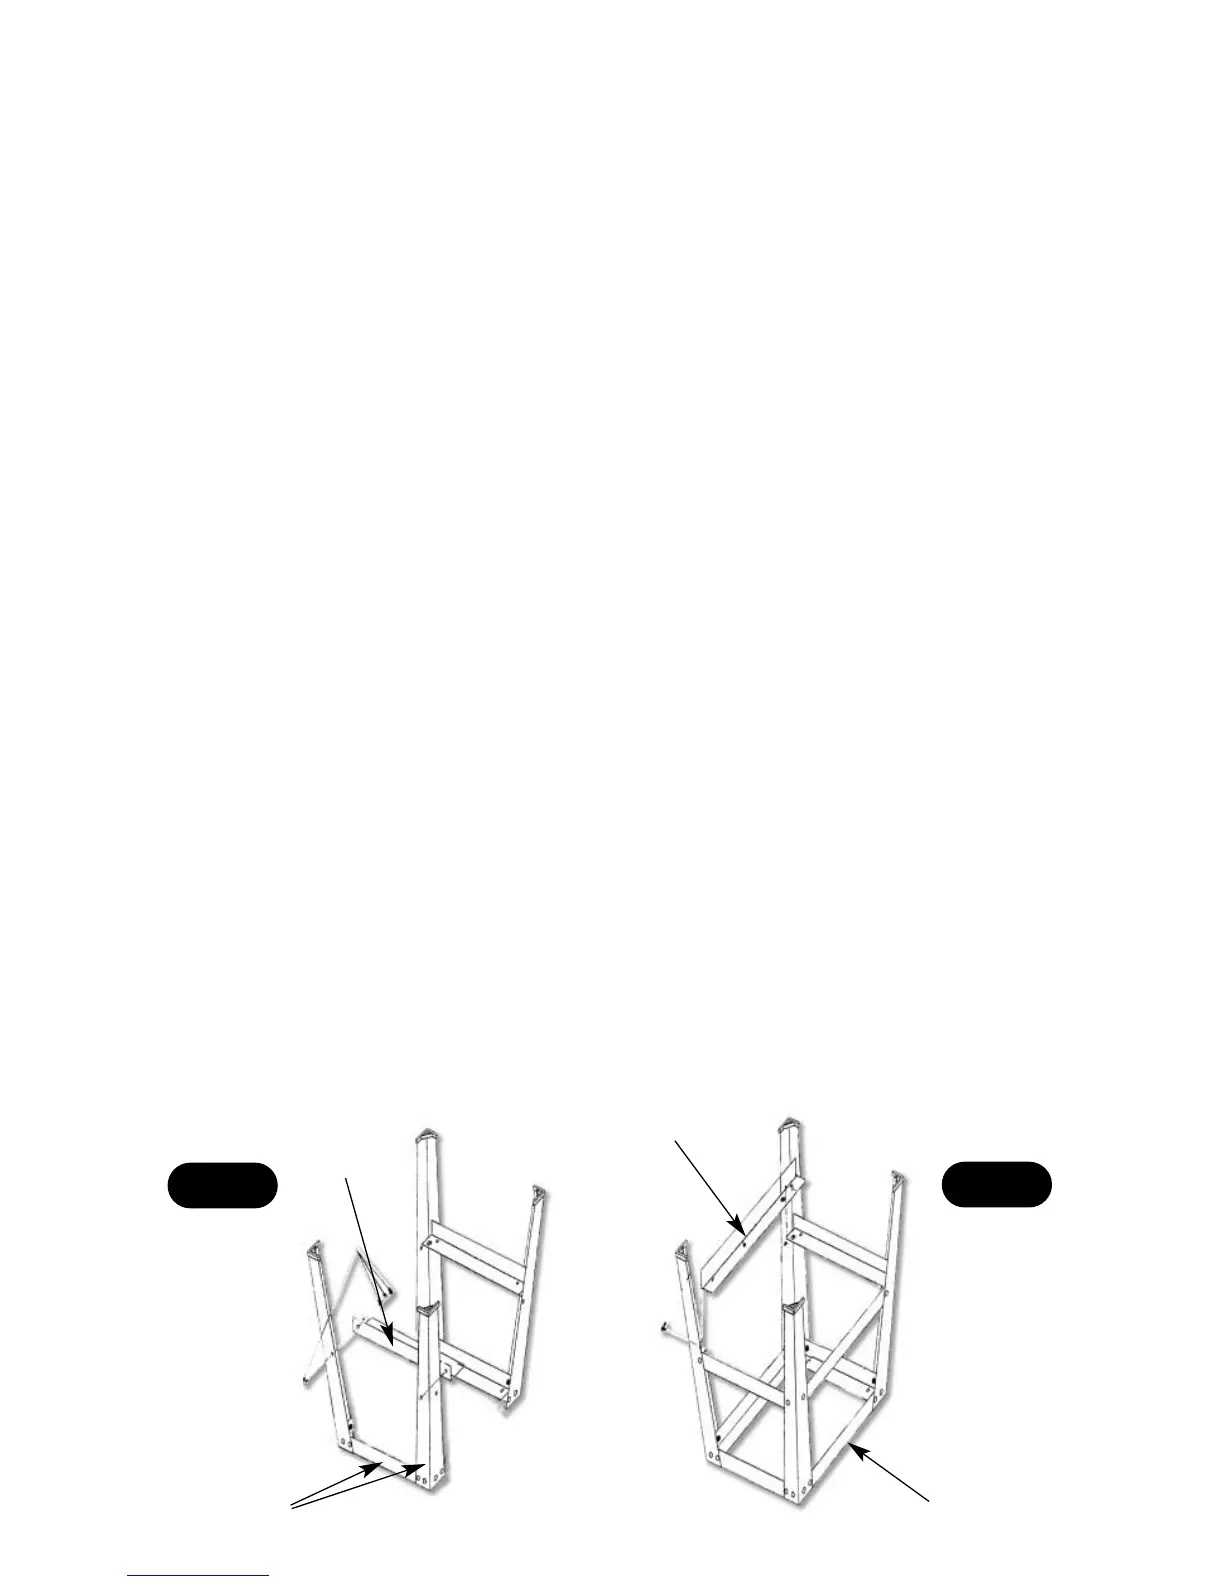
Identify the two shortest rails and the two shortest stretchers.
Assemble the two 'short' end frames for the stand. Bolt the components together by
putting the coach bolt through the leg, through the rail or stretcher, secure with washer
and nut. Tighten the nut only 'finger tight' at this time. (See fig 1)
When the two end frames have been assembled, select one, turn it upside down on a
flat surface and loosely bolt the 'long side' rails and stretchers (C) in place attach the
other side frame, (keep the interleaving of the top surfaces of the rails the same,
(See fig 2) i.e. if the top face of the narrow end of the stand rail is above the top face
of the long side, keep it the same on both sides and both ends). When all the
components are assembled, using the flat surface as a reference, tighten up all the nuts.
Check that the mounting holes for the machine are lined up (introducing one of the
bolts or a screwdriver shaft during tightening can prevent misalignment). Upright the
frame and stand on the floor. (See fig 3 on page 28)
B
A
C
C
Fig 1
Fig 2
27