–10– – 11 –
2.0 SPEAKER IMPEDANCE & POWER WIRE INFO
Itisrecommendedthatyoufollowtheoptimumspeaker/subwooferimpedancesuggestions
below.
A500 ➞ 4/2ohmsstereo/4ohmsmonobridged/sub4/2ohmsmono
A400 ➞ 4/2ohmsstereo/4ohmsmonobridged
A200 ➞ 4/2ohmsstereo/4ohmsmonobridged
A100 ➞ 4/2ohmsmono
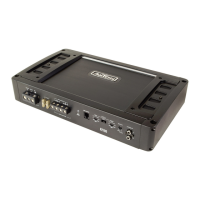
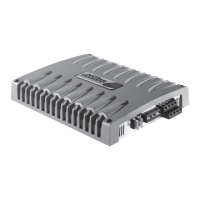
3. AMPLIFIER MOUNTING
Attention!Foryourownsafety,disconnectthenegativebatteryterminal(GND)beforeyou
startanywiringwork!
BeforeyouproceedtoinstallthisAXTONamplier,itisrecommendedtomapoutthe
completesystemandtherespectivewiringrequired.Consideralladditionalelectrical
requirementsandaccessories,suchaspowercables,interconnectcablesetc.,tocomplete
theinstall.Pleasenotethat-becauseofpossibleinterferenceproblemswiththeexistingcar
electrics and electronics, especially the routing of the signal cables and the chassis ground
connectionwillhaveaprofoundimpactonthetrouble-free(noisefree!)operationofthe
amplier.
The mounting location should be carefully selected and in the interest of passive driver and
passengersafety,theampliermustbesecurelymounted.Makesurethatthereisnowiring
harness, fuel tank etc. behind or below the mounting surface that may be damaged by the
drillingoftheholesfortheampliermountingscrews.Afterinstallation,thereshouldbea
clearanceofatleast5cmtoallsidesincludingthetopoftheamplierheatsink.Makesure
theunitisnotexposedtodirectsunlight,humidity,water,oilorspillofotheruidsthatmay
entertheamplier.
Oncethelocationwheretheamplierwillbemountedisdetermined,usetheunitasa
template for the marking of the mounting holes with pencil or felt-tip marker. The mounting
holes should be pilot-drilled, using a 2,5 mm or 3 mm drill bit. Bolt the amp down.
Important! There must not be a direct contact of the amplier heatsink, bottom panel
or any other metal part of the amplier to the vehicle metal panel! Electrical ground-
loops will cause audible hum!
4. WIRE ROUTING
4.1 MAIN POWER WIRES
Werecommendaminimummainpowercablecross-section(5mtotallength)of16to
20mm²,forboththepositiveandthegroundwires.Followingtheserecommendations
guaranteesatrouble-freeoperationofyouramplier,aswellasfullpoweroutput.
Runthepositivemainpowercable(„+12V“)directlyfromthepositiveterminalofthe
carbatterytotheamplier.Forprotectionofyourcaraudiosystemagainstelectricalre
hazards, resulting from a short-circuit of the main power cable to chassis ground a main
fuseholdermustbeinsertedwithintherst30cmofthepositivemainpowercable.The
applicable fuse value must be matched to the limitations of your main power cable and the
currentdrawoftheamplier–thereforechooseanappropriatefusevalue.
Attachthegroundcabletotheamplier.Inmostcasesitwillbebesttokeeptheground
cable(GND)asshortaspossible,i.e.tondachassiscontactveryclosetotheamplier.
The ground power wire must have the same cross-section as the positive power cable. The
contact point where the ground wire is attached to, must be solid and clean, i.e. free from
rustorpaint!
Tightenbothpowerinputterminalsoftheamplier,anddoublecheckforperfecttofboth
maincableleads!
4.2 RCA & REMOTE WIRES
Forbestinterferencefreetransmissionofthemusicsignal,usedoubleortripleshielded
RCA interconnects only. Twisted pair Interconnects offer excellent noise rejection as well.
Route the RCA interconnects away from potential sources of Interference, such as engine
computers, gas pumps, etc.
Carefully run the audio signal interconnects, the remote wire and – if applicable - the cable
ofthebasslevelremotecontrol(A100andA500only)fromtheheadunitordashboard
totheamplier.Asmentionedbefore,theaudiosignalcablesshouldalwaysberouted
completelyseparatefromthepowercables.Connecttheremote(turnon/turnoff)leadtothe
respectiveinputterminaloftheamplierandtotheremoteoutputofyourhead-unit.Now
you can connect the RCA interconnects to the respective outputs of your head-unit and to
theinputsoftheamplierbyusingtheprovidedRCAinputadapter.Payattentiontoconnect
the stereo interconnects correspondingly, left is 1CH, right is always 2CH a.s.o.
4.3 HIGH-LEVEL INPUT
Forlongerdistancesfromtheheadunittotheinputsection,itisbesttouse1.0mm
2
or
1.5 mm
2
speakercablestoavoidalossofpowerorriskdegradationofthesignalquality.
Once the speaker cables have been routed, connect them to the speaker cable input
adapter.Maintaincorrectpolarity(“+”to“+”and“-“to“-“).Whenusingthehigh-levelinput,
you can chose the Auto-Turn-On function “VOX” or “DC” instead of running a separate
remotewiretoturnontheamplier.“VOX”turnsontheamplierwhenitrecognizesan
audiosignal.“DC”isusingtheDCvoltageoftheheadunit’sinternalspeakeramplier.
TheAxtonampwillthenturnon/offaccordingtotheheadunit’sstateautomatically.We
recommend using the “DC” mode.
Forbestinstallationcomfortyoucanpurchasetheoptionalplug&playconnectorN-A400-
ISOandthecar-specicAxtonadapterN-A480DSP-ISOxx.Thatwayyouareabletoinstall
theamplierveryquicklyandwithoutanydamagetotheoriginalheadunitandspeaker
wires. Ask your Axton dealer for further information.
4.4 LOUDSPEAKER WIRES
Forlongerdistancestothespeakers,itisbesttouse1.5mm
2
or 2.5 mm
2
speaker cables to
avoidalossofpowerorriskdegradationofthesignalquality.
Once the speaker cables have been routed, turn loose the screws of the speaker terminal
binding posts and – after inserting the stripped and bare speaker cable ends – re-tighten the
screws.Maintaincorrectpolarity(“+”to“+”and“-“to“-“).
Close the electrical circuit by attaching the ground wire to the battery and switch on your
headunit.IfthestatusLEDdoesnotilluminate,yourinstallationiswrong!Immediatelyturn
offyourhead-unitandcarefullyrecheckallinstallationandwiringsteps!
 Loading...