– 10 – – 11 –
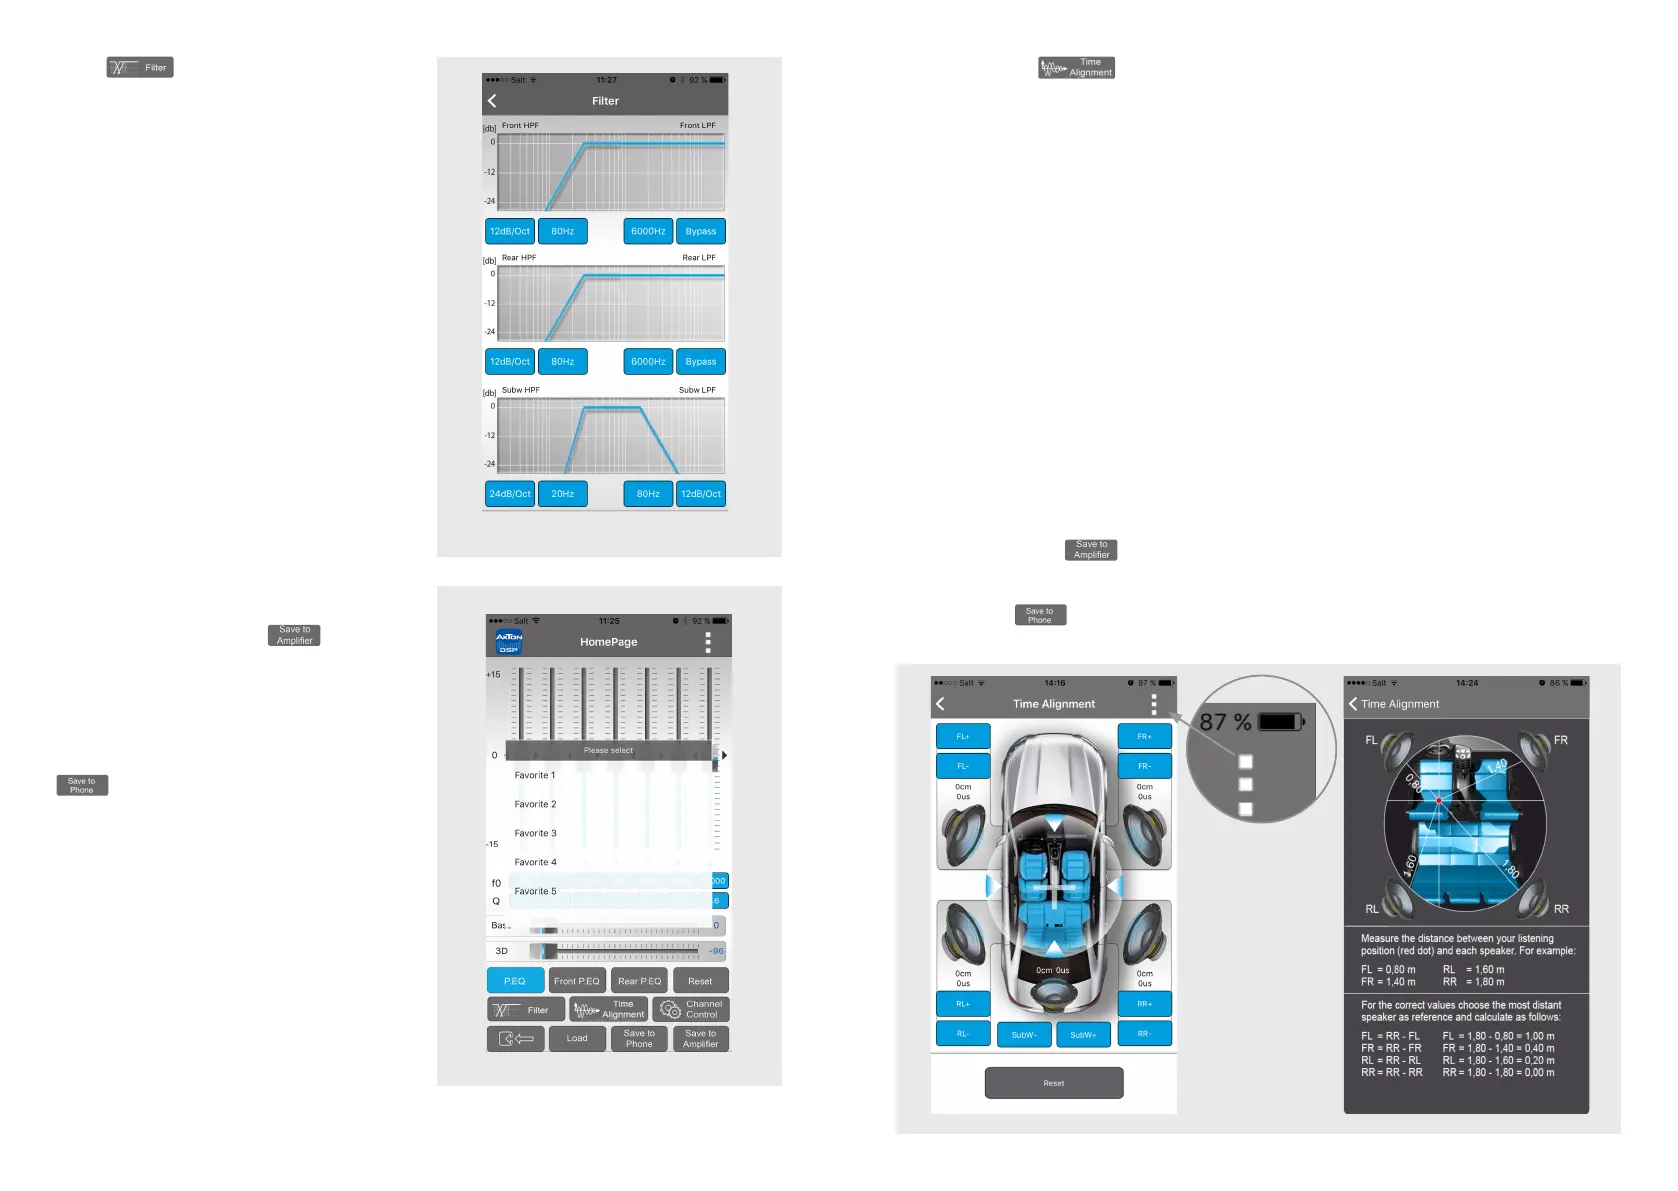
Time Alignment
In this menu you can apply a time delay to the speaker signal to simulate an ideal listening
position.
You can call a help menu at the top right corner of this menu. Note the distance between
your listening position and each speaker. Choose the most distant speaker as the refer-
ence for the other speakers.
With the aid of the following example, calculate the values for your speakers:
(FL) front left is 0.80 m from the listening position
(FR) front right is 1.40 m from the listening position
(RL) rear left is 0.50 m from the listening position
(RR) rear right is 1.30 m from the listening position
(SubW) subwoofer is 2.00 m from the listening position
Value for FL = SubW – FL → FL = 2.00 – 0.80 m
Value for FR = SubW – FR → FL = 2.00 – 1.40 m
Value for RL = SubW – RL → RL = 2.00 – 0.50 m
Value for RR = SubW – RR → RR = 2.00 – 1.30 m
SubW remains at the value „0“
When you have done the preferences, go back to the main menu, and touch the „Save to
the Amplier“ button
to transfer the preferences to the amplier. During the saving
process do not switch off the amplier as this may lead to malfunction and/or damage.
You can also save the preferences on your smartphone. To do this, press the „Save on
Phone“ button , and enter the desired lename.
Filter
In this menu you can assign a frequency
band to the connected speakers that
corresponds to their recommended
operating range. The screen is subdivided
into three: Front, Rear and Subwoofer. In
each area, in the left half you can set the
crossover frequency of the high pass lter
as well as its Q factor (dB/Oct.). In the
right half are the crossover frequency and
Q-factor of the low pass lter. The blue line
shows the set slope of the lter. „Bypass“
means that the signal is unltered and
contains all frequencies.
The lter settings also apply to the
corresponding preamp outputs.
When you have done the preferences,
go back to the main menu, and touch the
„Save to Amplier“ button
to transfer
the preferences to the amplier. During
the saving process do not switch off the
amplier as this may lead to malfunction
and/or damage. You can also save the
preferences on your smartphone. To do
this, press the „Save on Phone“ button
, and enter the desired lename.
Help menu
 Loading...