AB-7258
7
Precautions for installation
● Secure the clearance for wiring inside the wall (as shown in Figs. 1 and 3).
● Install Neostat with a dedicated mounting kit (sold separately) suitable for your application.
● Do not allow any refuse such as an electric wire scrap to get inside Neostat.
● Do not allow the lead wires caught between the mounting surface of Neostat and the wall.
● Do not put heavy load on the setting dial, the lead wires, etc. Doing so may distort Neostat, causing failure or affecting
humidity control.
● If air infiltrates to the rear side of the Neostat from the inside of the installed wall through the outlet box, shut off the air by
sealing the outlet box.
● Be sure to tighten all the screws necessary for installation.
● Tighten the screws with the specified torque (78.5 Nꞏcm for terminals and wall mounting screws, 39.2 Nꞏcm for main unit
mounting screws). Neostat may get damaged by excessive tightening and may drop from the wall by insufficient tightening.
● Be careful not to touch the diaphragm or nylon ribbon when Neostat is uncovered.
● After installation, leave Neostat well so that it adapts to ambient conditions (atmospheric environment).
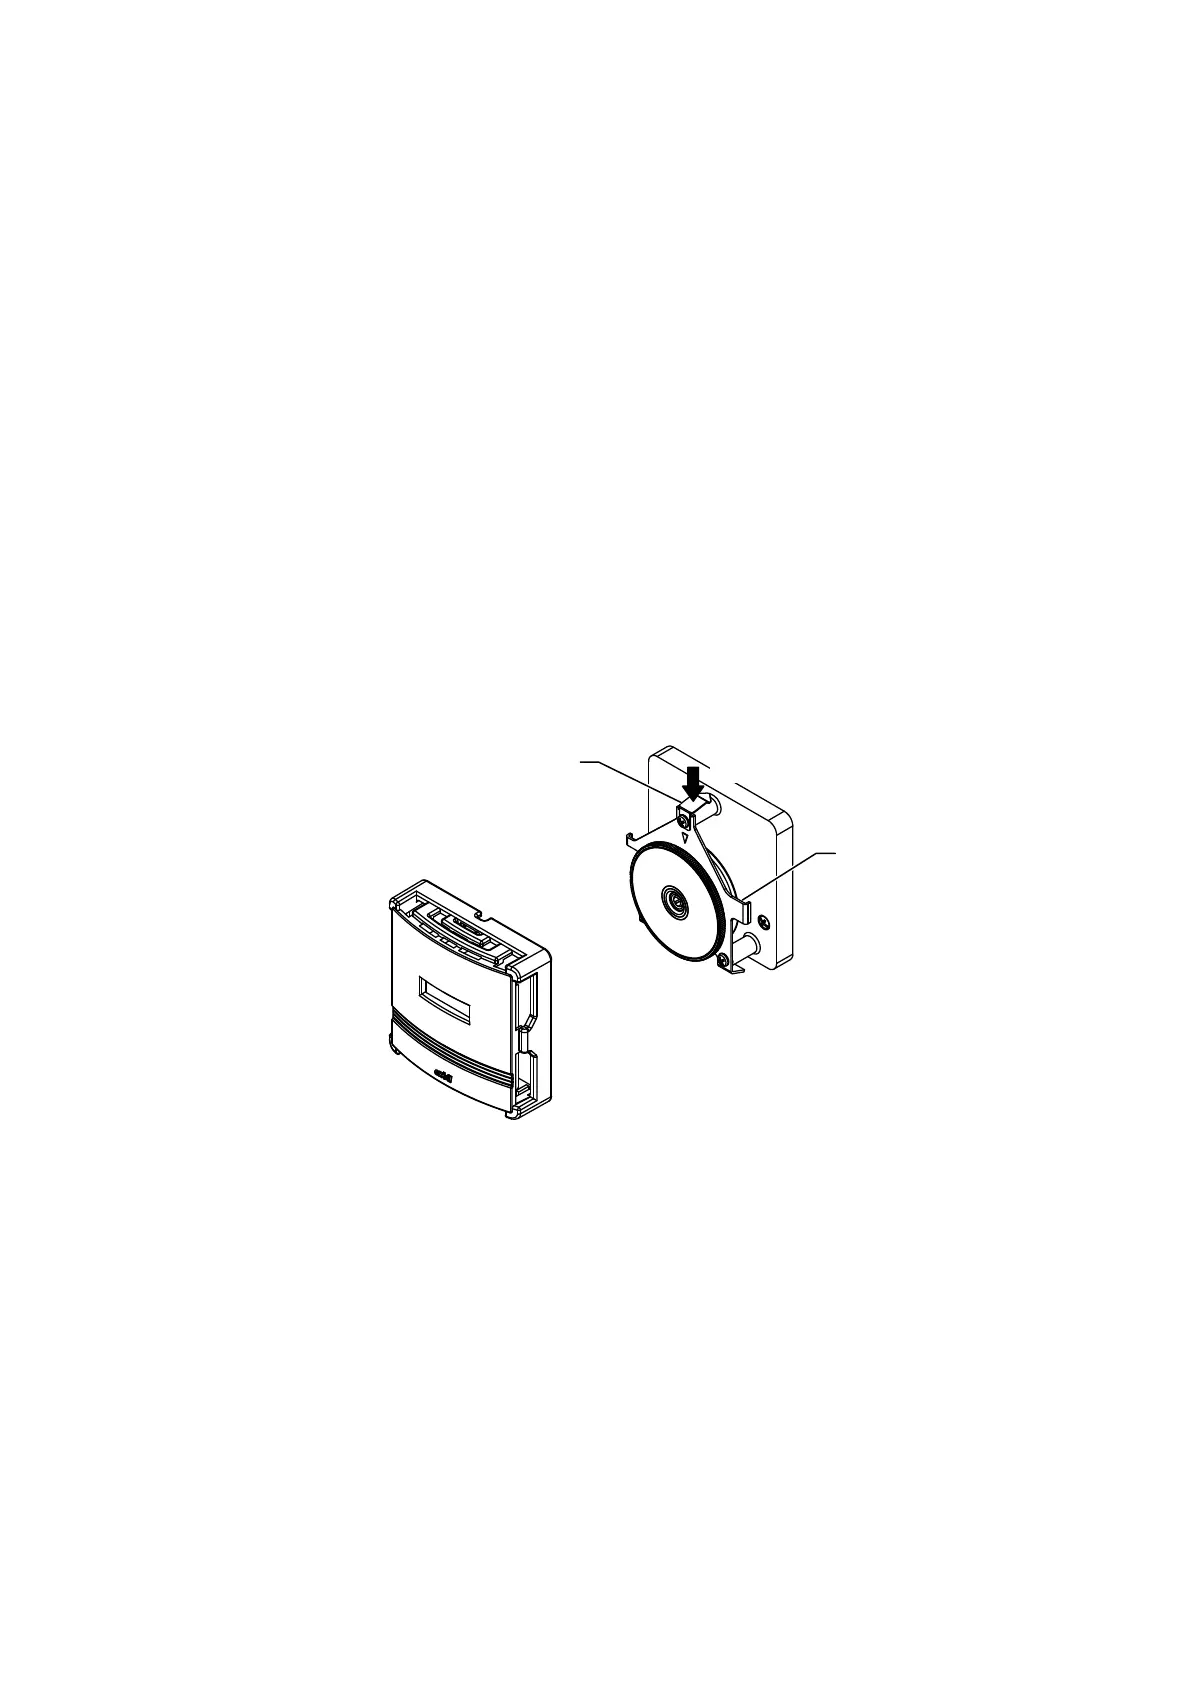
Cover removal
To remove the cover:
Press the spring, located on the upper center part of the Neostat main unit, using a thin object.
To attach the cover:
Engage the tabs, located on the lower part of the cover, with the slots on the lower part of the main unit. Then fix the cover with
the spring, located on the upper center part of the Neostat main unit.
Figure 3. Cover removal
Cove
Press the spring.
Main unit
Spring
Guide