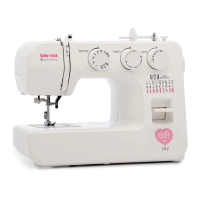
This document is a service manual for the Baby Lock Model BL8800 sewing machine, providing detailed instructions for maintenance, adjustment, and troubleshooting of various mechanical and electrical components.
Function Description:
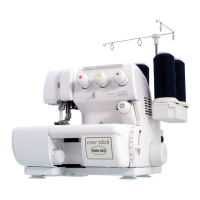
The Baby Lock BL8800 is a sewing machine designed for a range of sewing tasks, including straight stitching, zigzag stitching, and buttonholes. It incorporates electronic controls for stitch patterns, speed, and needle positioning, and features a self-diagnostic program to assist in identifying electrical faults. The machine's core functions involve precise coordination between the needle bar, hook, feed dog, and various tension mechanisms to create consistent stitches.
Important Technical Specifications:
- Needle Bar Height: The spacing between the surface of the hook race and the top edge of the needle eye at its lowest point should be 5.2 ± 0.2 mm.
- Gap Between Needle and Hook: When the needle crosses over the hook, the gap should be between 0.02 to 0.1 mm.
- Hook Timing: When the needle is at its lowest point and the handwheel is turned counter-clockwise, the tip of the hook should align with the right side of the needle. At this point, the gap between the tip of the hook and the top edge of the needle eye should be 1.5 to 2.0 mm.
- Feed Dog Height: The feed dog should come up over the needle plate by 0.8 +0.05 mm.
- Presser Foot Height: When lifted, the presser foot should be 5.5 mm from the needle plate.
- Motor Belt Tension: The motor belt should have a flexibility of 5-6 mm when average pressure is applied to its side.
- Timing Belt Tension: The timing belt should have a flexibility of 4-5 mm when average pressure is applied to its side.
- Hook Gear Backlash: Free play at the tip of the hook should be 0-0.5 mm.
- Power Line Frequency: The machine can operate on 50 or 60 Hz power lines.
Usage Features:
- Stitch Pattern Selection: The machine allows selection of various stitch patterns, including straight stitch (pattern number "2" for center needle position, "1" for left needle position) and zigzag stitch (pattern number "4" with stitch width 5 for maximum width).
- Forward and Reverse Stitch Adjustment: The length of forward and reverse stitches can be adjusted to ensure consistency, particularly for stretch stitch sewing. This involves setting a knob to the center "-" mark and fine-tuning with a screw (d) based on test stitches.
- Bobbin Winder: The bobbin winder mechanism ensures even winding of thread onto the bobbin. Adjustments can be made for uneven winding (tilting the winder left or right) and for the amount of thread wound (adjusting the center screw of the bobbin winder stop).
- Needle Threader: The machine includes a needle threader. Its height can be adjusted to ensure the hook enters the needle eye correctly.
- Upper Thread Tension Unit: The upper thread tension is factory-adjusted to position "4" for optimal sewing. It can be further adjusted by turning a tension regulator screw (a) to the left for weaker tension or to the right for stronger tension.
- Lower Thread Tension: The bobbin thread tension is also factory-adjusted. For weaker tension, the screw (a) on the bobbin case should be turned counter-clockwise; for stronger tension, it should be turned clockwise.
- Foot Controller and Speed Control Lever: The machine's speed can be controlled via a foot controller and a speed control lever. The self-diagnostic program can display the status and values of these controls.
Maintenance Features:
- Self-Diagnostic Program: The machine is equipped with a self-diagnostic program for electrical parts. To activate, turn off the power, then press both stitch length and width "+" buttons while turning on the power. This program displays the machine icon and version number, then cycles through checks for power line frequency, condition of switches and sensors, phase of feed pulse motor, phase of zigzag pulse motor, and condition of foot controller and speed control lever.
- Component Removal for Access: The manual details the removal of the front cover, light cover, needle plate, bobbin holder, and bed lid to access internal components for adjustment and repair.
- Adjustments for Key Mechanisms:
- Needle Bar Height: Loosening screw (b) on the needle bar holder allows adjustment of the needle bar's vertical position.
- Needle and Hook Gap: Loosening a lock screw and turning an adjusting nut (a) allows fine-tuning of the gap between the needle and the hook.
- Hook Timing: Loosening screws (b) on the lower shaft gear allows rotation of the hook race to align its tip with the needle and set the correct gap.
- Feed Dog Height: Loosening a lock nut (a) and turning an inner screw (b) adjusts the feed dog's vertical position.
- Needle Plate and Needle Position: Loosening screw (a) on the needle bar guide assembly allows lateral adjustment of the needle bar to ensure the needle falls evenly into the needle plate hole.
- Feed Motion Timing: Loosening screws (a) on the feed cam and screws (b) on the belt pulley allows alignment of guide-lines on the lower shaft and feed cam, and adjustment of the feed rock cam's lowest point.
- Presser Foot Height and Direction: Loosening screw (a) allows adjustment of the presser foot's height and ensures it faces frontward, parallel with the feed dog slot.
- Zigzag Timing / Needle Stop Position: Loosening screw (a) on the timing slit allows alignment of guide-lines on the upper shaft and the slit to ensure correct zigzag timing and needle stop position.
- Motor Belt and Timing Belt Tension: Loosening screws (a) on the respective pulleys allows adjustment of belt tension by pushing the pulley towards the belt.
- Hook Gear Backlash: Loosening screws (a) and moving the hook base (b) up or down adjusts the play in the hook gear.
- Warning Messages: The LCD can display warning messages if control buttons are not in their original position when the machine is powered on (e.g., start/stop button, reverse button, needle up/down button not released).
- Troubleshooting Flowcharts: The manual includes detailed troubleshooting flowcharts for electrical parts, guiding the user through checks of sensors, fuses, circuit boards, and other components based on specific symptoms (e.g., needle not stopping at up position, machine stopping after a few stitches, motor not running).