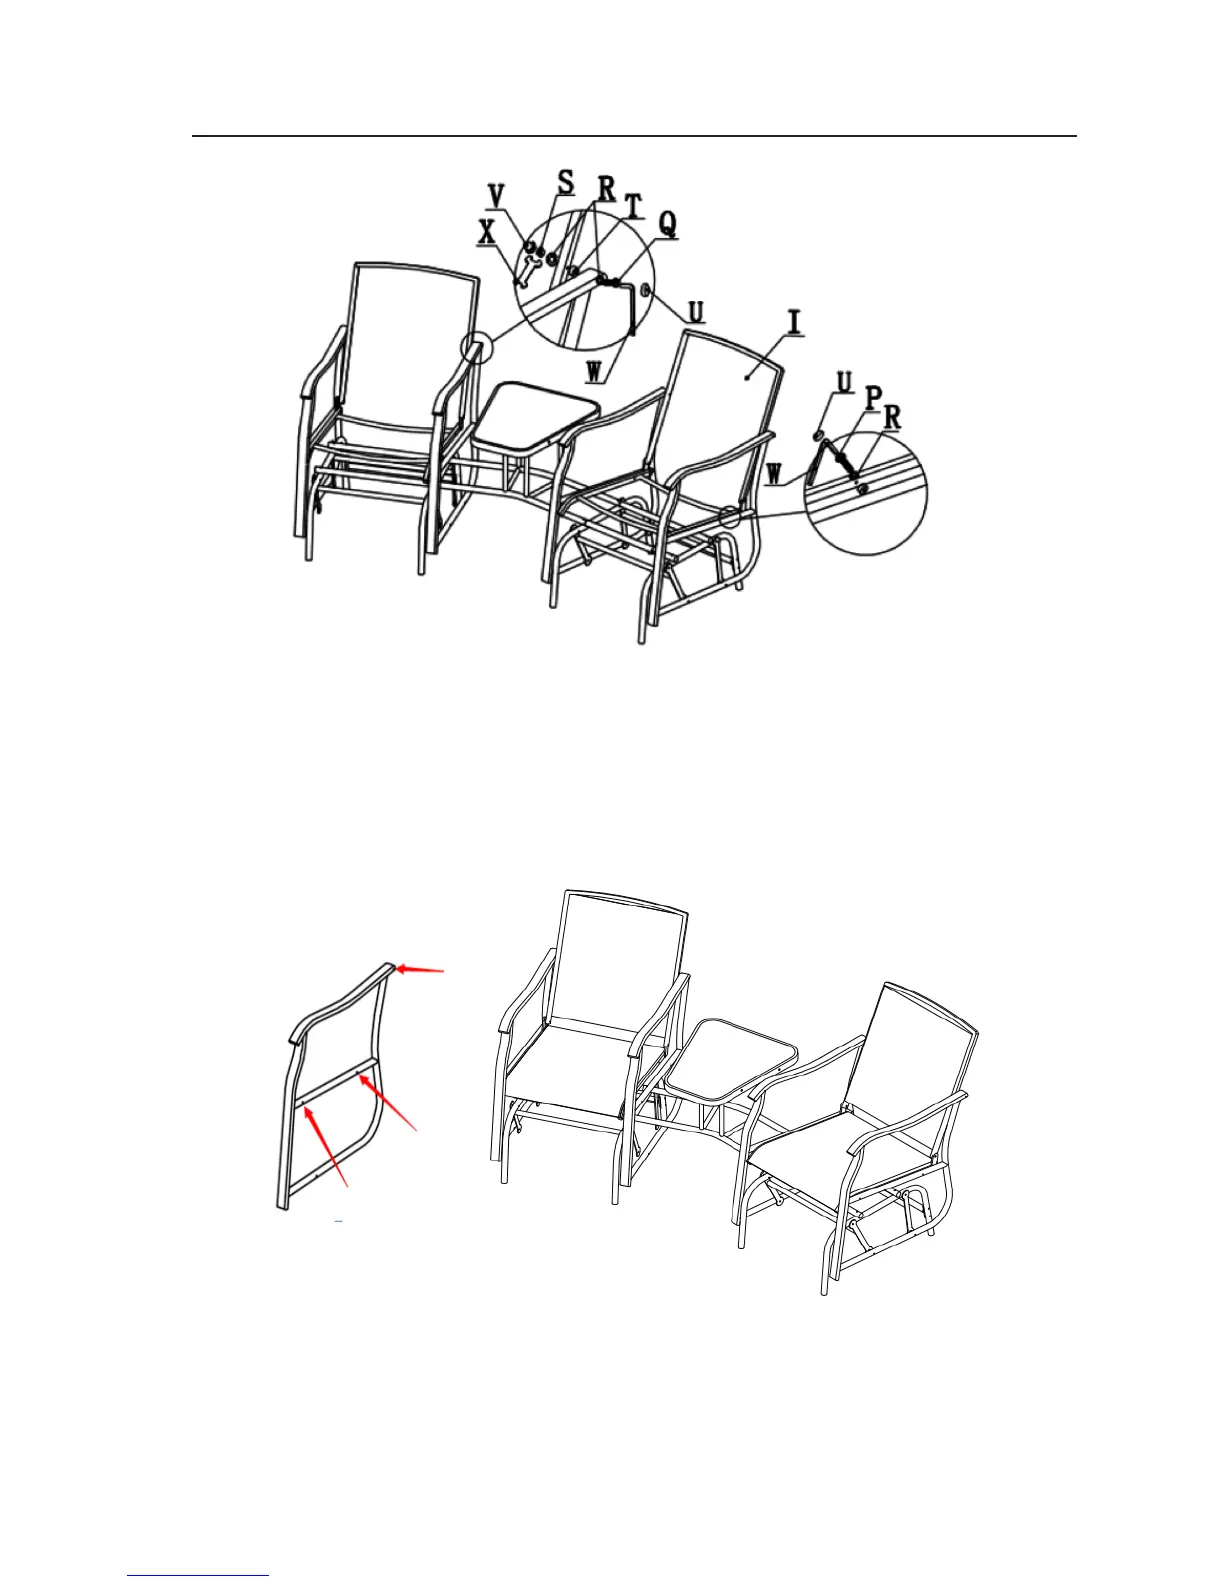
Step 9: Attach back (I) to left (B) & right armrest (A) with M6*70 bolt (Q), pplastic pad (T),
steel washer (R), M6 nuts (S) as shown above, do not tighten the bolts too much. Then attach
seat (I) to left (B) & right armrest (A) with M6 X35 bolt (P) and steel washer (R) as shown
above. Do not overtighten the bolts.
Note: There is only one connecting point between armrest and the back of chair, there are
2 connecting points between seat panel and armrest, as shown above.
Step 10: Check connecting points, and adjust if necessary, then, tighten all the bolts and nuts,
finnally, cover with bolt cap (U) and nut cap (V). The glider is ready to use as shown, above.
ASSEMBLY INSTRUCTIONS
10 11


 To Next Page