P. 15 - Outputs - sabotage loop
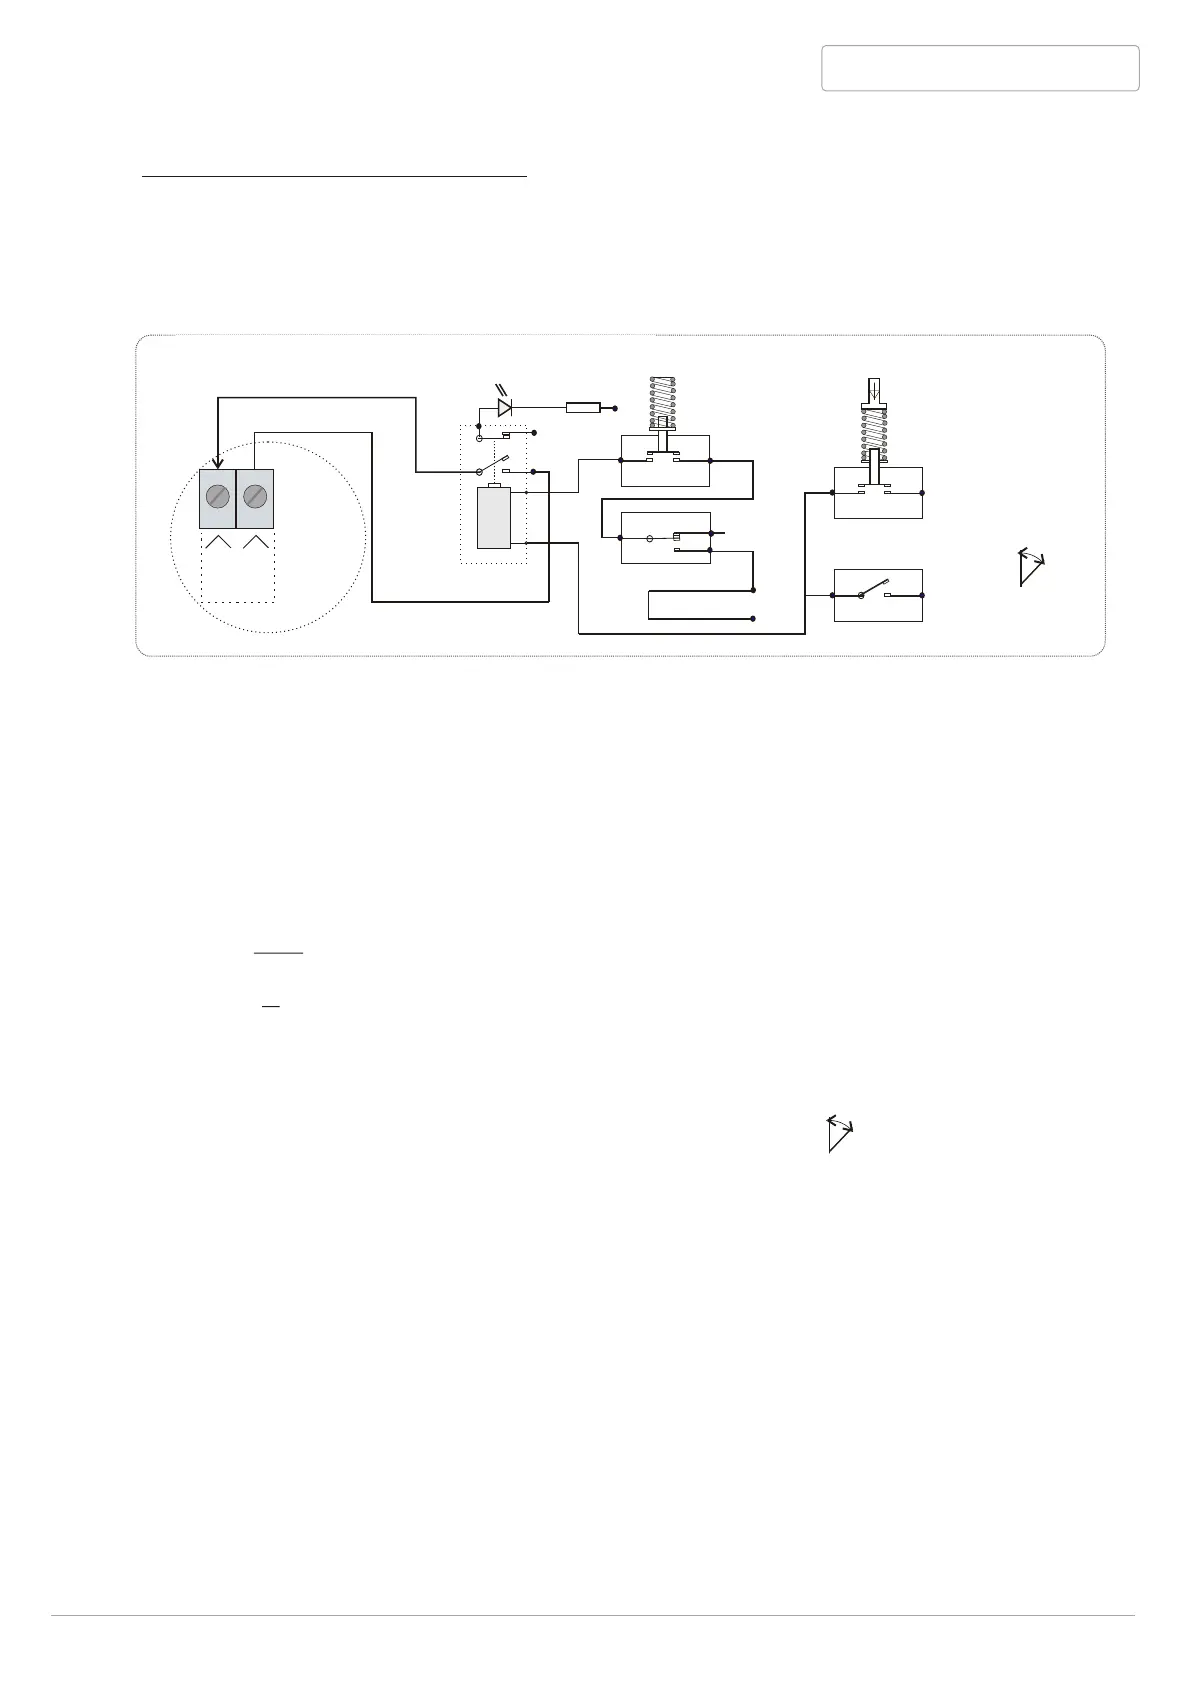
Output: sabotage loop [Tmpout]:
Block scheme BANDIT sabotage loop (tamper)
Tmpout
Ta
Tb
N.O.N.O.
N.O.N.O.
N.O.N.O.
N.O.N.O.
N.C.N.C.
OFFOFF
ON.ON.
1.
Internal
tamper
rear cover
2.
Internal
tamper
side hatch HY-3 pack
Control Box
switch
Dip B3
Tamperthread
Control Box
There are two built-in sabotage switches in the appliance (tampers):
1. Through a spring against the rear cover
2. Through a tamper pin, which is built-in in the HY-3 pack , against the side hatch.
a
:M
x
5
00
mA./
1
l
t2 vo
D
C
BANDIT 240 DB v.206
12 V
relay
NO.
NC.
0V
0V
12V
12V
0V
12V
H
-3
Y
This is a display of the principle, not a real scheme extract
Red
Tmp Led
The output connector [Tmpout] has to be integrated in the sabotage loop of the controlling
alarm system.
The tamper contact [Tmpout] is only closed (red Tmp Led off) if:
a) The rear cover is closed. If you want to perform a tamper loop test while installing:
Push-in the spring of the tamper of rear cover. If the tamper circuit is ok, the red Tmp LED
will go off as long as you keep the tamper spring pushed-in.
b) A HY-3 pack is in the unit and the side hatch is closed.
c) - there isn’t connected an optional"Control Box":
Position dip switch B3 = on (Control Box option not connected).
- there is connected an optional "Control Box" and if there is a confirmation of connection:
Position dip switch B3 = off (Control Box option connected):
The "Control Box" tamper thread correctly connected and not interrupted.
F
By switching the second button on the "Control Box" (sign: ) to on (green LED on
push button is on and "internal failure" frontLED blinks fast), the side hatch can be
opened and the HY-3 pack can be replaced, without interrupting the tamperloop.
For more info concerning the Control Box, see page 24.
-
H Y 3
F
If the side hatch and/or the rear cover are being opened while the unit is in guard mode,
it will switch immediately to alarm mode and perform a fog expulsion for the set period.
This "sabotage" fog expulsion can not be interrupted by switching the unit into guard
mode. For more info concerning Control Box, see page 24.


 To Next Page