EasyManua.ls Logo

Banner DXM - User Manual

Banner DXM
6 pages
Print Icon
To Next Page IconTo Next Page
Loading...
Quick Start Guide
Device Setup
Apply Power to the Controller
Follow these instructions to apply 12–30 V DC power to the controller using a wall plug.
Equipment used:
DXM Wireless Controller
MQDMC-401 0.3 m (1 ft) cordset with a 4-pin M12/Euro-style quick disconnect
fitting
PSW-24-1 Wall plug power supply; 24 V DC, 1 A
Important:
Never operate a 1 Watt radio without connecting an antenna
Operating 1 Watt radios without an antenna connected will damage the radio circuitry.
To avoid damaging the radio circuitry, never apply power to a Sure Cross
®
Performance or Sure Cross
MultiHop (1 Watt) radio without an antenna connected.
1. Connect the brown wire from the MQDMC-401 cordset to the DXM's PW (+ power) terminal.
2. Connect the blue wire from the MQDMC-401 cordset to the DXM's GD (- ground) terminal.
3. Connect the PSW-24-1 power supply to the MQDMC-401 cordset.
4. Plug in the PSW-24-1 wall plug power supply.
Binding and Conducting a Site Survey with the ISM Radio
The DXM internal ISM radio will either be a MultiHop master radio or a DX80 Gateway radio. Before the ISM radio can
communicate, the ISM radio within the DXM must be bound to the other radios in the wireless network.
Use the DXM LCD menu to bind external radios to the internal ISM radio.
If you are having
difficulty running binding or site surveys, it may be because of the speed of the XML configuration file or script
running on the DXM. To resolve this issue, try one of the following options:
Disable the XML and script by setting DIP switch 4 on the processor board to ON and cycling the power to the DXM. After
binding the devices, turn DIP switch 4 back OFF and cycle power again to return to normal operation of the XML and
script.
Adjust the XML or script to slow down the RTU read or write rules.
Upload a blank XML, bind all devices, then upload the
configured XML file.
Bind a DX80 Node to a DXM and Assign the Node Address
Before beginning the binding procedure, apply power to all the devices. Separate radios by 2 meters when running the binding
procedure. Put only one DXM Gateway into binding mode at a time to prevent binding to the wrong Gateway.
Binding Nodes to a Gateway ensures the Nodes only exchange data with the Gateway they are bound to. After a Gateway enters
binding mode, the Gateway automatically generates and transmits a unique extended addressing (XADR), or binding, code to all
Nodes within range that are also in binding mode. The extended addressing (binding) code
defines the network, and all radios
within a network must use the same code.
1. Enter binding mode on the DXM radio:
a) Use the arrow keys to select the ISM Radio menu on the LCD and press ENTER.
b) Highlight the Binding menu and press ENTER.
2. Assign the Node address to the Node.
For Nodes without rotary dials: Use the DXM arrow keys to select the Node address to assign to the DX80 Node about
to enter binding mode. The DXM assigns this Node address to the next Node that enters binding mode. Only bind one
Node at a time.
For Nodes with rotary dials: Use the Node's rotary dials to assign a valid decimal Node Address (between 01 and 47).
The left rotary dial represents the tens digit (0 through 4) and the right dial represents the ones digit (0 through 9) of the
Node Address. You can leave the DXM "Bind to" address set to 1 because the Node's rotary dials will override that
setting.
3. Start binding mode on the DXM radio by pressing ENTER on the DXM radio.
4. Enter binding mode on the DX80 Node.
For housed radios, triple-click button 2.
For board-level radios, triple-click the button.
For Nodes without buttons, refer to the Node's datasheet for instructions on entering binding mode.
DXM Controller Quick Start Guide
Original Document
191247 Rev. E
15 October 2020
191247
Question and Answer IconNeed help?

Do you have a question about the Banner DXM and is the answer not in the manual?

Summary

Device Setup

Apply Power to the Controller

Instructions for applying power to the DXM controller, including wireless controller and power supply details.

Binding and Site Survey

Bind DXM Gateway and Assign Node Address

Steps to bind a DXM Gateway to a DXM and assign a node address using the radio's LCD and dial.

Bind Multi-Hop Radio and Assign Device ID

Procedure to bind a Multi-Hop radio to a DXM and assign a Device ID using the radio's LCD and dial.

Conduct Site Survey from DXM

Steps to conduct a site survey from the DXM, checking network status and signal strength.

IP Address Configuration

Set Static IP via DXM LCD Menu

Steps to set the IP address, subnet mask, and gateway using the DXM's LCD menu system.

Set Static IP via Configuration Software

Instructions on using the DXM Configuration Software to define parameters and save them to an XML file.

Controller Configuration

Configure Controller Settings

Overview of configuring the DXM using the dedicated software and saving settings to an XML file.

Traditional Setup Procedure

Guide to traditional setup using the configuration software, including model selection and navigation.

Modify Multiple Registers

How to modify registers, including changing default settings and setting modify-parameter options.

Define RTU Read Rule

Steps to create a new read rule in the RTU Read configuration for specific register data.

Set Device Time and Daylight Saving

Procedure to set the DXM's time zone and daylight saving time via the system settings.

Upload Configuration File

Instructions for saving the configuration file and uploading it to the DXM via the configuration menu.

Overview

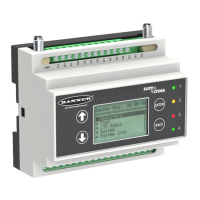
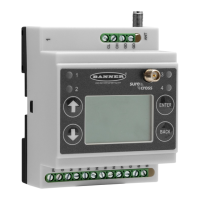
The DXM Controller is a versatile device designed for wireless network management and data acquisition, functioning as either a MultiHop master radio or a DX80 Gateway radio. It facilitates communication within a wireless network, allowing users to bind external radios, conduct site surveys, and configure various operational parameters.

Function Description:

The DXM Controller serves as the central hub for a wireless network, managing communication between multiple radios. It supports both DX80 and MultiHop radio networks. In a DX80 network, the DXM acts as a Gateway, controlling site surveys and displaying results on its LCD. For MultiHop networks, it functions as a master device, passing site survey requests to Modbus slave devices.

A key function of the DXM is its binding capability, which ensures that nodes and repeaters/slaves communicate only with their designated Gateway or master radio. This process involves assigning unique extended addressing (XADR) or binding codes to define the network. The DXM's internal ISM radio can be bound to other radios in the wireless network, and it can assign node addresses to DX80 Nodes or device IDs to MultiHop repeaters/slaves.

The device also offers comprehensive configuration options through its LCD menu and dedicated configuration software. Users can set a static IP address for network connectivity (Modbus TCP/IP or EtherNet/IP), define RTU read rules for data acquisition from Modbus Slave devices, and configure system settings such as time zone and daylight saving. The configuration software allows users to define parameters, save them in an XML file, and upload the file to the DXM for operation.

Important Technical Specifications:

  • Power Supply: Requires 12-30 V DC power. A PSW-24-1 wall plug power supply (24 V DC, 1 A) is specified for use.
  • Radio Type: Can operate as a MultiHop master radio or a DX80 Gateway radio.
  • Cordset: Uses an MQDMC-401 0.3 m (1 ft) cordset with a 4-pin M12/Euro-style quick disconnect fitting for power connection.
  • Network Connectivity: Supports USB and Ethernet ports for connection to a computer for configuration.
  • IP Addressing: Configurable for static IP addresses, subnet mask (SN), and default gateway (GW) to integrate into local area networks.
  • Radio Operation: Designed for 1 Watt radio operation.
  • Node Addressing (DX80): Supports Node addresses between 01 and 47.
  • Device ID (MultiHop): Supports device IDs between 11 and 60.
  • Configuration File: Uses XML files for storing configuration parameters.
  • LCD Display: Features an LCD for menu navigation, site survey results, and status indicators.
  • DIP Switches: Includes DIP switch 4 on the processor board for disabling XML and script during binding or site surveys.

Usage Features:

  • Power Application: Simple connection of the MQDMC-401 cordset to the DXM's PW (+) and GD (-) terminals, followed by connecting the PSW-24-1 power supply and plugging it into a wall outlet.
  • Binding Procedure:
    • DX80 Node: Enter binding mode via the LCD menu, assign a Node address (either automatically by DXM or manually via rotary dials on the Node), then initiate binding on both the DXM and the DX80 Node (triple-clicking button 2 for housed/board-level radios).
    • MultiHop Radio: Similar to DX80, enter binding mode on the DXM, assign a device ID (automatically or via rotary dials), then initiate binding on both the DXM and the MultiHop radio.
    • Troubleshooting Binding: Options include disabling XML/script via DIP switch 4, adjusting RTU read/write rules speed, or uploading a blank XML file before binding.
  • Site Survey: Accessible via the ISM Radio menu on the LCD. Allows selection of a radio ID to run a site survey, displaying results as green (highest signal), yellow, red, and missed packets. Important for verifying wireless communication.
  • IP Address Configuration: Navigate through the System Config > Ethernet menu on the LCD to set DHCP mode (OFF for static IP), IP address, subnet mask, and default gateway. Changes require a power cycle.
  • Configuration Software:
    • Connects via USB or Ethernet.
    • Automatically detects the DXM model.
    • Allows modification of local registers, including name, register group, units, counter, LCD permissions, SD card logging, sign type, cloud settings, and protocol conversion.
    • Supports defining RTU Read Rules, specifying slave ID, number of registers to read, beginning register, register type, read frequency, and error conditions.
    • Includes a "Sync PC Time with Device" function to match the DXM's time with the computer's.
    • Provides options to set device timezone and daylight saving observation.
  • XML Configuration Management: Save configuration files to the computer and upload them to the DXM. The software prompts to save changes before uploading.
  • Status Indicators: Application Status indicator (red, green, yellow) in the configuration software provides feedback on file upload progress and connection status.

Maintenance Features:

  • Radio Circuitry Protection: Crucial warning to never operate a 1 Watt radio without an antenna connected to prevent damage to the radio circuitry.
  • Troubleshooting Connection Issues: If connection attempts fail (Application Status Icon is Red), users are advised to close and restart the DXM Configuration Software, disconnect and reconnect the USB/Ethernet cable, and attempt connecting again.
  • Configuration File Management: The software emphasizes saving XML configuration files to prevent data loss and prompts users to save before uploading or exiting.
  • Firmware Updates: While not explicitly detailed as a maintenance feature, the ability to upload new configuration files implies a mechanism for updating or restoring device settings, which is a form of maintenance.
  • Reboot Functionality: The Device > Reboot option in the configuration software allows for restarting the DXM, which can help resolve operational issues.
  • Parameter Reset: The "Reset" option in the System Config > Ethernet menu allows resetting Ethernet parameters to XML defaults, useful for troubleshooting network connectivity.
  • Site Survey Exit: Users are reminded to exit Site Survey mode after completion to avoid system problems and conserve battery life of battery-powered radios.

Banner DXM Specifications

General IconGeneral
BrandBanner
ModelDXM
CategoryController
LanguageEnglish

Related product manuals