www.barbecook.com
27
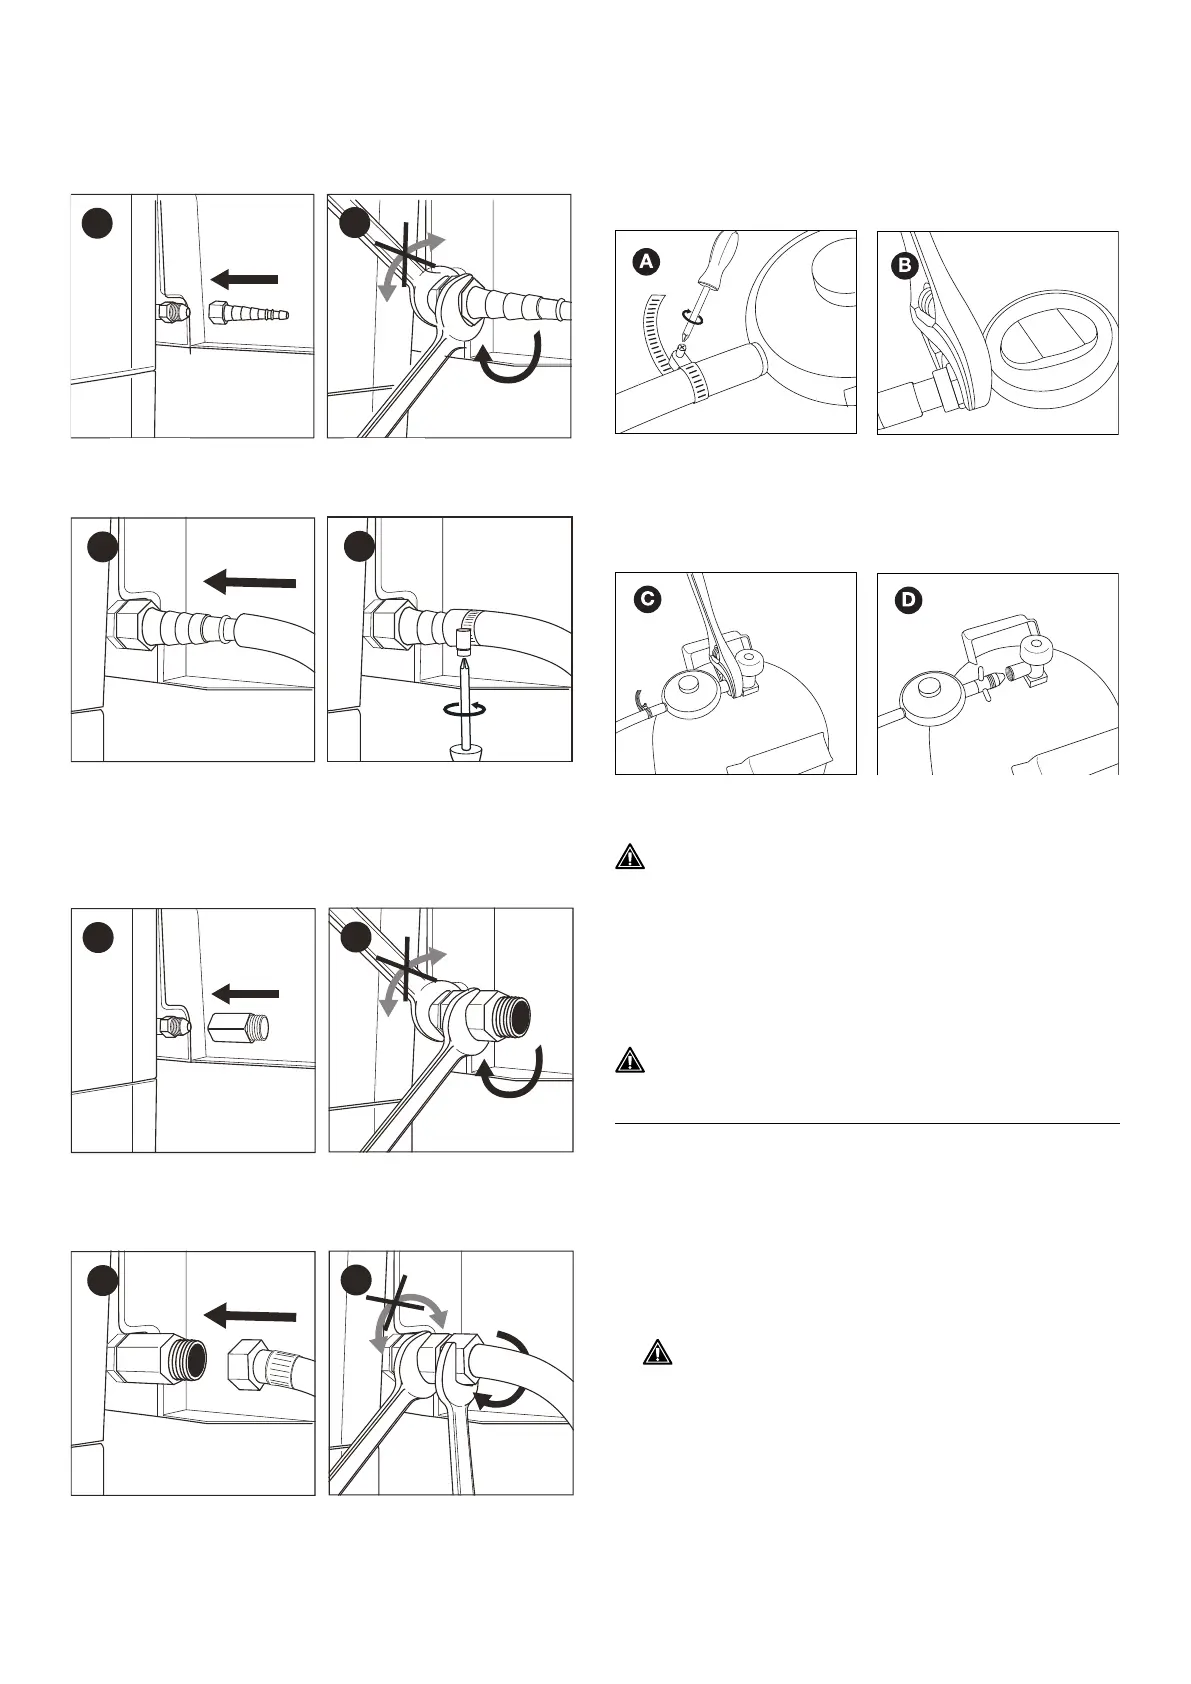
6.3.1 Coupling A
You require a 19mm wrench and a Phillips screwdriver.
1. Screw the coupling onto the gas tube on the appliance (A)
and tighten it with a 19mm wrench (B).
A
B
2. Slide the hose over the coupling (C) and tighten the
clamping ring with a Phillips screwdriver (D).
C
D
6.3.2 Coupling B
You require a 22mm wrench and an adjustable wrench.
1. Screw the coupling onto the gas tube on the appliance (A)
and tighten it with a 22mm wrench (B).
A
B
2. Screw the gas hose onto the coupling (C) and secure it
with two wrenches. Hold the coupling rm with one 22mm
wrench and tighten the hose with an adjustable wrench.
C
D
6.4. Connect the hose and gas bottle to the regulator.
You will require a Phillips screwdriver and/or an adjustable
wrench depending on the type of regulator that you are using.
1.
Connect the hose to the pressure regulator. Proceed as
follows:
• If the hose is tted with a clamping ring, slide the hose over
the regulator and tighten the clamping ring with a Phillip
screwdriver (A).
• If the hose is tted with a nut, screw the hose onto the
regulator and tighten the nut with an adjustable wrench (B).
2. Connect the pressure regulator to the gas bottle. Proceed as
follows:
• If the regulator is tted with a nut, screw the regulator
onto the gas bottle clockwise and tighten the nut with an
adjustable wrench (C).
• If the regulator has a thread, screw the regulator onto the
gas bottle counter-clockwise (D)
Only use regulators that
satisfy EN 16129.
6.5. Replace the gas bottle
1. Close the gas supply and set all control knobs to OFF.
2. Disconnect the empty gas bottle and connect the full gas
bottle.
3. Check the gas bottle, the hose, and all gas connections
for leaks. See “7. Checking for gas leaks”.
Note that when replacing the gas bottle, you must
always be well away from sources of ignition.
7. CHECKING FOR GAS LEAKS
7.1. Why check for gas leaks?
Propane and butane are both heavier than air. This means
that these gases will not drift away if they leak from the
appliance. On still days, leaked gas can accumulate in and
around the appliance and subsequently ignite and explode.
7.2. When to check for gas leaks?
• Before rst use or after a lengthy periodout of use.
Check that there are no gas leaks if the
appliance has been assembled by the supplier.
• You should you do this whenever you replace a gas part.
• At least once annually, ideally at the start of the season.
7.3. Safety instructions
• Place the appliance outside in a well-ventilated location.
Ensure that there are no ames or heat sources in the
vicinity of the appliance.
• Never use a lighter or matches to check for gas leaks.
• Do not smoke or ignite the burners when checking for gas
leaks.