EasyManua.ls Logo

Barbeques Galore DISCOVERER G4DISL User Manual

Barbeques Galore DISCOVERER G4DISL
36 pages
To Next Page IconTo Next Page
Page #1 background imageLoading...
Page #1 background image
WELCOME TO THE WORLD OF BARBEQUES GALORE
OUTDOOR COOKING
INSTRUCTIONS-
DISCOVERER G4DISL
For The Safe Use And Enjoyment
Of Your New Barbeque
PRODUCT CODEG4DISL
DISCOVERER 4 ON CART
WITH SIDE BURNER
Tools required:
1 adjustable spanner
1 phillips head screwdriver
Question and Answer IconNeed help?

Do you have a question about the Barbeques Galore DISCOVERER G4DISL and is the answer not in the manual?

Barbeques Galore DISCOVERER G4DISL Specifications

General IconGeneral
BrandBarbeques Galore
ModelDISCOVERER G4DISL
CategoryGrill
LanguageEnglish

Summary

Safety First

Where To Put Your Barbeque

Assembling Your Barbeque

Assembly Step 1: Unpacking and Part Check

Instructions for opening the carton, preparing a clean surface, and checking all initial parts.

Assembly Step 5: Install Side and Back Panels

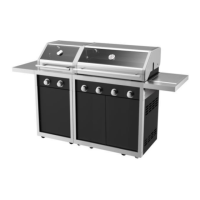
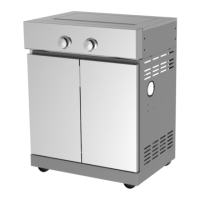
Instructions for fixing the side panels and the back panel to the barbeque base.

Assembly Step 6: Attach Front Rail and Top Panel

Guide to attaching the front rail, cart brackets, and the top panel of the barbeque.

Assembly Step 7: Install Barbeque Doors

Steps for attaching the door handles and then securing the barbeque doors.

Assembly Step 8: Mount the Firebox

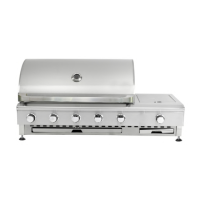
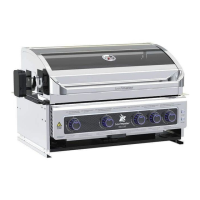
Instructions for positioning and attaching the barbeque head (firebox) onto the cart.

Assembly Step 9: Install Left Side Shelf

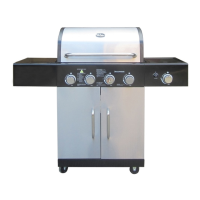
Procedure for attaching the left fascia, shelf angle bracket, and left side shelf.

Assembly Step 10: Install Right Side Shelf

Guide to attaching the right fascia, shelf angle bracket, and right side shelf.

Assembly Step 11A: Connect Side Burner and Hose

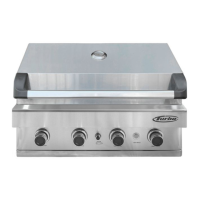
Detailed steps for fitting the side burner and its associated hose assembly.

Assembly Step 11B: Complete Side Burner Setup

Final instructions for finishing the side burner, including knob, trivet, and ignition.

Assembly Step 12: Install Grates and Flame Tamers

Instructions for placing flame tamers, cooking grill, hot plate, and warming rack.

Assembly Step 13: Install Drip Tray and Cup

Steps for fitting the fat channelling tray and the grease collection cup.

Installation

Lighting Your Barbeque

Barbeque Leak Testing Procedure

Essential steps for conducting a leak test using soapy water before lighting the barbeque.

First Time Use

Covered Cooking

Maintenance

Related product manuals