Page 10 <&(%$*4.8"4,7%J'*#$"&8#K%/7*,#*%4,77%HLMMMLMIILNOPO1 Item 63433
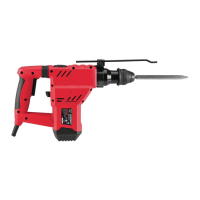
?@<6AQ RS6;@ACRE D@CEA6E@ET6?6AFS
T.,83"83%?X?%A>/*%&(%?X?%S7'#%A>/*%X("77%W"$#
T@FACREj Wear heavy-duty work gloves when
inserting and removing drill bits. Drill bits become very
hot during use. Do not remove drill bits until the bit
has cooled. Do not strike stuck bits with a hammer.
1. Grease the drill bit shank before installing.
2. Pull back on the Chuck and insert the
drill bit (sold separately). Make sure it
slides all the way into the opening.
3. Release the Chuck.
4. Check that the drill bit is secured in place.
It should not be able to be pulled out of the Chuck.
ERACT6-%F#*%#.,(/%+"$#1%%X'77K%+*8$K%&(%9,5,3*9%
+"$#%)"77%4,'#*%#$(*##%&8%$.*%9("77%,890&(%+(*,Z1
U&(Z/"*4*%,89%U&(Z%@(*,%?*$%F/
1. Designate a work area that is clean and well lit.
The work area must not allow access by children
or pets to prevent distraction and injury.
2. Route the power cord along a safe route to reach
the work area without creating a tripping hazard or
exposing the power cord to possible damage. The
power cord must reach the work area with enough
extra length to allow free movement while working.
3. Secure loose workpieces using a vise or clamps
(not included) to prevent movement while working.
4. There must not be objects, such as utility lines,
nearby that will present a hazard while working.
D,#&8(>%X("77"83%R/*(,$"&8
1. Make sure that the Trigger is in the
off-position and tool is unplugged.
2. Adjust the Auxiliary Handle as needed.
3. Select Forward or Reverse.
4. Select Function.
5. Adjust Depth Gauge.
6. Plug in the Power Cord.
7. Squeeze and hold the Trigger to
turn on the Rotary Hammer.
8. To lock the Trigger in the ON position,
squeeze the Trigger, press in the Trigger Lock
button, and then release the Trigger. The
tool will operate continuously. To stop the
tool, squeeze and release the Trigger.
9. Do not apply excessive force, allow
the tool to do the work.
T&84(*$*%X("77"83%A"/#-
a. Do not add water to the drill hole.
b. Clean the bit flutes regularly while drilling.
c. Back the bit out of the hole often during drilling,
especially when drilling deep holes.
d. Grease the bit shank and bit holder and keep
the shank end of the bit dust and debris free.
e. Use the shortest bit practical.
f. When drilling deep holes, work in stages,
use a short bit for the beginning of the hole,
then change to a longer bit.
10. To prevent accidents, turn off the tool and
unplug it after use. Clean, then store the
tool indoors out of children’s reach.