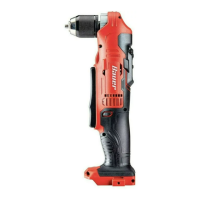
Page 10 <&(%$*4.8"4,7%H'*#$"&8#I%/7*,#*%4,77%JKLLLKLMMKNOPO1 Item 64121
?@<6AQ RS6;@ACRE D@CEA6E@ET6?6AFS
R/*(,$"83%C8#$('4$"&8#
% ;*,9%$.*%6EAC;6%CDSR;A@EA%?@<6AQ%CE<R;D@ACRE%#*4$"&8%,$%$.*%+*3"88"83%&2%$."#%
5,8',7%"847'9"83%,77%$*\$%'89*(%#'+.*,9"83#%$.*(*"8%+*2&(*%#*$%'/%&(%'#*%&2%$."#%/(&9'4$1
A&&7%?*$%F/
AR%S;6!6EA%?6;CRF?%CEiF;Q%<;RD%@TTCX6EA@G%RS6;@ACRE-%
D,Z*%#'(*%$.,$%$.*%A("33*(%"#%"8%$.*%&22K/&#"$"&8%,89%'8/7'3%$.*%$&&7%2(&5%"$#%
*7*4$("4,7%&'$7*$%+*2&(*%/*(2&(5"83%,8>%/(&4*9'(*%"8%$."#%#*4$"&81
X("77%W"$%C8#$,77,$"&8
T@FACREj Wear heavy-duty work gloves
to provide protection when inserting and
removing drill bits. Drill bits become very hot during
use. Do not remove drill bit until the bit has cooled.
1. Insert Chuck Key into Chuck, then turn Key
counterclockwise until Chuck’s jaws are open
enough for the bit to fit between jaws.
2. Use a bit designed for the workpiece type. Place
bit into the drill inside the Chuck’s Jaws.
3. Turn the Key clockwise until the bit is held securely
in place, centered between the Chuck’s Jaws.
ERACT6-%F#*%#.,(/%+"$#1%%X'77I%+*8$I%&(%
9,5,3*9%+"$#%5,>%4,'#*%+"89"83%,89%
/'$%#$(*##%&8%$.*%9("77%,890&(%+"$1
?*$$"83%?/**9
ERACT6- Make sure Speed Switch is fully engaged in
either L or H position. Do not set in between speeds.
Do not set Speed Switch when Drill is running.
Set the desired speed by rotating the Speed Switch
(L = Low and H = High). Point proper speed at arrow.
@((&)
?/**9%
?)"$4.
?*$$"83%X"(*4$"&8
Set direction to Forward or Reverse by
pressing Direction Switch to left or right.
<&(),(9
;*Y*(#*
X"(*4$"&8%
?)"$4.
?*$$"83%W&$$&5%B,897*%X"(*4$"&8
Set Bottom Handle to desired position by
pressing the Bottom Handle Rotation Button
and rotating the Handle at the same time.
W&$$&5%B,897*%
;&$,$"&8%
W'$$&8