Page 11<&(%$*4.8"4,7%H'*#$"&8#I%/7*,#*%4,77%JKLLLKLMMKNOPO1Item 64121
?@<6AQRS6;@ACRED@CEA6E@ET6 ?6AFS
U&(Z/"*4*%,89%U&(Z%@(*,%?*$%F/
1. Designate a work area that is clean and well lit.
The work area must not allow access by children
or pets to prevent distraction and injury.
2. Route the power cord along a safe route to reach
the work area without creating a tripping hazard or
exposing the power cord to possible damage. The
power cord must reach the work area with enough
extra length to allow free movement while working.
3. Secure loose workpieces using a vise or clamps
(not included) to prevent movement while working.
4. There must not be objects, such as utility lines,
nearby that will present a hazard while working.
V*8*(,7%R/*(,$"83%C8#$('4$"&8#
U@;ECEVj AR%S;6!6EA%?6;CRF?%CEiF;Q-%
U*,(%@E?C%,//(&Y*9%#,2*$>%37,##*#%)"$.%#"9*%#."*79#%9'("83%'#*1%%X&%8&$%)*,(%37&Y*#1%
B&79%X("77%#*4'(*7>%'#"83%+&$.%.,89#%$&%4&8$(&7%9("77%(*,4$"&8%$&%+"$%+"89"831%%W(,4*%9("77%"2%/(,4$"4,71%
[**/%,77%+&9>%/,($#%47*,(%&2%,8>%2"\*9%&+=*4$#%)."4.%4&'79%+*%4('#.*9%9'("83%9("77%(*,4$"&8%$&%+"$%+"89"831%
F#*%,%#4,22&79%).*8%9("77"83%&Y*(.*,9I%9&%8&$%'#*%,%7,99*(1%%
R87>%'#*%#.,(/%+"$#I%'#*%$.*%/(&/*(%+"$%2&(%$.*%=&+1%%?*$%?/**9%?)"$4.%$&%/(&/*(%#*$$"83 2&(%+"$%+*"83%'#*91%
@Y&"9%9("77"83%"8$&%Z8&$$>I%),(/*9I%/"$4.>%&(%)*$%)&(Z/"*4*#%&(%
)&(Z/"*4*#%$.,$%5,>%.,Y*%8,"7#%&(%&$.*(%."99*8%&+=*4$#%"8%$.*51%%
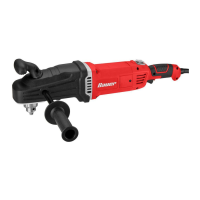
1. Make sure that the Trigger is in the
off-position, then plug in the tool.
2. Secure Drill:
a. Hold securely using both hands. Use one
hand to hold Bottom Handle and the other
hand to hold the Top or Side Handle, or
b. if practical, brace Drill against a solid fixed
object in addition to holding securely.
3. Touch Drill bit lightly against the
workpiece and squeeze the Trigger.
4. While the Drill is running, apply light pressure to
the Drill. Allow the tool to work at its own pace.
5. After the Drill bit cuts through the workpiece,
remove it while the Drill is still running. This
prevents the Drill bit from binding.
T@FACREj If the Drill bit binds in the workpiece,
the Chuck will stop rotating and:
• if the drill is set to High speed, $.*%X("77%
)"77%#'99*87>%$)"#$%"8%$.*%&//&#"$*%
9"(*4$"&8%&2%+"$%(&$,$"&8%)"$.%2&(4*%
4,/,+7*%&2%4,'#"83%#*("&'#%"8='(>1
• if the Drill is set to Low speed, a mechanical
clutch will disengage the bit from the gears
and a clicking sound will be heard.
6. C<%AB6%WCA%?A@;A?%AR%WCEXI%;6G6@?6%
A;CVV6; CDD6XC@A6GQj%
7. Allow Drill to come to a full stop, then unplug Drill.
8. Set Drill to Reverse direction and Low speed, plug
Drill back in, and reverse bit out of workpiece.
9. To prevent accidents, turn off the tool and
unplug it after use. Clean, then store the
tool indoors out of children’s reach.