Page 9<&(%$*4.8"4,7%H'*#$"&8#I%/7*,#*%4,77%JKLLLKLMMKNOPO1Item 64146
?@<6AQRS6;@ACRED@CEA6E@ET6 ?6AFS
?*$'/%K%W*2&(*%F#*-
% ;*,9%$.*%6EAC;6%CDSR;A@EA%?@<6AQ%CE<R;D@ACRE%#*4$"&8%,$%$.*%+*3"88"83%&2%$."#%
5,8',7%"847'9"83%,77%$*\$%'89*(%#'+.*,9"83#%$.*(*"8%+*2&(*%#*$%'/%&(%'#*%&2%$."#%/(&9'4$1
AR%S;6!6EA%?6;CRF?%CEiF;Q%<;RD%@TTCX6EA@G%RS6;@ACRE-%
D,Z*%#'(*%$.,$%$.*%S&)*(%?)"$4.%"#%"8%$.*%&22K/&#"$"&8%,89%'8/7'3%$.*%$&&7%2(&5%
"$#%*7*4$("4,7%&'$7*$%+*2&(*%/*(2&(5"83%,8>%/(&4*9'(*%"8%$."#%#*4$"&81
E&$*- For additional information regarding the parts listed in the following pages,
refer to the Assembly Diagram near the end of this manual.
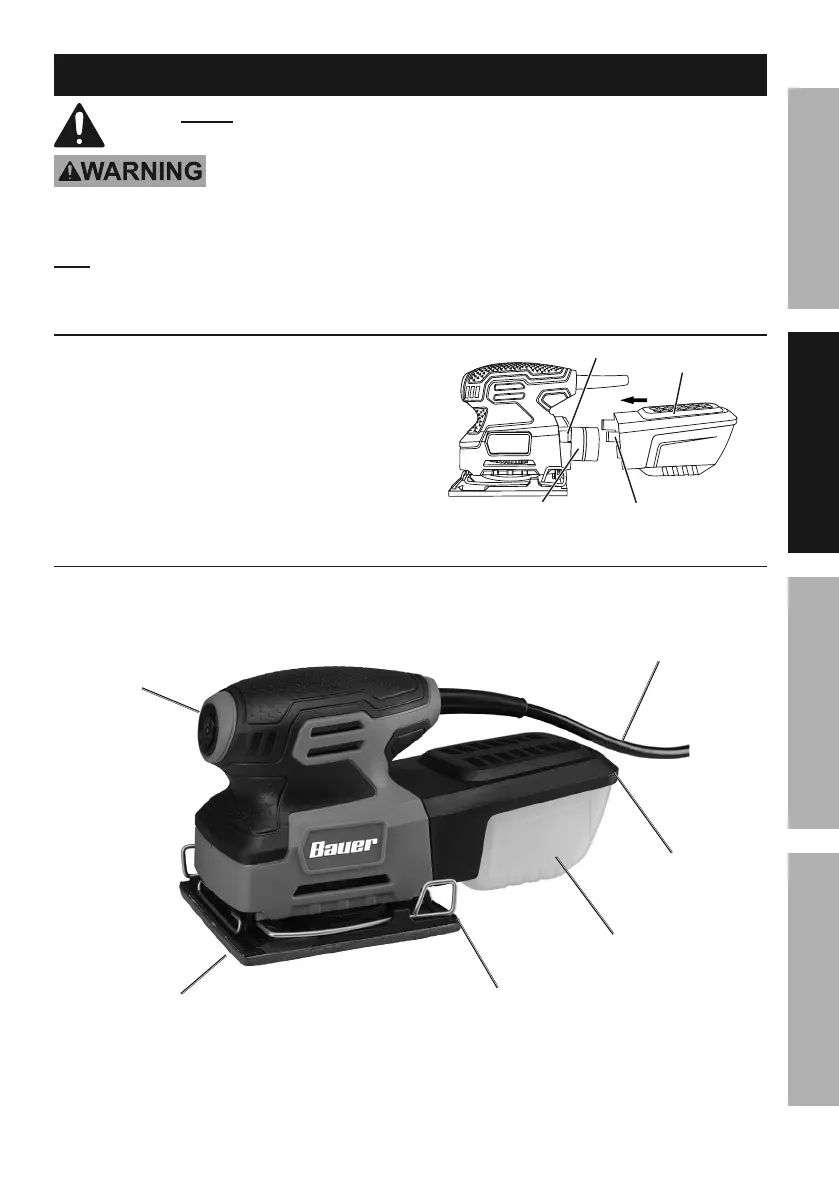
@##*5+7>
1. Slide the Dust Box onto the Dust Chute at the
back of the Sander. Push the Dust Box fully
onto the Dust Chute using firm pressure until the
Locking Tabs snap into place in the Tab Slots.
2. Dust collection will only work if the sandpaper
has holes that line up with the 8 dust collection
holes in the Backing Pad. Refer to Using the
Sandpaper Hole Punch on page 10.
X'#$%W&\
X'#$%T.'$*
G&4Z"83%A,+
A,+%?7&$
<'84$"&8#
S&)*(
?)"$4.
X'#$%
W&\
X'#$%W&\%
T&Y*(
W,4Z"83%S,9
S&)*(%T&(9
?,89/,/*(%
T7,5/