Page 8 ;&(%$*4.8"4,7%<'*#$"&8#=%/7*,#*%4,77%>?@@@?@AA?BCDC1 Item 58079
EF;6GH IJ6KFGLIM NFLMG6MFMO6E6GPJ
I/*(,$"83%L8#$('4$"&8#
%K*,9%$.*%6MGLK6%LNJIKGFMG%EF;6GH%LM;IKNFGLIM%#*4$"&8%,$%$.*%+*3"88"83%&2%$."#%
5,8',7%"847'9"83%,77%$*Z$%'89*(%#'+.*,9"83#%$.*(*"8%+*2&(*%#*$%'/%&(%'#*%&2%$."#%/(&9'4$1
Q&(X/"*4*%,89%Q&(X%F(*,%E*$%P/
1. Workpiece selection:
a. Workpiece must be free of foreign objects.
b. Wear a NIOSH-approved respirator and have
appropriate ventilation whenever removing paint.
c. Designate a work area that is clean and well lit.
The work area must not allow access by children
or pets to prevent distraction and injury.
2. Route the power cord along a safe route to reach
the work area without creating a tripping hazard or
exposing the power cord to possible damage. The
power cord must reach the work area with enough
extra length to allow free movement while working.
3. Secure loose workpieces using a vise or clamps
(not included) to prevent movement while working.
4. There must not be objects, such as utility lines,
nearby that will present a hazard while working.
G&&7%O.,83"83
GI%JK6!6MG%E6KLIPE%LMiPKH%;KIN%FOOLU6MGFT%IJ6KFGLIM-%
N,X*%#'(*%$.,$%$.*%J&)*(%E)"$4.%"#%"8%$.*%&22?/&#"$"&8%,89%'8/7'3%$.*%$&&7%2(&5%
"$#%*7*4$("4,7%&'$7*$%+*2&(*%/*(2&(5"83%,8V%/(&4*9'(*%"8%$."#%#*4$"&81
K*5&W"83%U('5
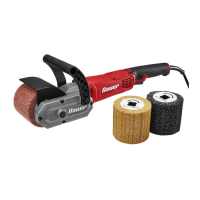
1. Press and hold Spindle Lock to
stop Drum from rotating.
E/"897*%
T&4X
2. While pressing Spindle Lock, remove Screw by
turning clockwise with included hex wrench.
3. Remove Washer and Drum.
E4(*)
Q,#.*(
U('5
L8#$,77"83%U('5
1. Align indents on Drum with tabs on
Spindle, then install Drum.
2. Insert Screw into Washer, then thread Screw into
Spindle counterclockwise with included hex wrench.
R*8*(,7%L8#$('4$"&8#%2&(%P#*
1. Hold tool with both hands. Grasp Handle with
one hand and Auxiliary Handle with other hand.
2. Make sure that the Power Switch is in
the off-position, then plug in the tool.
3. Adjust Speed Dial.
M&$*- If workpiece gets hot, reduce speed.
4. Apply tool to workpiece, then turn on tool
and let it come up to full speed.
M&$*- Soft-start feature prevents tool from jumping
at start up, so tool may initially seem slow to start.
5. To create a smoother finish, keep tool moving
across the work surface. Do not allow it to rest
on one spot for a long time while it is operating.
6. Engage Trigger Lock as needed.
7. To prevent accidents, turn off the tool, let it
come to a complete stop before setting it down,
and unplug it after use. Clean, then store
the tool indoors out of children’s reach.

 Loading...