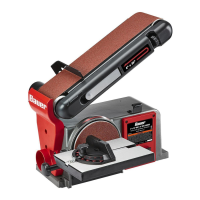
Page 9For technical questions, please call 1-888-866-5797.Item 58862
SAFETYOPERATIONMAINTENANCE SETUP
Operating Instructions
Read the ENTIRE IMPORTANT SAFETY INFORMATION section at the beginning of this
manual including all text under subheadings therein before set up or use of this product.
Tool Set Up
TO PREVENT SERIOUS INJURY FROM ACCIDENTAL OPERATION:
Turn the Power Switch of the tool off and unplug the tool from its electrical outlet
before performing any procedure in this section.
TO PREVENT SERIOUS INJURY:
DO NOT OPERATE WITH ANY GUARD DISABLED, DAMAGED, OR REMOVED.
Mounting Sander to Workbench
Note: For temporary mounting, attach a large C-Clamp
to each side of the Sander and workbench. For
permanent mounting, follow instructions below:
1. Place Sander on a stable workbench.
2. Using the mounting holes mark the
hole locations on the workbench.
3. Remove the Sander. Drill two 3/8"
holes through the workbench.
4. Align the Sander Base over the mounting
holes and secure it using two 5/16" washers
and screws, locking washers and nuts.
(Mounting hardware not included.)
Leveling the Table
1. Loosen the two Locking Handles. Place a
combination square (not included) on the Table
so that the combination square touches the
Sanding Disc. If the Table is 90° to the disc,
the table is level. Always maintain a maximum
of 1/16" clearance between the Table and the
Sanding Disc. Tighten the Locking Handles.
2. If the Table is not 90° to the Sanding Disc, loosen
Locking Handles and tilt Table until it is square
with the disc. Retighten Locking Handles.
3. Loosen Screw holding the Angle Pointer and
adjust it to point to 90°. Tighten the Screw.
Squaring the Miter Gauge
1. Loosen the Miter Gauge Knob, and
set the Miter Gauge to 0°.
2. Place a combination square (not included) against
the Sanding Disc and the flat face of the miter
gauge. Miter Gauge should be 90° to Sanding Disc.
3. Adjust as needed, then tighten Miter Gauge Knob.
4. Loosen the Screw holding the Miter Gauge
Pointer. Adjust it to 0° on the Miter Scale.
Tighten Screw and recheck with square.
Replacing Sanding Discs
Note: Before using the Sanding Disc the first
time, wipe down the Backing Disc with denatured
alcohol (shellac thinner). This will clean the surface,
leave no residue and assure a secure bond.
1. Remove the Table, Disc Guard and Dust Cover.
2. Peel off old Sanding Disc. Align perimeter
of new Sanding Disc over the Backing Disc
and press firmly onto Backing Disc.
Note: Adhesive from old Sanding Disc may leave
residue. Wipe the Backing Disc with denatured
alcohol (shellac thinner). This will clean the surface,
leave no residue and assure a secure bond.