Page 12 <&(%$*4.8"4,7%H'*#$"&8#I%/7*,#*%4,77%JKLLLKLMMKNOPO1 Item 58162
?@<6AQ RS6;@ACRE D@CEA6E@ET6?6AFS
V*8*(,7%R/*(,$"83%C8#$('4$"&8#
AR%S;6!6EA%?6;CRF?%CEdF;Q%UBCG6%CE%RS6;@ACRE-%
F#*%/*(#&8,7%/(&$*4$"Y*%*H'"/5*8$1%%@7),>#%)*,(%*>*%/(&$*4$"&81%
U*,(%@E?CK,//(&Y*9%#,2*$>%3&337*#%)"$.%#"9*%#."*79#1%%
1. Charge the tool before use.
2. Select an appropriate bit or attachment
for the job. Insert the bit or attachment.
3. Start the tool by pushing the
Power Switch to ON position.
4. Use the speed buttons to increase
or decrease speed. Use a speed
appropriate to the bit and the material
being worked on. In general, harder
materials require faster speeds and
softer materials require slower speeds.
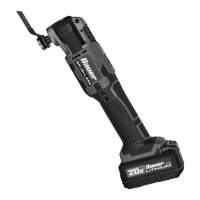
S&)*(%?)"$4.%
?/**9%W'$$&8#
5. Apply the bit to the work material as needed.
6. When task is complete, stop the tool
by pushing power switch to the OFF
position. Wait for tool to completely stop
spinning. Remove the bit or attachment.
7. Store tool, parts and accessories inside case
to protect from moisture and humidity. Store
in an indoor dry area out of reach of children.