Page 7For technical questions, please call 1-888-866-5797.Item 58871
SAFETYOPERATIONMAINTENANCE SETUP
Setup - Before Use:
Read the ENTIRE IMPORTANT SAFETY INFORMATION section at the beginning of this
manual including all text under subheadings therein before set up or use of this product.
TO PREVENT SERIOUS INJURY FROM ACCIDENTAL OPERATION:
Turn the Power Switch of the tool off and unplug the tool from its electrical outlet
before performing any procedure in this section.
Note: For additional information regarding the parts listed in the following
pages, refer to Parts List and Diagram on page 14.
Mounting
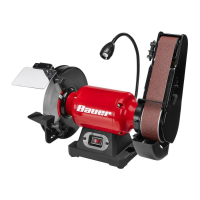
1. Ensure that the Grinder/Belt Sander is always
stable and secure (e.g. fixed to a bench). Select
a workbench or mounting location that is able to
support the weight of the Grinder/Belt Sander, plus
any additional weight placed on it during use.
2. Use the mounting bolt holes provided in
the Base to mount the Grinder/Belt Sander
to the mounting location before use.
Mounting hardware not included.
Assembly
1. Attach the Spark Arrestor (10) to the Wheel
Guard (7) using two M5 x 10 Hex Bolt Assemblies (8).
2. Attach the Eye Shield to the Spark Arrestor bracket
as shown using an M6 x 12 Square Neck Screw (9),
Flat Washer (16), and M6 Lock Knob (17).
Eye
Shield
Flat
Washer
M6 Lock
Knob
Wheel
Guard
M5x10
Screw
Spark
Arrestor
M5x10
Screws
3. Attach the Work Rest Support (33) to
the Wheel Guard using an M8 x 12 Lock
Knob (39) and Flat Washer (94).
4. Attach the Work Rest (40) to the Work Rest
Support using the M6 x 17 Work Rest Lock Knob (44)
and Flat Washer (41). Make sure the Work
Rest is perpendicular to the Grinding Wheel.
Work
Rest
Work
Rest
Support
Flat
Washer
M6x17
Lock Knob
Wheel
Guard
M6x17
Lock Knob
Flat
Washer