Page 11?)+('-71;%7/:(K*-&'%);&L(2:-/&-(7/::(#MNNNMN!!MOPQP4Item 64416
BC?9DRST9>CDFSHGCFHD9HCHU9 B9DIT
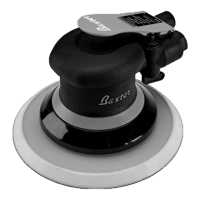
W-;-+/:(S2-+/'%;6(F;&'+*7'%);&
1� If an automatic oiler is not used, add a few
drops of Pneumatic Tool Oil to the airline
connection before use� Add a few drops
more after each hour of continual use�
2� Wipe the work surface clean of all dirt and
debris, especially that of previous coarse
grit sanding sessions, which will scratch the
surface of a finer grit sanding session�
3� Attach the desired grit sanding disc (sold
separately) onto the Backing Pad�
4� Attach the air supply�
5� Pressing down on the Trigger with the palm of
your hand starts the Sander� Grip the Sander
but with the palm of the hand not pressing down�
With the sanding pad placed flat on the working
surface, press down on the Trigger with the palm
of the hand to begin the sanding operation�
UCIDFSHe Start and stop the Sander while it is held
firmly against the work surface� Applying the Sander
to the workpiece while running with the sanding
pad tilted will sand a groove into the workpiece and
may cause the Sander to move in the direction of
rotation, resuting in loss of control of the tool�
6� The speed of the Sander may be varied
by turning the air Regulator Value�
H)'-0 Do not allow free, no-load rotating at high
speed to avoid possible injury or damage to the tool�
7� Keep heavy pressure off of the Sander when
operating� Allow the sanding disc to do the work�
8� Move the Sander in a uniform pattern up and
down or side to side to ensure even sanding�
9� Periodically, stop the Sander and check
for possible disc wear� Replace used or
worn sanding discs when necessary�
10� If the tool requires more force to accomplish
the task, verify that the tool receives sufficient,
unobstructed airflow (CFM) and increase the
pressure (PSI) output of the regulator up to the
maximum air pressure rating of this tool�
UCIDFSHe((DS(T>9$9HD(FH[I>R(?>SG(
DSSJ(S>(CUU9BBS>R(?CFJI>90(
Y)(;)'(-]7--<('1-(')):c&((
8/]%8*8(/%+(2+-&&*+-(+/'%;64
If the tool still does not have sufficient force
at maximum pressure and sufficient airflow,
then a larger tool may be required�
11� To prevent accidents, after use, release the Trigger,
detach the air supply and then safely discharge
any residual air pressure in the tool� Clean
external surfaces of the tool with a clean, dry cloth�
Then store the tool indoors out of children’s reach�
 Loading...