Page 12 ?)+('-71;%7/:(K*-&'%);&L(2:-/&-(7/::(#MNNNMN!!MOPQP4 Item 64416
BC?9DR ST9>CDFSH GCFHD9HCHU9B9DIT
I&-+MG/%;'-;/;7-(F;&'+*7'%);&
(T+)7-<*+-&(;)'(&2-7%5%7/::A(-]2:/%;-<(%;('1%&(8/;*/:(8*&'(
.-(2-+5)+8-<();:A(.A(/(K*/:%5%-<('-71;%7%/;4
DS(T>9$9HD(B9>FSIB(FH[I>R(?>SG(CUUFY9HDCJ(ST9>CDFSH0(
D*+;()55('1-(')):L(<-'/71('1-(/%+(&*22:AL(&/5-:A(<%&71/+6-(/;A(+-&%<*/:(/%+(2+-&&*+-(
%;('1-(')):L(/;<(+-:-/&-('1-('1+)'':-(/;<3)+('*+;('1-(&,%'71(')(%'&()55(2)&%'%);(.-5)+-(
2-+5)+8%;6(/;A(%;&2-7'%);L(8/%;'-;/;7-L()+(7:-/;%;6(2+)7-<*+-&4
DS(T>9$9HD(B9>FSIB(FH[I>R(?>SG(DSSJ(?CFJI>90(
Y)(;)'(*&-(</8/6-<(-K*%28-;'4((F5(/.;)+8/:(;)%&-L(^%.+/'%);L(
)+(:-/\%;6(/%+()77*+&L(1/^-('1-(2+).:-8(7)++-7'-<(.-5)+-(5*+'1-+(*&-4
U:-/;%;6L(G/%;'-;/;7-L(/;<(J*.+%7/'%);
H)'-0 These procedures are in addition to the regular checks and maintenance
explained as part of the regular operation of the air-operated tool�
1� X9?S>9(9CUE(IB9L inspect the general
condition of the tool� Check for:
• loose hardware or housing,
• misalignment or binding of moving parts,
• cracked or broken parts, and
• any other condition that may
affect its safe operation�
2� Y/%:A(M(C%+(B*22:A(G/%;'-;/;7-0(
Every day, maintain the air supply according
to the component manufacturers' instructions�
Drain the moisture filter regularly�
Performing routine air supply maintenance
will allow the tool to operate more safely
and will also reduce wear on the tool�
3� V--\:A0 Clean Silencer Filter� Remove Silencer
Cap, remove the Filter, and wash in warm water�
Allow to dry completely prior to replacement�
4� h*/+'-+:A(f-^-+A(i(8);'1&g(j(
D)):(Y%&/&&-8.:AL(U:-/;%;6L(/;<(F;&2-7'%);0(
Have the internal mechanism cleaned, inspected,
and lubricated by a qualified technician�
5� Any dirt or dust inside the motor may result in
slow rotation or complete stoppage� Use an air
filter at the air source to filter out dust and dirt�
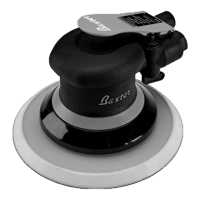
6� Periodically, remove the Backing Pad by sliding
the supplied Wrench between the Backing Pad
and the Shroud� Engage the nut on the shaft
to lock it, and spin the Backing Pad off�
7� Clean out the inner workings of the Sander,
inside the Housing, with a vacuum or a brush�
8� Replace and secure the Backing Pad�

 Loading...