– 11 –
NOTE: Programming is based on Proof cycle completion Time/Day. The program always starts with
Sunday as the rst day for programming. To activate the program, select the arrow button as shown below.
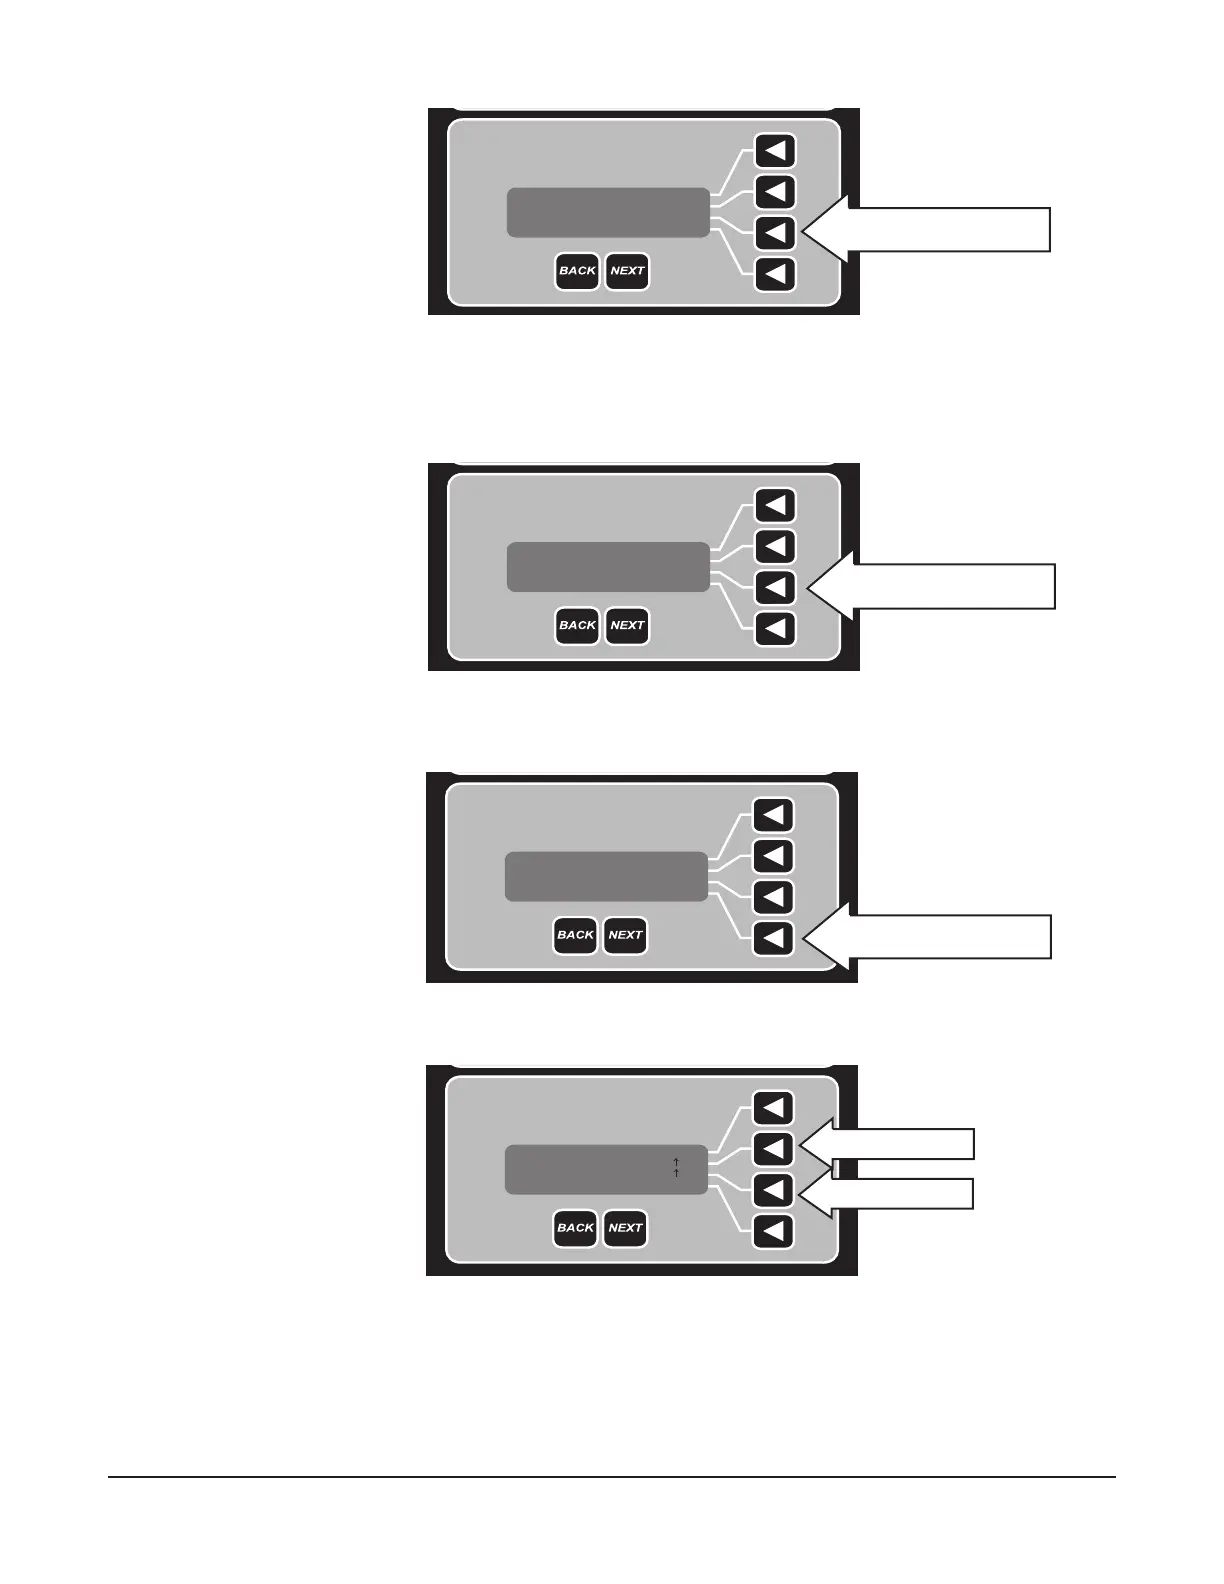
Set CLOCK? >
[NEXT]
Curent Time 8:58 am
If time is correct, then press
NEXT button or arrow button.
If time is not correct, select the
"Set CLOCK?" arrow button to
change time (Fig. 10).
If the program on Sunday is
activated, this screen will display
(Fig. 12).
The next LCD screen displays
time that the program will
be completed for proofing
(Fig. 13).
Press NEXT button or arrow
button.
ACTIVATE Program >
[EXIT] [NEXT]
Sunday Program is
INACTIVE (skipped)
Operator also has the choice to
skip the program on that day by
pressing NEXT button or arrow
button (Fig. 11).
INACTIVATE Program >
[EXIT] [NEXT]
Sunday Program is
ACTIVE (will proof)
Enter the desired time when to
complete Proong by pressing
"Hours" and "Minutes" arrow
buttons. Keep in mind that hour
or minute is changed by one
arrow button. If the desired
hours or minutes is missed, keep
pressing the arrow button until
the desired time is reached.
Press NEXT button or arrow
button.
[EXIT] [NEXT]
Proofing Complete at
7:00 am Hours >
Minutes >
Fig. 10
Fig. 11
Fig. 12
Fig. 13
Press here to edit time.
Press here to activate or
deactivate the program.
Press here to proceed to
next screen.
Change hours.
Change minutes.