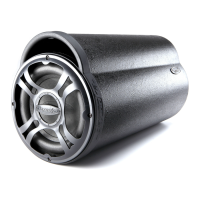
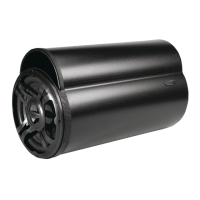
ALL RS Amplified, SM8A-hp, and SM10A-hp: The Auto/off Jumper Clip
must be in the off position (the two right most pins) and the Orange wire will
supply turn on voltage to the Amplified Bazooka.
OPTION THREE:
The Amplified Bazooka subwoofer has a built-in Auto Turn-On Feature. If you
choose to use this feature, the Amplified Bazooka subwoofer will turn on
automatically whenever there is music present at the inputs (high level or low
level input). To use the Auto Turn-On Option with:
ALL EL Amplified, SM8A, and SM10A: Locate the Auto/Off Jumper Loop
located on the wiring harness; SAS ships the Amplified Bazooka subwoofer
with this Jumper in the ON Position. The Quick Disconnect YELLOW On/Off
Jumper Loop must be plugged into the harness.
ALL RS Amplified, SM8A-hp, and SM10A-hp: Locate the Auto/Off Jumper
Clip located on the back of the unit; SAS ships the Amplified Bazooka subwoofer
with this Jumper in the Off Position. The Jumper must be placed in the Auto
Position. The Jumper Clip must be lifted off of the middle and right hand pins
and reinserted across the left hand.
INPUT SIGNAL CONNECTIONS (Does not apply to CS8A5)
High-Level Inputs:
If the source unit has both front and rear speaker outputs, use only one set of
speaker outputs for the high-level input of the Amplified Bazooka. Connect
the GREEN wire from the 14-pin Molex plug of the Amplified Bazooka subwoofer
to the source units left (+) positive speaker output. Connect the GREEN W/BLACK
stripe wire of the plug to the source units left (-) negative speaker output.
Connect the GRAY wire of the plug to the source units right (+) positive speaker
output. Connect the GRAY W/BLACK stripe wire of the plug to the source units
right (-) negative speaker output. When using high-level inputs, take the time
after you make all wiring connections to run through the AM I IN PHASE
procedure at the end of this manual to confirm that your inputs are in correct
electrical phase and the proper bass response is being produced.
Low-Level Inputs:
If your source unit only has low-level RCA phono jack output, use only the low-
level inputs of the Amplified Bazooka. Connect the low-level RCA phono jack
inputs of the Amplified Bazooka subwoofer to the source with a shielded RCA
patch cord. To avoid possible noise problems, be sure to run the patch cord
away from all power wires and factory wire harnesses. When using the low-
level inputs DO NOT make any connections to the Green and Gray high-level
input wires of the Amplified Bazooka subwoofer and make sure these wires
are insulated to avoid the possibility of a short circuit.
17
ADJUSTING THE CROSSOVER (All RS Amplified, SM8A-hp,
and SM10A-hp ONLY)
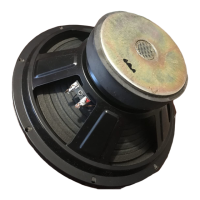
The built-in crossover on the Amplified Bazooka subwoofer is an 18
dB per octave electronic low pass filter, it has a 60 Hz to 250 Hz variable
crossover point. Select the crossover point that you feel best fits your
system design. Set the potentiometer labeled XOVER to the point you
selected, 60 Hz being all the way to the left (counterclockwise) and
250 Hz being all the way to the right (clockwise). When you have set
the crossover, proceed to the next step.
CS8A5 TURN ON & INPUT/OUTPUT CONNECTIONS:
Turn On:
The BLUE with WHITE wire on the CS8A5s 10-pin connector is the
remote turn on wire. You have two options in connecting the remote
turn on wire. Select the option best suited for your application.
Option One:
For the best functionality, the remote turn on wire should be connected
to the source unit's "Accessory", "Auto-Antenna" or "Remote" lead
-- any of which will supply 12 Volts positive when the cars radio is
turned on.
Option Two:
If the source does not have an Auto-Antenna lead (or if the Auto-
Antenna goes down during tape or CD operation), you will need to
connect the remote turn on wire to an accessory or ignition point at
the vehicle fuse block. In this configuration, the CS8A5 will be on
whenever the ignition is on. This method may allow noise or turn-
on-and-off transients to become amplified when the source
unit is not in use.
18
 Loading...