8
USB image retrieval
Warning: Select USB from the Output Sub-Menu on your scanner BEFORE connecting the
USB cable. Once images have been copied, disconnect the USB cable before switching your
scanner off.
Note: The scanner identifies itself as a removable flash drive and will function with Windows,
Apple and Linux computers.
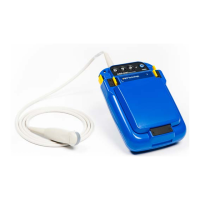
To retrieve stored images from the scanner, select USB from the Output Sub-Menu. Connect the USB
adapter cable (accessory) to the front panel and connect the USB plug to a computer. The scanner
will identify itself as a USB Flash drive with the name Easi-Scan, if necessary, perform any mounting
operations required by your operating system.
Once the drive has mounted, all of the stored images will be visible as bmp (bitmap) images which can
be copied to the computer and opened in most image viewers.
The scanner is read only and images cannot be deleted via the connected computer. To clear the
images stored on the scanner disconnect the USB lead, and Select ‘Delete all’ from the scanner menu,
available when ‘Review’ is selected from the Image Sub-Menu. See Image storage and Review section.
1.3.9 Image ID entry
The Easi-Scan Micro-Convex allows the operator to enter an identification number (ID), which will be
associated with the image once it is stored.
If a ID has been entered, on storing an image the ID will be overlaid across the top left of the image, and
the first five characters of the ID will form the image filename. The ID will only be displayed when the
image is frozen. Selecting ‘ID’ from the Main Menu, brings up the ID Entry Menu. The operator can use
the
Up and Down
buttons to select the digit to be changed, pressing Select highlights the digit
and its value can be changed by using the
Up and Down b
uttons, pressing Select
again returns
to the digit selection mode. To exit this sub-menu, it is necessary to either wait for the menu to blank or
press and hold the Select button
until the scanner beeps twice andthe menuexits.
1.3.10 Output selection
On Easi-Scan Micro-Convex , current BCF Display and accessory products are automatically detected
when connected: all BUGs variants will be detected upon connection, switching the output to Goggles
Mode; connecting the wrist display will cause the Easi-Scan Micro-Convex to switch to Wrist Display
Mode; and connecting the USB cable between the Easi-Scan Curve and a computer will switch the
scanner into USB mode. If using older accessories or cables it may be necessary to manually set the
output.
The operator can select from 3 different uses on the front panel user connector: