Do you have a question about the BE QUIET! Shadow Rock and is the answer not in the manual?
Recommended preparation and list of components needed for installation.
Steps to assemble the cooler mounting frame on the motherboard.
Instructions for attaching the cooler and backplate to the CPU socket.
Guide for mounting the fan onto the cooler and connecting it.
Details on manufacturer guarantee, period, exclusions, and liabilities.
This document provides a comprehensive guide for the installation and maintenance of the be quiet! Shadow Rock LP CPU cooler, designed for both Intel and AMD platforms. It outlines the necessary components, step-by-step assembly instructions, and important safety precautions.
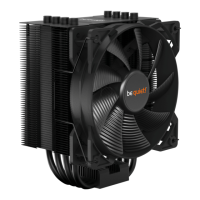
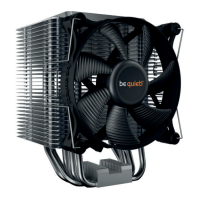
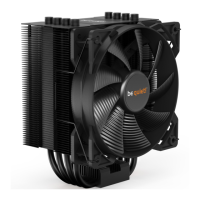
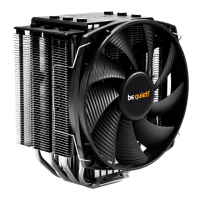
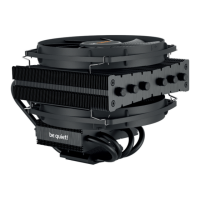
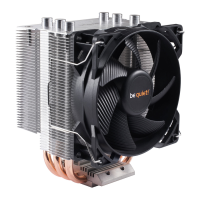
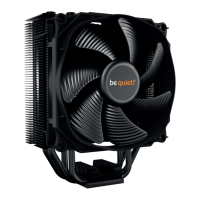
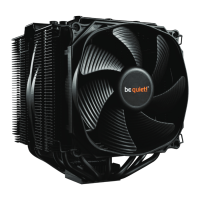
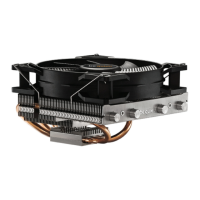
The Shadow Rock LP is a low-profile CPU cooler designed to efficiently dissipate heat from the central processing unit (CPU) of a computer. Its primary function is to maintain optimal CPU temperatures, preventing overheating and ensuring stable system performance. The cooler achieves this through a combination of a heatsink unit and a 120mm fan, which work together to draw heat away from the CPU and expel it from the system. The low-profile design makes it suitable for compact PC builds where space is limited, such as in Home Theater PCs (HTPCs) or small form factor cases. The cooler supports a wide range of Intel and AMD sockets, offering broad compatibility for various system configurations.
The installation process for the Shadow Rock LP CPU cooler is detailed for both Intel LGA 2011 (square ILM) and Intel LGA 775/115X/1366 sockets, as well as AMD AM2(+)/AM3(+)/AM4/FM1/FM2(+) platforms.
The installation begins with the assembly of the cooler mounting frame. This involves screwing four spacer nuts into the threads of the socket frame. Subsequently, two Intel mounting brackets are placed onto these spacer nuts and secured tightly with four mounting bracket fastening screws. Before positioning the cooler, it is crucial to remove the protective covering from the underside of the cooler, which is in direct contact with the CPU. The cooler mounting bridge is then placed centrally on the cooler unit, and two Intel/AMD mounting bridge fastening screws are inserted from above into the bridge. The cooler is then positioned onto the CPU, and the mounting bridge fastening screws are alternately tightened using either the provided open-end wrench or a cross-tip screwdriver until the cooler unit is firmly affixed to the motherboard. Finally, the 120mm fan is mounted onto the cooler unit using two fan clips and connected to the CPU fan connector on the motherboard.
Installation starts with mounting the Intel backplate. Four Intel backplate screws are positioned into the notches on the rear side of the Intel backplate, ensuring alignment with the motherboard holes for the specific socket. Four O-rings are used to secure the backplate screws onto the Intel backplate. Once assembled, the backplate is placed under the motherboard, making sure the backplate screws are precisely located within the motherboard holes. For LGA 775 sockets, an Intel LGA 775 backplate cap must be inserted into the middle of the Intel backplate. Next, the cooler mounting frame is assembled by screwing four Intel 775/115X/1366 nuts onto the previously positioned Intel backplate. Two Intel mounting brackets are then placed onto these nuts and affixed with four mounting bracket fastening screws. Similar to the LGA 2011 installation, the protective covering on the underside of the cooler must be removed. The cooler mounting bridge is placed centrally on the cooler unit, and two Intel/AMD mounting bridge fastening screws are inserted from above. The cooler is then positioned onto the CPU, and the mounting bridge fastening screws are alternately tightened using the open-end wrench or a cross-tip screwdriver. The 120mm fan is then mounted onto the cooler unit using two fan clips and connected to the CPU fan connector on the motherboard.
The installation process for AMD platforms begins with the assembly of the cooler mounting bridge. Two AMD clips are lightly screwed onto the underside of the cooler mounting bridge using two Intel/AMD mounting bridge fastening screws. The cooler mounting bridge is then placed centrally on the cooler unit. The protective covering on the underside of the cooler must be removed before installation. The cooler is then positioned over the CPU, and the cooler mounting bridge is pressed on one side of the retention module until it hooks in. This procedure is repeated for the other side. A cross-tip screwdriver can be used for this step. The Intel/AMD mounting bridge fastening screws are then alternately tightened to ensure the cooler unit is firmly affixed to the motherboard. Finally, the 120mm fan is mounted onto the cooler unit using two fan clips and connected to the CPU fan connector on the motherboard.
For all installations, it is recommended to perform preparatory mounting of the cooler outside the PC case for subsequent installation inside the case. This allows for easier handling and ensures all components are correctly assembled before being placed into the potentially confined space of a PC chassis.
The primary maintenance feature highlighted in the manual is the process of dismantling the 120mm fan. To remove the fan, the notches of the fan clips (12) should be pushed away from the fan. This allows for easy removal of the fan for cleaning or replacement. Regular cleaning of the fan and heatsink is crucial to prevent dust buildup, which can impede airflow and reduce cooling efficiency. While not explicitly detailed, general cooler maintenance would involve periodically checking for dust accumulation on the heatsink fins and fan blades, and cleaning them with compressed air or a soft brush.
The manual emphasizes several important safety precautions:
The product comes with a 3-year manufacturer guarantee for consumers, valid only with the original purchase from authorized be quiet! dealers. Guarantee work requires a copy of the purchase receipt. Any manipulation or structural changes, including damage from external mechanical force, will void the guarantee. The general warranty conditions can be viewed on bequiet.com.
This comprehensive guide ensures users can effectively install, utilize, and maintain their be quiet! Shadow Rock LP CPU cooler for optimal performance and longevity.
| Number of Heat Pipes | 4 |
|---|---|
| Fan Size | 120mm |
| Heatsink Material | Aluminum |
| Type | CPU Cooler |
| Socket Compatibility | Intel LGA 1150/1151/1155/1156/2011/2011-3/2066, AMD AM4/AM3+/FM1/FM2+ |
| TDP Rating | 150 W |