12 13
• Make sure the power switch is o
(light will be o).
• Unwind the power cord completely
and plug into a grounded 120 volt
outlet.
• Turn the safety lock button on the
spray gun to unlocked. While pointing
the spray gun in a safe direction,
squeeze the trigger on the spray gun
until there is a steady stream of water,
letting the water and air out of the
hose.
• Push the power button to turn the unit
on (green power light will turn on).
The unit will turn on for 1 - 2 seconds
and shut o. This is a normal function
of the auto start feature.
ASSEMBLY INSTRUCTIONS
OPERATING INSTRUCTIONS
OPERATING INSTRUCTIONS
• Turn on water supply at the faucet to
completely open.
3
14
1
2
N
F
N
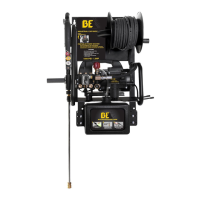
Pull back on collar at the other end of
soft PVC hose (N). Push firmly to con-
nect hose to power washer unit. Twist
collar to secure. Confirm hose is locked
into power washer unit by slightly pull-
ing on hose. The hose is now securely
attached.
Insert extension lance (*I) into nozzle
holder (H), and press spray gun (K)
with extension lance (*I) into spray
gun holster (M).
Attach a garden hose to built in gar-
den hose adapter. The water is now
connected to your power washer.
Note: Flush out garden hose before
connecting to garden hose adapter
You have now completed the as-
sembly and are ready to begin using
your electric power washer. Read and
observe all safety instructions.
K
lock
• Squeeze the spray gun trigger to
begin pressure washing.
• Begin power washing by squeezing
the trigger on the spray gun all the
way into the handle.
• Release the spray gun trigger to
stop the power washer.
• Allow the motor to come to a com-
plete stop before squeezing the trig-
ger again.
• Squeezing rapidly will cause the
auto start feature to miss an on/o
cycle that may prevent it from turn-
ing on while squeezing trigger after
rapid squeezing. Use slow, deliber-
ate trigger pulls to avoid this.