7.3 Vertical Calibration Check:
1. Set the laser up in vertical leveling mode as per procedure 3.2
2. Set up a plumb line in front of a wall approximately 10m from the laser.
3. Physically move the laser to aim the rotating beam at the plumb line.
4. Check if the laser accurately follows the plumb-line. If the beam deviates
from the plumb line do not move the laser and proceed with the
calibration procedure for the vertical axis outlined in 7.4
7.4 Vertical Calibration Adjustment:
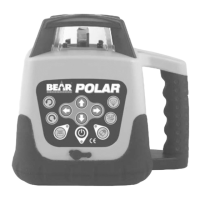
1. Press and hold the
¡
and
¢
buttons on the laser control panel for about
3 seconds. The anti-drift LED will start flashing to indicate that the laser
is in vertical calibration mode.
2. Use the
£
or buttons to adjust the angle of the beam until it no longer
deviates from the plumb line.
3. Press and hold the
¡
and
¢
buttons on the laser control panel for about
3 seconds to save the calibration data and exit vertical calibration mode.
The laser will return to vertical leveling mode and the anti-drift LED will
turn off.
Note: If the laser is turned off without saving the calibration data, the calibration
of the laser will not change and you must begin the entire calibration
procedure again.
— 19 —
 Loading...