16
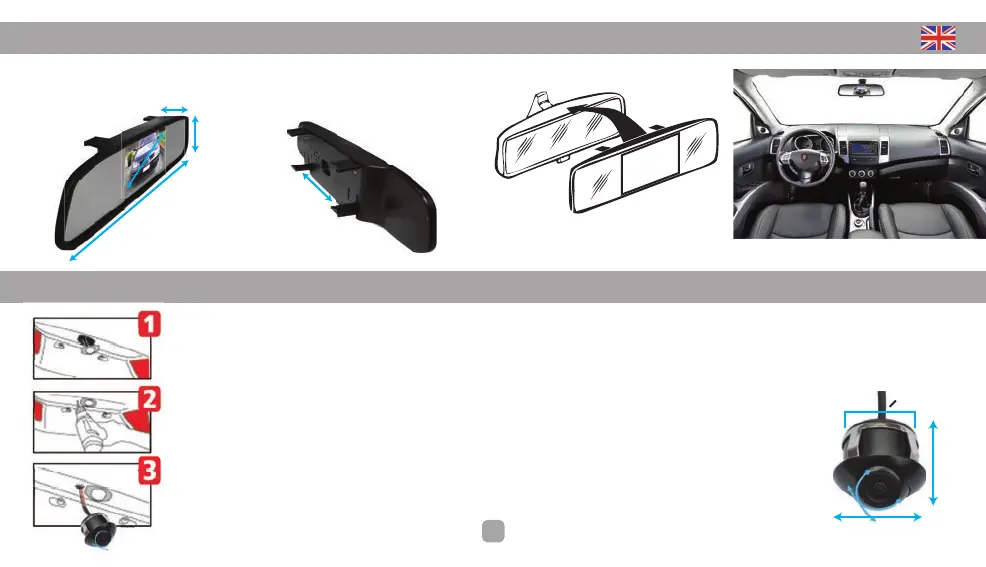
5. MONITOR INSTALLATION
Once the connections are made, you simply clip the mirror to the original one in your vehicle.
6. CAMERA INSTALLATION
The camera is placed at the pilot of rear registration plate . The camera must of course be as centrally as possible in the vehicle.
Remove the pilot Original plate from the slot in order to identify the most suitable location to the right , left or right on the pilot bracket plate . In the trunk , find out how to
wire the camera, allow the setting of the camera and connect it to the son of the original vehicle as shown previous pages.
After choosing the best camera location , drill a hole with a diameter of 18 mm.
We advise you to protect the support of an adhesive ( adhesive type of painter ) to avoid damage during drilling .
A light sanding may be required after drilling the hole for trimming the contour of the hole so as not to damage
the insulation of the cable from the camera.
I If you drill into the sheet metal , it is advisable to put the anti- rust paint on the plate.
9,5 mm
21,5 mm
O 18 mm
285 mm
75 mm
20 mm
100 mm
140 mm
The camera is placed at the pilot of rear registration plate . The camera must of course be as centrally as possible in the vehicle.
Remove the pilot Original plate from the slot in order to identify the most suitable location to the right , left or right on the pilot bracket plate . In the trunk , find out how to
wire the camera, allow the setting of the camera and connect it to the son of the original vehicle as shown previous pages.
After choosing the best camera location , drill a hole with a diameter of 18 mm.
We advise you to protect the support of an adhesive ( adhesive type of painter ) to avoid damage during drilling .
A light sanding may be required after drilling the hole for trimming the contour of the hole so as not to damage
the insulation of the cable from the camera.
I If you drill into the sheet metal , it is advisable to put the anti- rust paint on the plate.
To set the orientation of
your camera, simply
unscrew Part 1, Part 2,
then move the camera
lens to the chosen
direction.
Once the selected
position, screw and
tighten the two parties.