V7.4 Plus OP-L
Part 2: Know Your Roaster
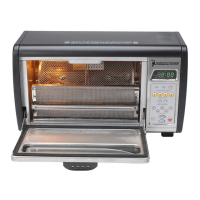
In the box you should receive a roaster, roasting drum, chaff tray, and cleaning brush.
Roasting drum: The roasting drum opens at one end to be filled with green coffee beans. One end has a square peg (red arrow- #1),
which can only fit into the motor drive (inside right-not shown). The other end has a grooved round peg (blue arrow- #2) that fits into
the roasting drum slot (purple arrow- #3).
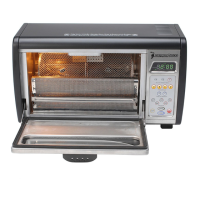
Chaff Tray: The chaff tray collects chaff that falls from the roasting drum or is pushed into the tray by the cooling fan. The tray can
also be used as a “dust pan”. Remove the tray; remove the roasting drum, then using the brush sweep the remaining chaff into a pile.
Place the tray at the lip of the roasting chamber and using the brush, sweep the remaining chaff into the tray. Before inserting the
chaff tray, check that the flap is in a “roast” position. It should be pointed slightly downward so that as the roasting drum rotates, it
will not catch and jam. Next, depress the spring-loaded handle downward (see below). This allows the vanes to drop flat for roasting
drum clearance. Slide the chaff tray under the roasting drum, releasing the handle after the tray is in place.
Proper Chaff Tray Placement: To ensure the chaff tray does not impede the rotation of the roasting drum, proper placement is
critical. Please take a moment to do the following:
1) Open the roaster door. Note the grill that protects the quartz roasting elements extends across the back except for small gaps
(#5 arrows below) on the left and right sides.
2) Slide the chaff tray into place, making sure the front of its sidewalls (#6 arrows below) slide all the way into the gaps (#5
arrows below).
3) Make a mental note of the tray position (both front and back) for future reference.
Cleaning the Chaff Tray: Remove the chaff tray by depressing the handle to flatten the vanes, and slide the tray out of the chamber.
Swing the flap up (shown below in 4b) from its “roast” position (4a) to allow the tray contents to be dumped. Remember to move the
flap back into a downward “roast” position (4a) in preparation for your next roast.