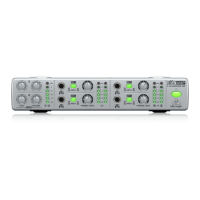
5 REFERENCE AMPLIFIER A500 User Manual
behringer.com
Introduction1.
Balanced inputs and outputs
Your BEHRINGER A500 features electronically servo-balanced inputs
(exception: RCA connectors [6] and [7] are intended only for unbalanced
connections). The automatic servo function recognizes when unbalanced
jacks are connected and internally adjusts the nominal signal level so that no
difference in the signal level between inputs and outputs exists (6 dB correction).
This manual first describes the terminology used, so that you fully ◊
understand the A500 and its functions. Please read the manual
carefully and keep it for future reference.
Before you get started1.1
Shipment1.1.1
Your A500 was carefully packed at the factory, and the packaging was designed
to protect the unit from rough handling. Nevertheless, we recommend that
you carefully examine the packaging and its contents for any signs of physical
damage that may have occurred during transit.
If the unit is damaged, please do NOT return it to BEHRINGER. ◊
Instead, notify your dealer and the shipping company immediately.
Otherwise, claims for damage or replacement may not be honored.
Always use the original packaging to prevent damage during storage ◊
or transport.
Make sure that no children are left unsupervised with the A500 or ◊
its packaging.
Please ensure proper disposal of all packing materials.◊
Initial operation1.1.2
Make sure there is enough space around the unit for cooling. To avoid
overheating, please do not place your amplifier near radiators and other
equipment emitting heat.
Before plugging the unit into a power socket, please make sure you ◊
have selected the correct voltage!
The fuse compartment near the power plug socket contains three triangular
markings. Two of these triangles are opposite one another. The voltage
indicated adjacent to these markings is the voltage to which your unit
has been set up, and can be altered by rotating the fuse compartment by
180°. ATTENTION: This does not apply to export models that were
manufactured only for use with 120 V, for example!
If you alter the unit’s voltage, you must change the fuse accordingly. ◊
The correct value of the fuse needed can be found in the
chapter “SPECIFICATIONS.”
Faulty fuses must be replaced with fuses of appropriate rating ◊
only! The correct value of the fuses needed can be found in the
chapter “SPECIFICATIONS.”
Power is delivered via the cable enclosed with the unit. All required safety
precautions have been adhered to.
Please keep in mind that all your equipment has to be grounded ◊
at all times. For your own protection, never change or disable the
grounding on your equipment or on the cables! The unit should
always be connected to the mains socket outlet with a protective
earthing connection.
Attention! !
High volume levels can damage your hearing and your speakers. ◊
Please turn down both volume controls to the minimum (all the way
to the left) before you power up the amp. Always make sure you use
appropriate volume levels.
Online registration1.1.3
Please register your new BEHRINGER equipment right after your purchase
by visiting http://behringer.com and read the terms and conditions of our
warranty carefully.
Should your BEHRINGER product malfunction, it is our intention to have it
repaired as quickly as possible. To arrange for warranty service, please contact
the BEHRINGER retailer from whom the equipment was purchased. Should your
BEHRINGER dealer not be located in your vicinity, you may directly contact
one of our subsidiaries. Corresponding contact information is included in the
original equipment packaging (Global Contact Information/European Contact
Information). Should your country not be listed, please contact the distributor
nearest you. A list of distributors can be found in the support area of our
website (http://behringer.com).
Registering your purchase and equipment with us helps us process your repair
claims more quickly and efficiently.
Thank you for your cooperation!