ULTRAVOICE VX2000
7
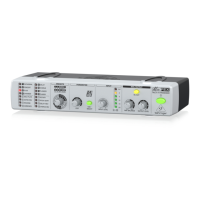
2.4 Voice-optimized EQ
Fig. 2.4: Voice-optimized EQ
The Voice-Optimized EQ is a 3-band equalizer for creative
sound shaping. You can raise or lower the level of specific
frequency ranges to make up for tonal deficiencies of the
input signal.
Use the IN/OUT switch to activate the voice-optimized EQ.
The TUNING control selects a specific frequency range (130
Hz through 720 Hz).
The WARMTH control allows you to raise or lower the level
of the frequency range selected. In level reduction mode
the bandwidth is narrower than in level boost mode, i.e. you
can adapt the filter setting specifically to the application
concerned.
Use the PRESENCE control to give the signal more high
and upper midrange brilliance (around 1700 Hz), so as to
bring vocals more to the front and give them more presence
in the overall sound image.
The BREATH control allows you to raise or lower the treble
range, for example, to boost or cut vocal-specific frequencies
(e.g. breathing noise). The frequency range processed is
around 8 kHz.
The ABSENCE switch lowers those frequencies around 4
kHz that are responsible for a harsh and nasty sound.
2. CONTROL ELEMENTS
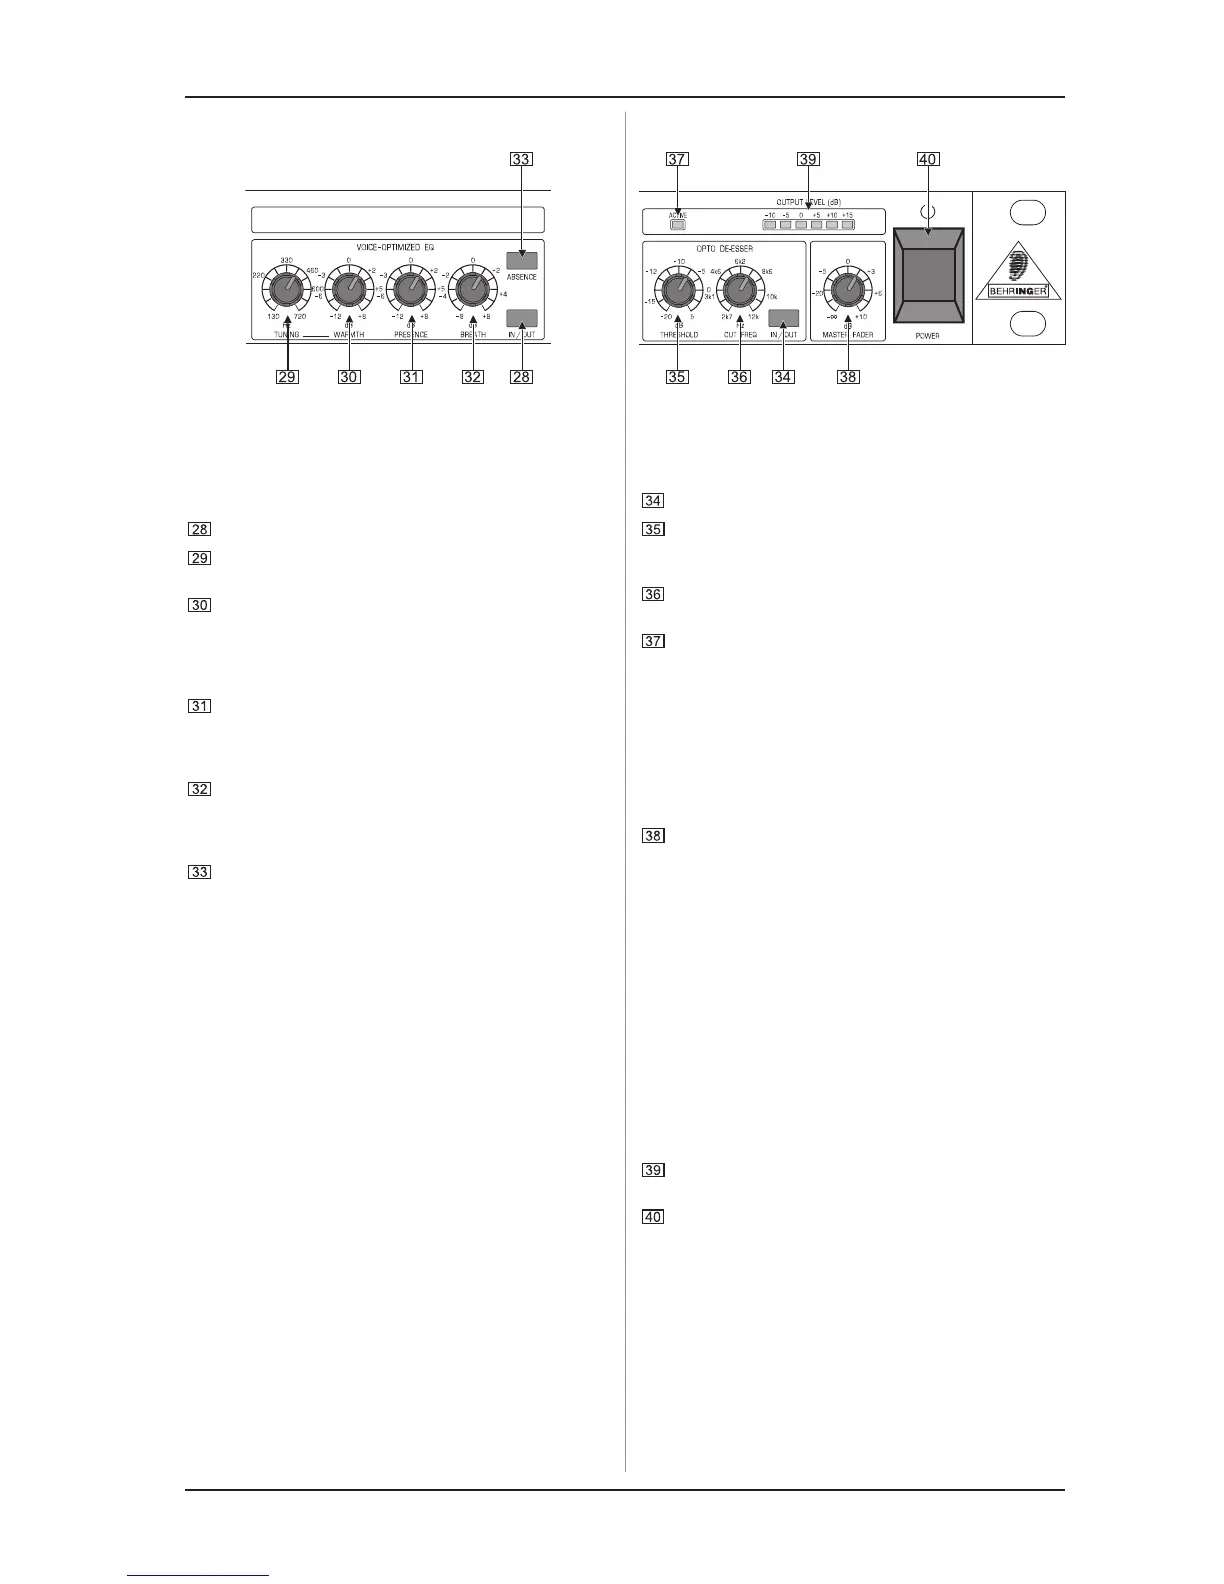
2.5 Opto de-esser and master section
Fig. 2.5: Opto de-esser and master section
Vocal tracks are often affected by unwanted sibilant
sounds. The opto de-esser allows you to easily remove
interference of that kind.
Press the IN/OUT switch to activate the opto de-esser.
The THRESHOLD control determines the amount of
suppression applied to sibilant sounds. The lower this value,
the more sibilance is removed.
Use the CUT FREQ control to select the frequency range
to be removed from the overall sound image.
The ACTIVE LED shows you that the opto de-esser is on.
The more processing is applied to the signal, the brighter
the LED lights up.
+ When using the opto de-esser, dont choose too low a
threshold, so as to avoid affecting the original sound
character of the program material. You have found the
best setting for this parameter, when the difference to
the unprocessed signal can be heard only by way of a
direct A/B comparison with the IN/OUT switch.
The MASTER FADER adapts the output signal to meet the
input sensitivity of downstream devices (e.g. DAT or hard-
disk recorder).
+ When you adjust the signal levels, you should start with
the lowest level possible and raise it slowly until the
levels have been adapted properly. If you start with too
high a level, you risk damaging the input stages of
downstream devices!
ATTENTION!
+ We would like to bring your attention to the fact that
extremely loud sound levels may damage your hearing
as well as your headphones. Please lower all MASTER
knob leftwards before powering up the unit.
The six OUTPUT LEVEL LEDs read the output level from -
10 through +15 dB.
Use the POWER switch to power up your VX2000. The
POWER switch should always be in the Off position when
you are about to connect your unit to the mains.
+ Attention: The POWER switch does not fully disconnect
the unit from the mains. Unplug the power cord
completely when the unit is not used for prolonged
periods of time.