EasyManua.ls Logo

Bell'O AT306 User Manual

Bell'O AT306
12 pages
To Next Page IconTo Next Page
Page #1 background imageLoading...
Page #1 background image
M-1_030512v1T
AT306
AUDIO/VIDEO COMPONENT TOWER
TOUR D’ÉQUIPEMENTS AUDIO/VIDÉO
TORRE DE COMPONENTES DE AUDIO/VIDEO
МНОГОУРОВНЕВЫЙ СТЕНД ДЛЯ АУДИО/ВИДЕО
АППАРАТУРЫ
Patent pending / Brevet en instance / Patent pendiente / Заявлено на патент
Made in China / Fabriqué en Chine / Hecho en China / Сделано в Китае
Italian designed / De design italien / De diseño italiano/ Разработано в Италии
Do not discard these instructions / Ne pas jeter ces instructions
Conserve estas instrucciones / Не выбрасывайте эту инструкцию
ASSEMBLY INSTRUCTIONS
INSTRUCTIONS D’ASSEMBLAGE
INSTRUCCIONES DE ENSAMBLAJE
  
Question and Answer IconNeed help?

Do you have a question about the Bell'O AT306 and is the answer not in the manual?

Bell'O AT306 Specifications

General IconGeneral
BrandBell'O
ModelAT306
CategoryIndoor Furnishing
LanguageEnglish

Summary

Product Information and Model

Model AT306 Overview

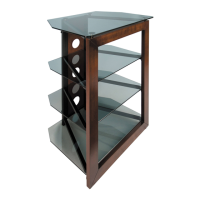
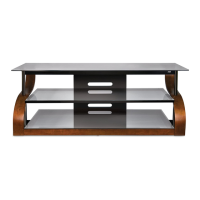
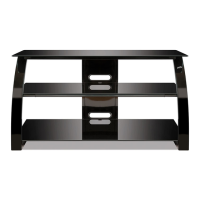
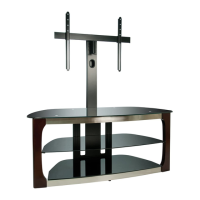
Identifies the product as an Audio/Video Component Tower model AT306.

Brand and Design Origin

Shows the Bell'O brand and indicates Italian design for the product.

Important Safety Precautions

Shelf Weight Limits and Loading

Advises on maximum weight limits for shelves and heaviest component placement.

Safe Usage and Handling

Details precautions for moving, surface requirements, and avoiding leaning or climbing.

Parts Identification and Quantity

Component List

Lists all parts and their quantities required for assembly, labeled M1 through M8.

Assembly Step 1: Frame Setup

Unpack and Unfold Frame

Instructions to remove and unfold the main frame assembly (M1) from the packaging.

Assembly Step 2: Attach CMS Panel

Connect Cable Management Panel

Attaching the Cable Management System panel (M2) to the frame (M1) using turn knobs (M5).

Assembly Step 3: Install Supports

Screw in Shelf Support Posts

Screwing shelf support posts (M7) into the top of the frame assembly (M1).

Press in Suction Cups

Pressing suction cups (M8) into the holes of the shelf support posts (M7).

Assembly Step 4: Prepare for Shelves

Place Glass Pads

Distributing twelve glass pads (M6) along the shelf support bars of the frame assembly (M1).

Position and Level Unit

Moving the stand to its final location and using adjustable feet to ensure it is level.

Assembly Step 5: Install Shelves

Install Top Shelf

Placing the top shelf (M3) onto suction cups (M8) and pressing down to create suction.

Install Lower Shelves

Tilting and placing lower glass shelves (M4) onto glass pads (M6) and ensuring they are level.

Product Warranty Details

Limited One-Year Warranty

Details the one-year limited warranty for furniture and 30-day for glass, excluding certain damages.

Replacement Part Service

Instructions on how to get replacement or missing parts via website or phone.

Related product manuals