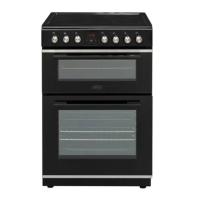
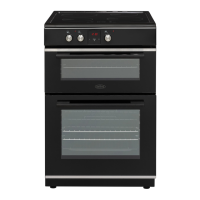
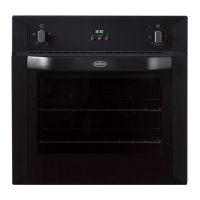
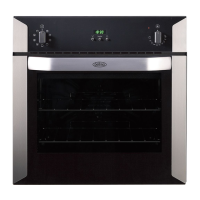
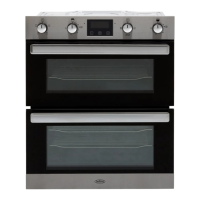
The Belling BFS60DOCER is a freestanding double oven with a ceramic cooktop, designed for indoor domestic household use. It offers a range of cooking functions and features for versatile meal preparation.
Function Description
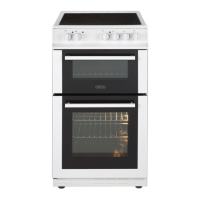
The appliance features a ceramic cooktop with multiple heating zones, controlled by 6-position knobs. Each knob is marked with a symbol indicating the corresponding heater. An on/off light on the control panel illuminates when any ceramic heater is in use. The cooktop includes dual and oval heaters, which have two heating zones. The outer zone can be activated by turning the knob to the designated position, and both outer zones will switch on. To deactivate, the knob is turned to the 'Off' position. A residual heat indicator, if available, will activate for cooking zones above 60°C, indicating stored heat in the vitroceramic glass. If the power supply is disconnected while the indicator is on, it will flash upon reconnection until the residual heat decreases or a cooking zone is activated.
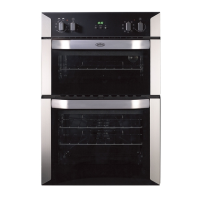
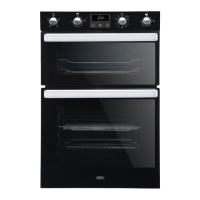
The double oven offers various cooking functions for both the main and top ovens. The main oven includes:
- Defrost Function: This function uses the fan to circulate air, aiding in defrosting frozen food without cooking it. It's recommended to place food on a middle shelf with a tray underneath to catch melting ice.
- Turbo Function: This function utilizes the ring heating element and fan to evenly disperse heat, ensuring uniform cooking across all racks. Preheating for 10 minutes is recommended.
- Static Cooking Function: This function uses the lower and upper heating elements to emit heat for even cooking, ideal for pastries, cakes, baked pasta, lasagne, and pizza. Preheating for 10 minutes is recommended, and it's best to cook on one shelf at a time.
- Fan Function: This function combines the lower and upper heating elements with the fan for air circulation, providing a slightly grilled effect. It's suitable for baking foods like pizza or pastry evenly in a short time, with a recommended 10-minute preheat.
- Grilling Function: This function activates the grill heating element for grilling and toasting. It's used with the upper shelves, and it's advised to lightly brush the wire grid with oil and place a tray beneath to catch drips. Preheating for 10 minutes is recommended, and the oven door must be closed with the temperature set to 190°C.
- Grill and Fan Function: This function combines the grill heating element with the fan, making it ideal for thicker foods. Similar to the grilling function, use the upper shelves, lightly oil the wire grid, and the oven door must be closed with the temperature set to 190°C.
The top oven offers:
- Static Cooking Function: Similar to the main oven's static function, it uses upper and lower heating elements for even cooking, suitable for cakes, baked pasta, lasagne, and pizza. Preheating for 10 minutes and cooking on one rack at a time are recommended.
- Upper Heating Function: This function uses the upper heating element at its highest level, ideal for heating food or frying the top of already cooked food.
- Grilling Function: This function activates the grill heating element at its highest level for grilling. The top oven door must be kept open during use of this function.
- Faster Grilling Function: This function uses the grill and upper heating elements at their highest level for wide-area grilling. The top oven door must be kept open during use of this function.
The appliance also features a digital touch timer with various settings:
- Time Adjustment: Allows setting the current time, which must be done before using the oven.
- Key Lock: Automatically activates after 5 seconds of inactivity, locking the timer buttons. It can be unlocked by pressing and holding the "MODE" button for 2 seconds.
- Audible Warning Time Adjustment: Sets an audible warning for a specified duration (0:00 to 23:59 hours) without activating the oven.
- Semi-automatic Time Adjustment (Cooking Period): Sets a fixed cooking period (0 to 10 hours) after which the oven will switch off and an audible warning will sound.
- Semi-automatic Time Adjustment (Finishing Time): Automatically starts the oven to finish cooking at a set time (up to 10 hours after the current time).
- Full-automatic Programming: Allows setting a start time and duration for cooking, with a maximum end time of 10 hours after the current time. The oven calculates the operating time and starts automatically to finish cooking at the set time.
- Sound Adjustment: Adjusts the volume of the audible warning sound, offering three different signal types.
Usage Features
- Pan Placement: Always position pans over the center of the cooking zone with handles turned to a safe position to prevent knocking.
- Saucepan Selection: Use only flat saucepans with a sufficiently thick base, ensuring the bottom is dry before placing on the hob. For energy conservation, match the pan diameter to the hotplate being used.
- Lids: If possible, always place lids on pans to retain heat and moisture.
- Oven Gloves: Always use oven gloves when removing or replacing food in the oven to prevent burns.
- Oven Door: Take care when opening the oven door during or after cooking due to hot steam. Do not place anything on the oven door when it is open, as this could unbalance the oven or damage the door.
- Storage Compartment: Avoid placing heavy or flammable items (e.g., nylon, plastic bags, paper, cloth) or cookware with plastic accessories into the drawer, as the inside surface can get hot.
- Safety Chain: The appliance is equipped with a safety chain to prevent tipping. It should be secured to the kitchen wall using a wall plug and hook.
- Adjustable Feet: The appliance has four adjustable feet, allowing for leveling and height adjustment up to 30 mm to ensure stability.
- Accessories: The wire grid for deep trays is recommended for grilling steaks, meatballs, and similar foods. The deep tray itself is best for cooking stews. Both should be placed correctly into the oven racks.
Maintenance Features
- General Cleaning: Ensure the appliance is turned off at the mains and cooled before cleaning. Do not use harsh abrasive cleaners, scourers, caustic creams, abrasive powders, rough wire wool, or hard tools, as they can scratch surfaces. Avoid steam cleaners.
- Oven Interior: Enamelled ovens are best cleaned when warm. Wipe with a soft cloth soaked in soapy water after each use, then rinse with a wet cloth and dry. Liquid cleaning materials may be needed occasionally for thorough cleaning.
- Catalytic Liners: These matte-finished panels absorb grease and oil residue, burning them to ash during cooking. To maintain efficiency, if a large amount of fat is spilled, set the oven to maximum temperature for 20-30 minutes, then wipe the floor after cooling. Manual cleaning with soap-impregnated steel wool or aerosol cleaners is not recommended, as it can damage the porous surface. Catalytic liners can be removed by unscrewing them from the oven cavity.
- Ceramic Glass: Clean with a cream or liquid cleaner, then rinse and dry thoroughly. Do not use cleaning materials meant for steel. Spilt sugary or sweet foods must be cleaned immediately after the glass has cooled. Dust should be cleaned with a wet cloth.
- Glass Parts: Clean regularly with a glass cleaner, then rinse and dry thoroughly.
- Enamelled Parts: Wipe with a soft cloth soaked in soapy water, then rinse with a wet cloth and dry. Do not clean while hot. Avoid leaving vinegar, coffee, milk, salt, water, lemon, or tomato juice on the enamel for extended periods.
- Stainless Steel Parts (if available): Clean regularly with a soft cloth soaked in water, then dry thoroughly. Do not clean while hot or leave acidic substances on the surface for long periods.
- Inner Glass Removal: The oven door glass can be removed for cleaning by pushing it in one direction and then pulling it out. To replace, push the glass towards and under the location bracket.
- Oven Door Removal: The entire oven door can be removed for cleaning by opening the locking catches and pulling the door towards you when it is almost closed.
- Oven Lamp Replacement: Switch off the appliance and allow it to cool. Remove the glass lens, then replace the bulb with a new one (230 V, 15-25 Watt, Type E14, resistant to 300°C). The lamp is specifically designed for cooking appliances and not for room illumination.