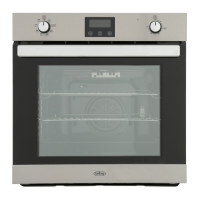
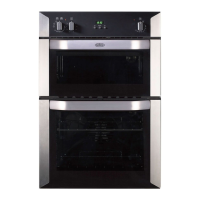
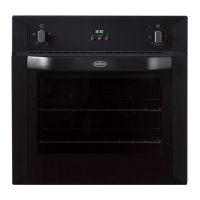
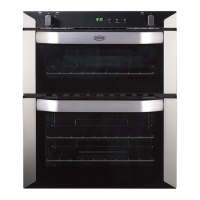
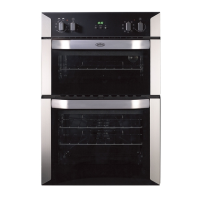
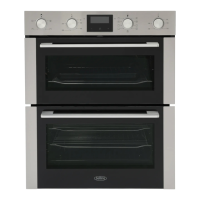
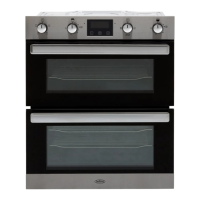
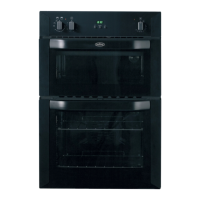
This document is a user manual for a Belling Built-In Fanned 60cm oven, providing instructions for its operation, maintenance, and safety.
Function Description
The oven features an "Oven Function Selector Control (K1)" and an "Oven Temperature Control (K2)" to manage various cooking functions and temperatures. The available functions include:
- Oven Lamp: Can be operated independently for cleaning or maintenance, without activating heating elements. It also illuminates when any oven function is selected, except for the ECO function.
- Defrost and Dough Proving: This setting provides a gentle heat, suitable for defrosting frozen foods or assisting dough to rise faster than at room temperature.
- Fanned Oven: This function ensures an even temperature throughout the oven, making it ideal for batch baking or cooking multiple dishes simultaneously.
- Fanned Grill: The fan circulates air around the food, which is perfect for grilling thinner items like bacon, fish, and gammon steaks. This function reduces the need for frequent turning, and the oven door should remain closed during use.
- Fanned Dual Grill: Similar to the Fanned Grill, this function also uses the fan to circulate air for grilling thinner foods such as bacon, fish, and gammon steaks, requiring less turning. The oven door should be closed.
- Single Grill: This function heats the central area under the grill, making it suitable for toasting and grilling meats like sausages, chops, and steaks. It should be used with the oven door closed, placing food in the middle of the grill pan.
- Dual Grill: Activates both the inner and outer grill elements, useful for toasting and grilling thinner meats like bacon. The oven door should be closed, and food placed in the middle part of the grill pan.
- Slow Cook: Provides a gentle heat for slow cooking or keeping food warm. To use this, select the conventional cooking function and set the temperature to 100°C.
- ECO: This function maintains an even temperature, suitable for batch baking or cooking foods with energy efficiency in mind.
Usage Features
To use the appliance, first turn the "Oven Function Selector Control (K1)" to the desired cooking function, then rotate the "Oven Temperature Control (K2)" to set the required temperature. The temperature can be adjusted during use.
The oven is equipped with a Cooling Fan that operates when cooking is finished, paused, or if the central oven temperature exceeds 75°C. It continues to run for approximately 15 minutes until the temperature drops below 75°C.
The appliance includes a Clock/Programmer with several features:
- Setting the Time of Day: When first connected or in standby, the clock displays "hh:mm" (24-hour format). To set, press the function key until the clock symbol flashes, then use the plus/minus keys. The time is accepted after about 7 seconds of inactivity.
- Minute Minder: This feature allows setting a duration between 1 and 99 minutes. It does not automatically switch off the oven. To set, press the function key until the minute minder symbol flashes, then use plus/minus keys. The countdown begins after 7 seconds. The minute minder can be checked, modified, or cancelled. An alarm sounds when the time elapses, which can be silenced by pressing the function key.
- Manual Operation: If the programmer is not in semi-automatic or fully-automatic mode, oven functions can be used manually, indicated by the "Man" icon.
- Semi-automatic Cooking: This allows the main oven to switch off automatically after a specified time (1 minute to 23 hours 59 minutes). Set the cooking function and temperature, then press the function key until the 'cooking duration' symbol flashes to set the duration. The 'Auto' and 'Cookpot' symbols will light up.
- Fully Automatic Cooking: This feature allows the oven to switch on and off automatically. Users can set the 'cooking duration time' and the desired 'cooking end time', and the timer will calculate the start time. The 'Auto' symbol remains lit, but the 'Cookpot' symbol goes out until the calculated start time.
- Buzzer Volume: The buzzer volume can be adjusted (L1, L2, L3) by pressing the function key until the volume level appears, then using the plus/minus keys.
- Child Lock: To activate, press and hold the plus key for about 5 seconds until the padlock symbol appears. This prevents accidental changes. To deactivate, press and hold the plus key again for 5 seconds until the symbol disappears. The child lock cannot be modified or cancelled if a cooking program is in progress.
Bluetooth Connectivity (If fitted)
The appliance may feature Bluetooth connectivity, indicated by a symbol:
- No symbol: Appliance cannot connect.
- Blinking symbol: Ready to pair with a smart device using the Zeus App.
- Solid symbol: Connected to a smart device, and the timer can be set via the Zeus App.
To activate/deactivate, press and hold the function key for 5 seconds.
- Clear Memory: If connection issues arise, the Bluetooth pairing can be cleared by pressing the function and plus keys simultaneously until a beep is heard. Paired data is cleared, and pairing information should also be deleted from the smart device's Bluetooth settings.
- 6-digit Pairing Code: When connecting via the Zeus App, a unique 6-digit pairing code will be displayed on the timer, scrolling from right to left (showing four digits at a time).
Soft Closing Door (If fitted)
The oven door can be paused at any angle greater than 30°. If the door is at or below a 30° angle, it will close slowly due to the damper. Users are advised not to close the door vigorously.
Maintenance Features
Catalytic Oven Liners (If fitted)
Some ovens have light grey, soft-touch enamel catalytic liners on the sides, which are partly self-cleaning. These liners work best when the oven is heated above 200°C. For cooking below this temperature, occasional wiping with a lint-free cloth and hot soapy water, followed by heating the oven to 200°C for about an hour, will help maintain their effectiveness. Harsh abrasives or chemicals should not be used on this enamel.
Removing the Door (Optional)
The oven door can be removed for cleaning or maintenance.
- Open the door to its maximum angle and pull the catches on each hinge forward.
- Close the door to approximately 30°, hold it on both sides, and slowly pull it out from the oven. Do not lift by the handle.
- With the door fully open or removed, push the black latches near the hinges outward.
- Lift and remove the inner glass, then the middle glass. Exercise caution as the door may spring back once the weight of the glass is removed.
To reassemble, reverse the steps, ensuring the glass is correctly oriented, hinges are aligned, and locating cables are fully in place.
Warnings: Do not forcibly pull the oven door to prevent glass shattering. Hinge springs can cause injury; do not touch them. Do not lift or carry the oven door by the handle.
Accessories
- Wire Shelf: Used for dishes, cake pans, and items for roasting and baking.
- Shelf Support Rails: These removable rails on the right and left sides support the wire shelf and grill pan.
- Grill Pan: Suitable for cooking large quantities of food, such as moist cakes, pastries, frozen food, or for collecting fat/spillage and meat juices. It can also serve as a roasting tin or baking sheet.
- Telescopic Runner (If fitted): Some models include telescopic runners for easier oven use. These can be disassembled by unscrewing the fixing screws.
Shelf Placement Warning
To ensure safe operation, shelves must be correctly placed between the side rails. Shelves and the grill pan can only be used between the first and fifth layers. Shelves should be inserted with the upstand at the back and pointing upwards to prevent tipping. When inserting standard shelves, slightly raise them and push them towards the back of the oven until the shelf stopper is reached.
Bulb Replacement
To replace the oven lamp:
- Disconnect power from the mains outlet or switch off the circuit breaker.
- Unscrew the glass lamp cover counter-clockwise (it may be stiff) and replace the bulb with a new 25-40W/220V-240V, T300°C halogen lamp.
- Screw the glass lamp cover back in place.
Cleaning Your Appliance
- Do's: Always switch off the appliance and allow it to cool before cleaning. Use warm, soapy water and a wrung-out cloth. Wipe with a damp cloth and dry with a soft cloth. Be careful when cleaning over control panel symbols to prevent fading. Clean food spillages as soon as possible, as some foods (e.g., vinegar, fruit juices, salt) can mark or damage metal or paintwork.
- Don'ts: Do not use undiluted bleaches, chloride products, wire wool, abrasive cleaners, nylon pads, or steam cleaners. Do not place cast iron griddles or pan supports in the dishwasher.
Regular cleaning is crucial to prevent fat buildup, which can affect performance, cause damage, and invalidate the guarantee. Do not use metal scrapers to clean the oven door glass.