This document provides installation and operation instructions for the Bellini 60cm Electric Oven, models BOM609CX and BOM609CX-F. It covers safety guidelines, product features, installation procedures, usage instructions, troubleshooting, maintenance, and warranty information.
General Overview
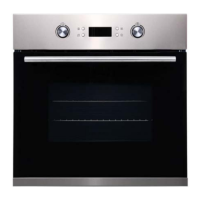
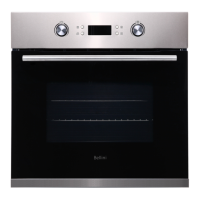
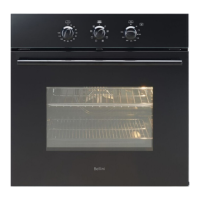
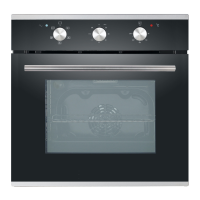
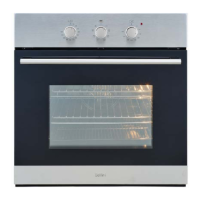
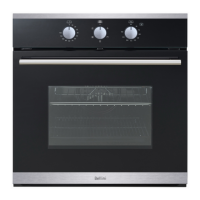
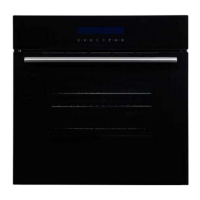
The Bellini 60cm Electric Oven is designed for domestic use, offering various cooking functions to meet diverse culinary needs. It features a user-friendly interface with knobs and buttons for function selection, temperature adjustment, and timer settings. The oven is equipped with a 3-layer glass door for improved insulation and safety.
Safety Instructions
Before using the oven, it is crucial to read and understand all safety instructions to prevent harm to persons, animals, or property.
- Installation: The appliance must be installed by an authorized person in compliance with local building codes and wiring rules (AS/NZS 3000). Ensure the supply cord is not damaged and a functional switch is provided in an accessible position. The appliance must be properly earthed.
- Child Safety: This appliance is not intended for use by persons with reduced physical, sensory, or mental capabilities, or lack of experience and knowledge, unless supervised. Children should be supervised to ensure they do not play with the appliance. Accessible parts become hot during use, so children should be kept away to avoid burns and scalds.
- General Use: Do not use the oven as a space heater. Keep the appliance clean and vents unobstructed to avoid fire. Do not spray aerosols near the appliance during operation or store flammable materials in or under it. Always use gloves when handling hot items. Turn off the grill immediately after use to prevent fat fires. Do not leave the appliance unattended while cooking, especially with oils and fats. Avoid placing pans weighing over 15kg on the opened oven door.
- Technical Faults: Do not use the appliance if there is a technical fault. Any faults must be fixed by an appropriately qualified and authorized person. Disconnect power and report faults to the service center.
- Environmental Hints: Use the oven efficiently by cooking multiple trays of food simultaneously. Select the correct shelf location and avoid opening the oven door more than necessary, as the oven retains heat after being turned off. Dispose of the product at an authorized recycling facility for electrical and electronic appliances.
Product Description
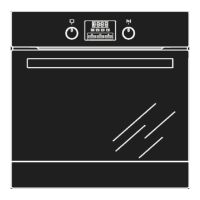
The oven features a control panel with several key components:
- Function Selection Knob (K1): Used to select the desired cooking function.
- Plus/Minus Knob (K2): Used to increase/decrease temperature or time digits.
- Minute Minder Button (A): Used to enter the minute minder program before cooking starts.
- LED Display (B): Shows selected function, current time, minute minder indication, temperature setting, child lock symbol, timer indication, and lamp indication.
- Start Button (C): Initiates or resumes cooking.
- Timer Button (D): Enters timer setting mode.
- Stop/Pause Button (E): Pauses the cooking program with one press, or cancels it with two presses.
- Door Handle (F): For opening and closing the oven door.
- 3 Layers Glass Door (G): Provides insulation and safety.
Usage Features
The Bellini oven offers a range of cooking functions, each designed for specific culinary tasks:
- Switch off function (0): Turns off the oven.
- Oven Light: Allows observation of cooking progress without opening the door.
- Defrost: Circulates air at room temperature to thaw frozen food quickly without heat. Ideal for ready-made dishes and cream-filled produce.
- Bottom Element: A concealed element at the bottom provides concentrated heat to the base of food, perfect for slow cooking casseroles, stews, pastries, and pizzas requiring a crispy base. Temperature range: 60-120°C (default 60°C).
- Conventional cooking: Top and bottom elements work together for traditional cooking. Requires pre-heating. Ideal for single items like large cakes. Food should be placed in the center of the oven. Temperature range: 50-250°C (default 220°C).
- Convention with fan: Combines fan and heating elements for even heat penetration, saving energy. Dishes are lightly browned outside and moist inside. Suitable for grilling or roasting large pieces of meat at higher temperatures. Temperature range: 50-250°C (default 220°C).
- Radiant grill: The inner grill element switches on and off to maintain temperature. Best for small items on the top shelf and larger items on lower shelves. Temperature range: 180-240°C (default 210°C).
- Combined Grill (Grill & Top element): Both the inside radiant element and top element are active. Temperature range: 180-240°C (default 210°C).
- Combined grill with fan: The inside radiant element and top element work with the fan. Temperature range: 180-240°C (default 210°C).
- Rear heater with fan: An element around the convection fan provides additional heat for convection cooking, improving air circulation and creating even heat. Temperature range: 50-240°C (default 180°C).
Starting Cooking
- In standby mode, pop up K1 and rotate to select the desired function. The corresponding icon and default temperature will appear on the LED display.
- To change the default temperature, pop up K2 and rotate to select a new temperature.
- Press the Start button to begin cooking. The default cooking duration is 9 hours.
- To adjust the cooking duration, pop up K1 and rotate, then press the Start button to confirm.
- Cooking temperature or duration can be adjusted even after cooking has started by rotating K1 (duration) or K2 (temperature) and pressing Start to confirm.
Work With Timer
The timer function allows setting the oven to start cooking at a desired time and for a specific duration.
- O'clock Setting: When the oven is first connected to power, the LED display shows "0:00". Press the Timer button to enter O'clock setting. Rotate K2 to adjust the hour (0-23), press Timer to confirm, then rotate K2 to adjust the minute (0-59), and press Timer to finalize.
- Timer Setting: Press the Timer button to enter cooking start time setting. Adjust hour and minute using K2 and Timer button as above. Rotate K1 to choose the desired function. Press Start to confirm. Rotate K1 to select cooking duration and K2 to adjust cooking temperature. Press Start to finish. The oven will start cooking when the defined start time is reached and stop when the duration ends.
- If step 7 (selecting duration and temperature) is skipped, the oven will use default settings (9 hours duration, default temperature for the function).
- Check or Cancel Settings: During a program, press Stop/Pause once to check settings. Pressing it twice will cancel the timer setting. Pressing the Timer button will show the cooking start time, then revert to O'clock display after 3 seconds.
Work With Minute Minder
The minute minder provides a sound alert when time is up, but the oven continues heating. This feature reminds you to turn over food or add condiments.
- In standby or O'clock mode, press the Minute Minder button to enter minute minder setting.
- Rotate K2 to adjust the hour (0-9), press Minute Minder to confirm, then rotate K2 to adjust the minute (0-59).
- Press Minute Minder to finalize. The system counts down, and 10 beeps sound when time is up.
- Minute minder and timer cannot be set together.
- Minute minder can be set independently without cooking. If cooking has already started, this function cannot be programmed.
Child Lock
To activate/deactivate child lock, press the Start and Stop/Pause buttons together and hold for 3 seconds. When locked, a locker icon appears on the LED display, and all buttons/knobs are disabled.
Energy Saving Mode
To save energy, the LED display can be turned off in standby or minute minder program by pressing and holding the Start and Stop/Pause buttons for 3 seconds. Any key or knob operation will turn the display back on.
Inquiry
During cooking, press the Start and Stop/Pause buttons together to check the oven cavity temperature. During minute minder progress, press the Minute Minder button to check the O'clock time.
Maintenance and Cleaning
Regular maintenance and cleaning are essential for the oven's performance and longevity.
- Safety First: Always disconnect the oven from the power supply before cleaning or performing maintenance. Do not use steam cleaners.
- General Cleaning: Do not line the oven bottom with aluminum foil. Do not immerse the unit, cord, or plug in water. Do not clean the appliance when it is hot. Clean the inside and external surfaces with a damp cloth after it has cooled down. Wash all accessories in hot soapy water or a dishwasher and wipe dry. If condensation forms during extended use, dry it with a soft cloth.
- Stainless Steel: Clean stainless steel surfaces regularly with warm water and a mild detergent, following the polish or brushing lines. Avoid abrasive cleaners or harsh solvents. Be careful of sharp edges.
- Glass: Clean glass surfaces on doors and control panels immediately after soiling with a damp cloth. Oven cleaners can be used for stubborn marks. The glass door is durable but can break if scratched by harsh abrasive cleaners or sharp metal scrapers.
- Oven Interior: Keep the appliance clean to prevent fat and oil accumulation around elements, burners, or fans. Clean the oven dish, baking trays, and grill dish inserts regularly. Wrap meats in foil or use roasting bags to minimize cleaning.
- Grill: Keep the grill dish and grill insert clean to prevent fat fires.
Replacement of the Oven Light Bulb
- Set all control knobs to "OFF" and disconnect the mains plug.
- Unscrew and wash the lamp cover, then wipe it dry.
- Unplug the old bulb and replace it with a new high-temperature bulb (300°C) with the following parameters: voltage 230V, power 25W, G9.
- Insert the new bulb correctly into the ceramic socket.
- Screw the lamp cover back on.
Door Removal
To clean the oven chamber more easily, the door can be removed:
- Tilt the safety catch part of the hinge upwards.
- Close the door lightly, then lift and pull it out towards you.
- To refit, reverse the process, ensuring the hinge notch is correctly placed on the hinge holder protrusion.
- Lower the safety catch back down. Failure to do so may damage the hinge.
Removal of the Internal Glass Panel
- Slide the glass panel towards direction 1.
- Lift the glass as indicated by direction 2.
- Carefully slide the glass out.