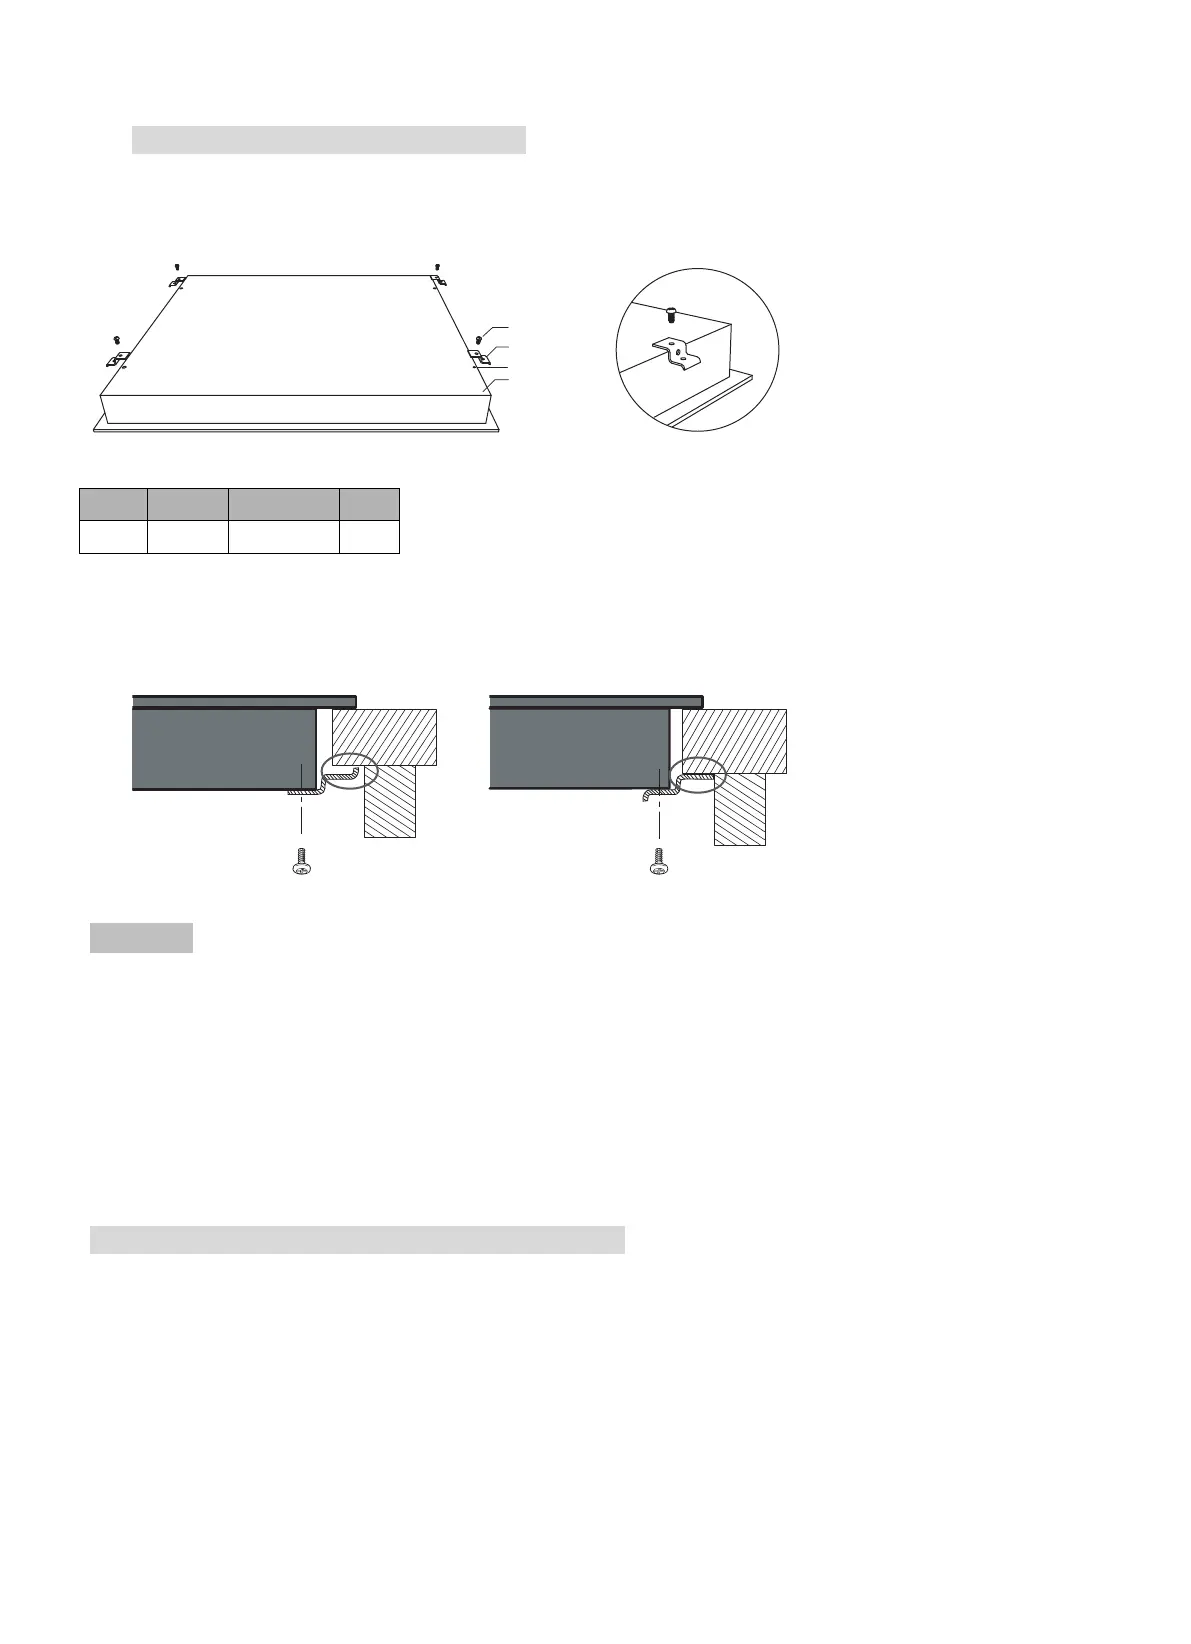
Before locating the fixing brackets
The unit should be placed on a stable, smooth surface (use the packaging). Do not apply force onto the
controls protruding from the hob.
Fix the hob on the work surface by screw four brackets on the bottom of hob (see picture) after installation.
Adjust the bracket position to suit for different work surface’s thickness.
Cautions
1.The ceramic cooker hob must be installed by qualified personnel or technicians. We have professionals at your
service. Please never conduct the operation by yourself.
2. The ceramic cooker hob shall not be mounted to cooling equipment, dishwashers and rotary dryers.
3. The ceramic cooker hob shall be installed such that better heat radiation can be ensured to enhance its
reliability.
4. The wall and induced heating zone above the work surface shall withstand heat.
5. To avoid any damage, the sandwich layer and adhesive must be resistant to heat.
6. A steam cleaner is not to be used.
Connecting the hob to the mains power supply
The power supply should be connected in compliance with the relevant standard, or a single-pole circuit breaker.
the method of connection is shown below.
A
B
C
D
HOB
TABLE
A
HOB
TABLE
B
BRACKET
BRACKET