7
Time+
This buttons allow you to select a delay time
period if you don’t want your bread maker to
start cooking immediately. You must decide
how long it will be before your bread is ready
by pressing the”Time+”.please note the
delay time should include the baking time of
program. that is,at the completion of delay
time hot bread is available. At rst the program
and degree of colour must be selected,then
press “Time+” to increase the delay time in
increments of 10 minutes. the maximum delay
is 13 hours.
Note:1.This button is not applicable for
the programs Dessert and Bake.
2.For time delay baking,do not use any
easily perishable ingredients such as
eggs,fresh milk,fruits,onions,etc.
Keep warm
Bread can be automatically kept warm for 60
Minutes after baking,if you would like to take
the bread out,switch the program off with the
Start/Stop button.
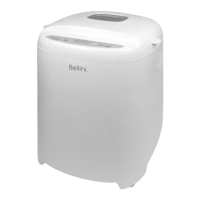
Using Your Bread Maker
Getting to know Your Bread Maker
Congratulations on the purchase of your new
Bread Maker. Before rst using your Bread
Maker, it is important that you read and follow
the instructions. in this use and care booklet,
even if you feel your are quite familiar with this
type of appliance.
Your attention is drawn particularly to the
section dealing with IMPORTANT SAFEGUARDS.
Find a place and keep this booklet handy for
future reference.
This appliance has been designed to operate
from a standard domestic power outlet. It is
not intended for industrial or commercial use.
Before rst use
Note: Do not immerse the bread maker
or power cord and plug in water or any
other liquid.
Before using your bread maker for the rst
time, check if all parts and accessories are
complete and free of damage. wash the
inside of the bread pan and the kneading
paddle with hot soapy water. Rinse and dry
thoroughly.
Using a damp cloth or sponge, wipe the
interior of the bread maker, the inside of the lid
and the exterior of the bread maker.
Use only a mild detergent solution.
Wash the measuring spoon and measuring
cup with hot soapy water, then rinse and dry
them thoroughly.
Using
Note: Never exceed the maximum
capacity of your bread maker (900g).
Place your bread maker away from direct
sunlight, draughts, or heating appliances
and radiators. These can adversely affect
the operation of your bread maker and
spoil the results.
1. Hold the bread pan and turn it anti-
clockwise direction as “unlock” mark
indicated on bread maker oven
chamber,then lift the bread pan out of the
bread maker using its handle.
2. Fit the kneading/mixing paddle onto the
shaft in the bottom of the bread pan.
The shaft has a attened side to grip the
paddle when it is rotating. Align the paddle
with the at on the shaft and press it down.
2
1
 Loading...