1150-003
INVERTER MULTI-PROCESS WELDER KIT
20
IMPORTANT
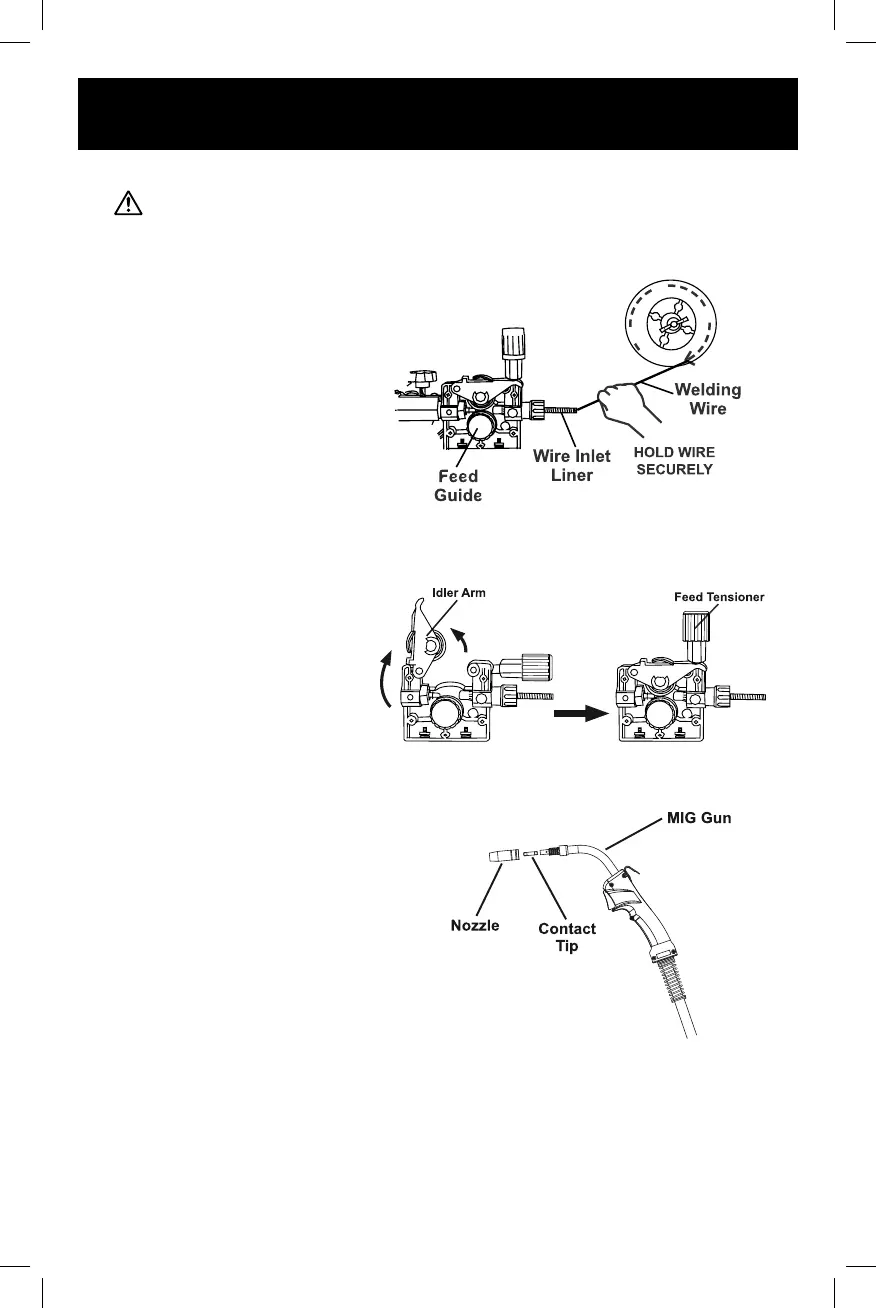
Securely hold onto the end of the welding wire and keep tension on it during
the following steps. If this is not done, the welding wire will unravel and
unspool which can cause tangling and feeding problems.
18. Cut o all bent and crimped
wire. The cut end must have
no burrs or sharp edges; cut
again if needed.
19. Keep tension on the wire and
guide at least 12 inches of
wire into the Wire Inlet Liner
and Feed Guide.
20. Make sure the welding wire
is resting in the groove of the
Feed Roller, then push the
wire Idler Arm down, and
swing the Feed Tensioner up
to latch it across the tip of
the arm. After the wire is held
by the Tensioner, you may
release it.
NOTE: The tension should be
3– 5 for solid wire and 2 – 3 for
flux-cored wire. Too much force
on flux-cored wire will crush it
and may cause feeding issues.
21. Pull the Nozzle to remove it.
22. Unscrew the Contact Tip
counterclockwise and remove.
23. Lay the MIG Gun Cable out in a straight
line so that the welding wire moves
through it easily. Leave the cover open,
so that the feed mechanism can be
observed.
IMPORTANT Stainless steel wire is less flexible than other
welding wire. therefore, it is more dicult to feed through the
liner and gun. it is especially important to keep the gun cable
straight while feeding stainless steel wire.