25
SETTING UP THE WELD
1. Make practice welds on pieces of scrap the same thickness as your intended
workpiece to practice technique before welding anything of value. Clean the
weld surfaces thoroughly with a wire brush or angle grinder; there must be no
rust, paint, oil, or other materials on the weld surfaces, only bare metal.
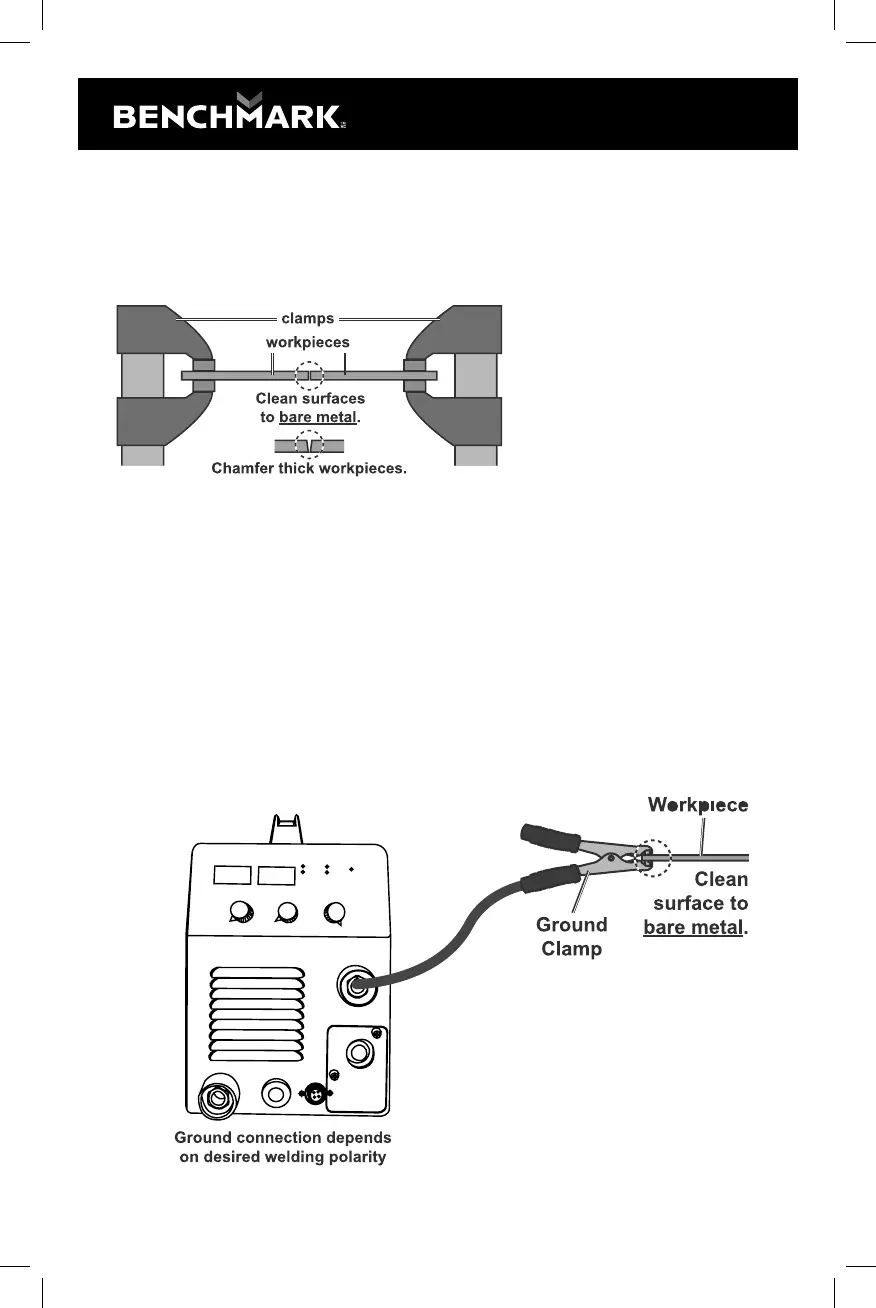
2. Use clamps (not included) to hold the workpieces in position so that you can
concentrate on proper welding technique. The distance (if any) between the
two workpieces must be controlled properly to allow the weld to hold both sides
securely while allowing the weld to penetrate fully into the joint. The edges of
thicker workpieces may need to be chamfered (or beveled) to allow proper weld
penetration.
NOTICE: When welding equipment on a vehicle, disconnect the vehicle battery
power from both the positive connection and the ground before welding. This
prevents damage to some vehicle electrical systems and electronics due to the high
voltage and high frequency bursts common in welding.
3. Clamp Ground Cable to bare metal on the workpiece near the weld area, or to
metal work bench where the workpiece is clamped.