1150-003
INVERTER MULTI-PROCESS WELDER KIT
26
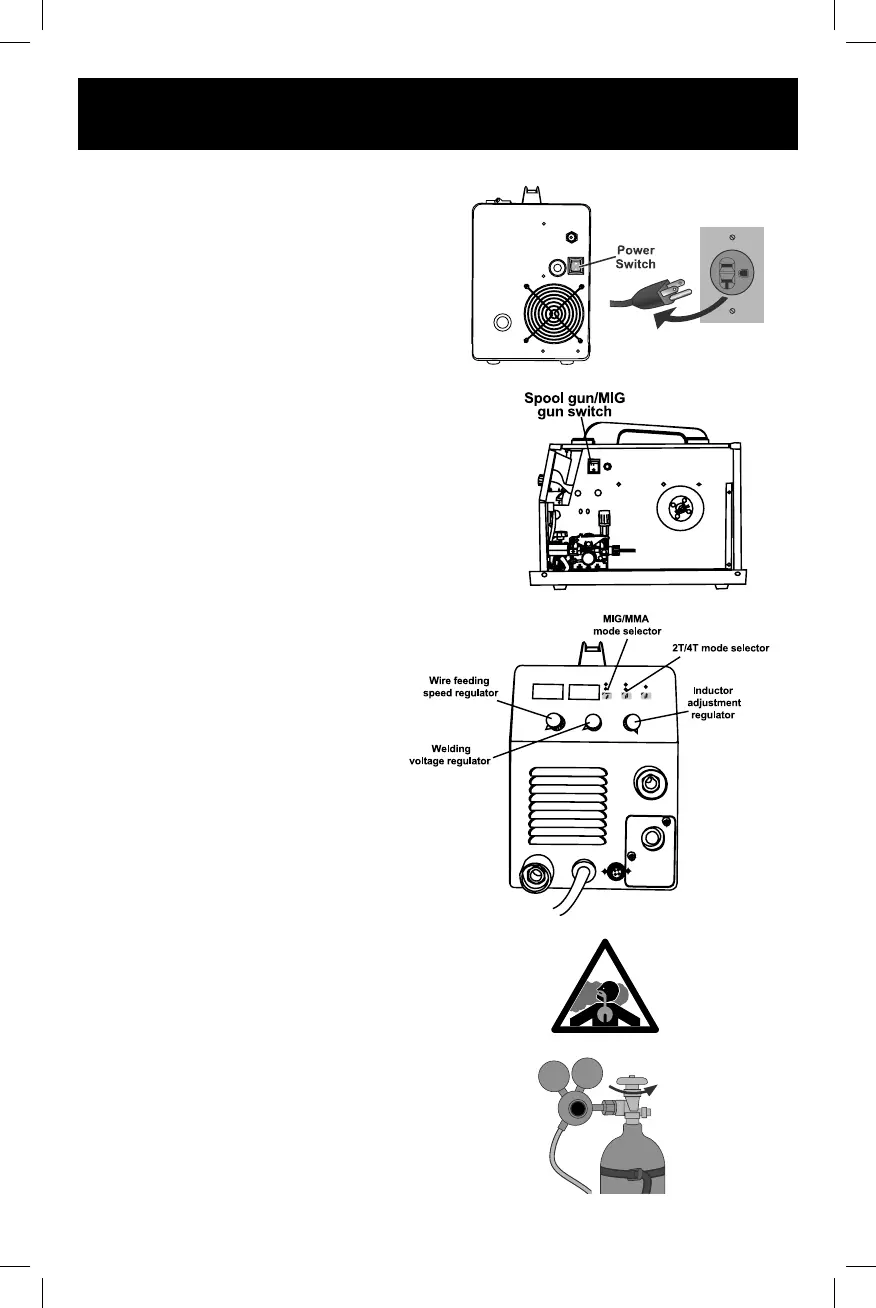
4. Turn the Power Switch to the OFF
position, then plug the Power Cord into
a properly grounded, GFCI protected
120 VAC (20 amp rated) or 230 VAC
receptacle that matches the plug. The
circuit must be equipped with delayed
action-type circuit breaker or fuses.
5. Set MIG Gun down on nonconductive,
nonflammable surface away from any
grounded objects.
6. Turn the Power Switch ON.
7. Press the Spool gun/MIG gun switch to
MIG gun position.
SETTING
1. Press the setting up button to select MIG.
2. Turn the welding voltage regulator to
adjust voltage.
3. Turn the wire feeding speed regulator to
adjust the wire feed speed.
4. Turn the Inductor adjustment regulator
to adjust length of arc. Increase for
more fluid puddle and flatter bead.
Decease for colder puddle.
5. Press the 2T/4T mode selector to
select work mode.
2T Mode: Press the gun/torch trigger to
weld and release to stop. It's usually
used under spot welding/section
welding application.
4T Mode: Press and release the gun/torch
trigger to start, weld without holding
the trigger on and stop by pressing and
releasing the trigger again.
This is particularly useful when doing
continuously welding jobs.
GAS SHIELDED, SOLID-CORE WIRE ONLY