6 720 611 451 GB (03.11)
Commissioning
27
5.10 Appliance Data Monitoring
If an external Gateway module is fitted then the
operating system must be commissioned at this
stage.
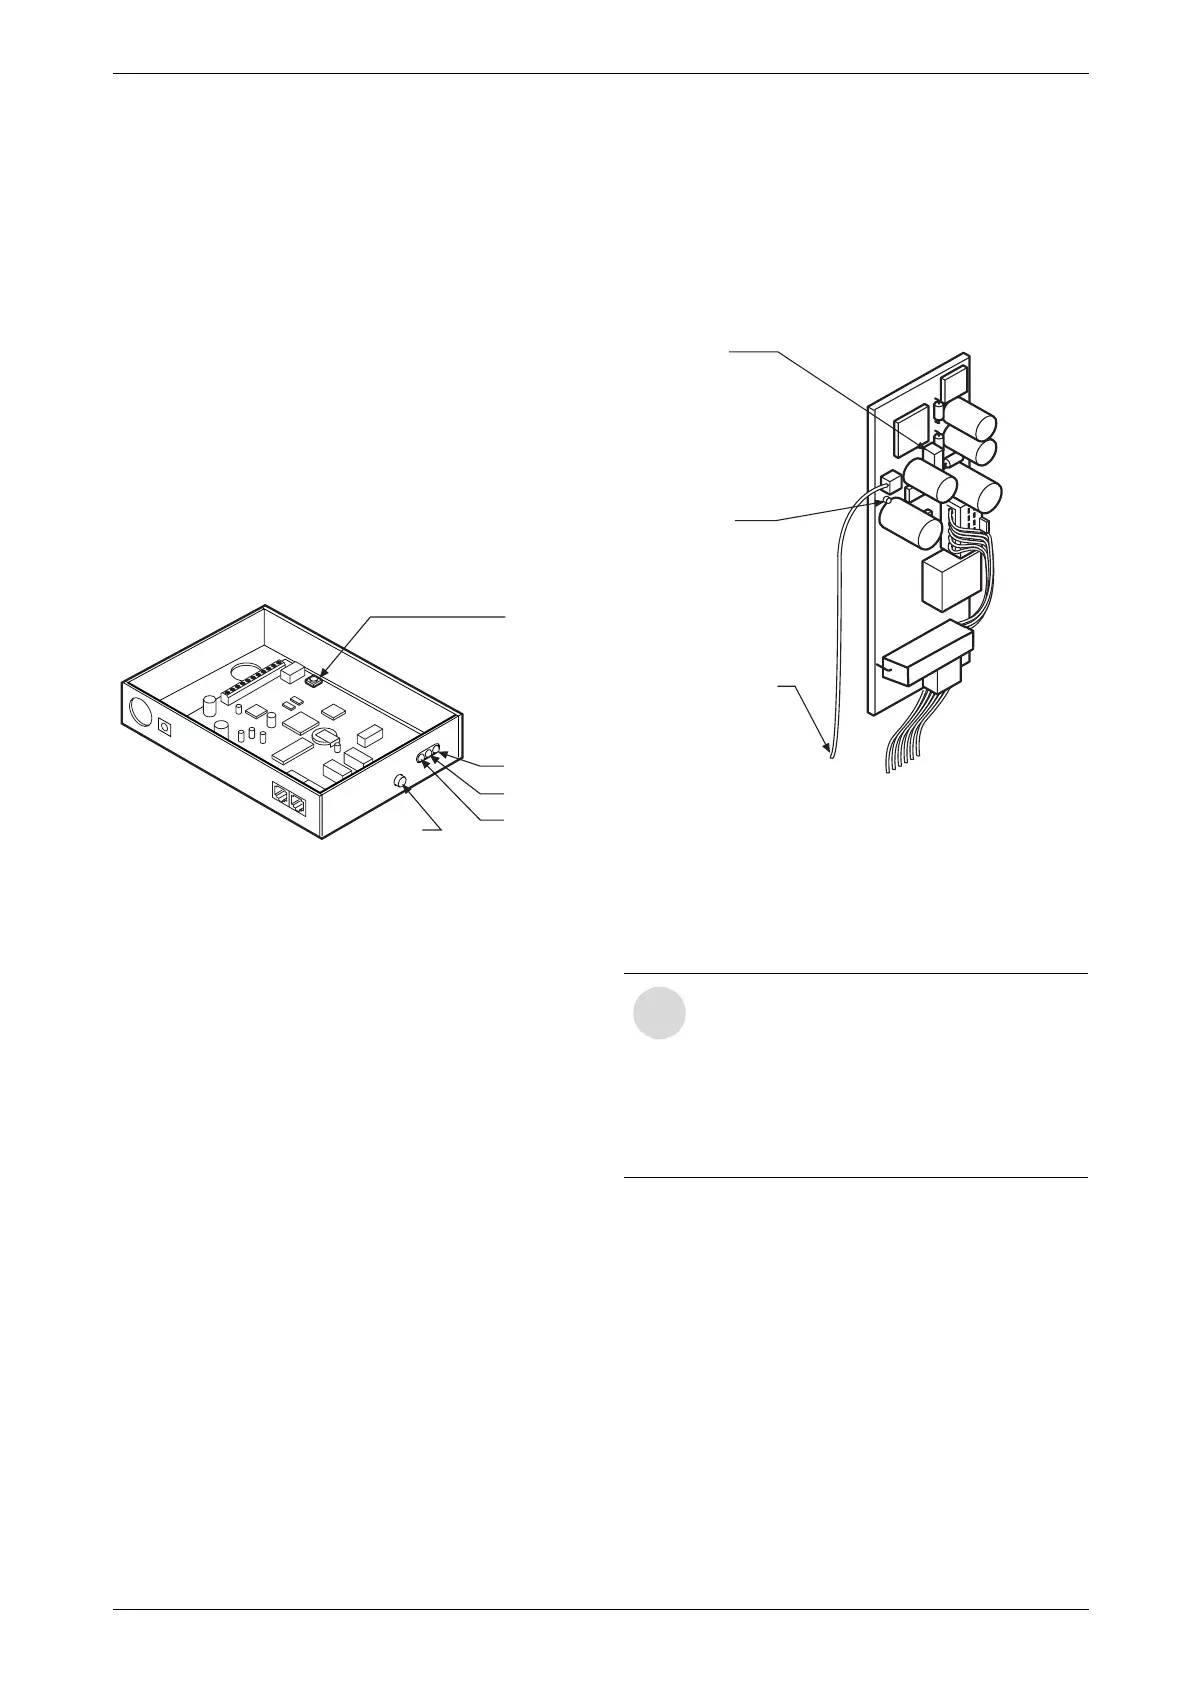
Commissioning of ADM and Gateway
Check if Gateway is plugged into the telephone line and
mains.
1. Remove the cover from the gateway.
2. Unplug the power connector from the side of the
gateway.
3. Reconnect the power to the gateway. Press and hold
SW1 and SW2 within 5 seconds of powering up,
see Fig. 35.
4. Observe 2 distinct clicks from the relays on the gate-
way.
Fig. 35 Gateway Module - switches and LED’s
5. Release the switches. Note only the RED LED is ON.
The Gateway is now reset.
6. Press SW1. Observe 0.5 Hz flashing of GREEN
LED. The gateway is now in “House Address Crea-
tion mode”. This lasts for approx. 1 minute.
7. Wait until GREEN LED flashes 3 seconds ON and 1
second OFF. The gateway has now Created the
House Address.
8. Make the jumper JP1 on the ADM while powering up
the appliance, see Fig. 36.
Observe LED on ADM flashing. The flashing rate is
0.5 Hz, the ADM is now in “House Address Acquisi-
tion mode”.
Fig. 36 ADM - switches and LED’s
9. Return to the gateway and press SW1. Observe
GREEN LED through the side of the box "House
Address Distribution mode”
10.After 100 seconds from step 8 observe ADM LED
flashing at 2 Hz.
11.After 60 seconds from step 9 observe GREEN LED
on gateway is ON.
12. The ADM will now cause the gateway to dial into
BG. A click of the relay will be heard from the gate-
way at each end of the dialling in.
13.Now power down the Heatronic, remove JP1,
replace all covers and power up again. The system is
now set up.
SW1
LED’s
Red
Yellow
Green
SW2
i
“House Address Acquisition mode” on the
ADM and “House Address Distribution
mode” on the gateway must overlap. Note
the times are as follows, the ADM will stay
in “House Address Acquisition mode” for
100 seconds and the gateway will stay in
and “House Address Distribution mode”
for 60 seconds.
JP1
LED
SENSOR