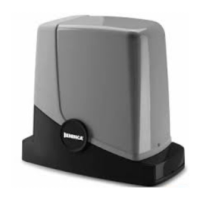
7
Repeat the procedure from the beginning. During this phase, the anti-crash sensor is disabled. if the Encoder device is installed,
the anti-crushing sensor is disabled during the acquisition phase.
6) RESET STROKE ACQUISITION & SLOWDOWNS
To set the control unit to function without slowdowns (timed operation regulated by TW trimmer), proceed as follows:
1) Move the gate to an intermediate position, far from the limit switches
2) Move DIP 1 to ON (DIP 2-3-4-5-6=OFF)
3) Give the Step/Step command through the PP input or remote control
4) The flashing LEDs will confirm the initiated reset
5) When the LEDs turn off, move DIP 1 to OFF
The control unit has deleted data relative to the stroke and slowdowns.
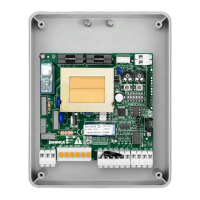
7) SERVICE MAN MODE
With all DIPs on ON, the control unit switches to SERVICE MAN mode.
The PHOT input has the CLOSE push-button function (connect the button with N.O. contact).
The PP input has the OPEN push-button function (connect the button with N.O. contact).
The OPEN/CLOSE push-buttons must be kept pressed during operation. The opening of the STOP input stops the motor. The
contemporary pressure of OPEN/CLOSE stops the motor.
8) ADJUSTMENT OF THE TORQUE (DIP1:ON)
When DIP1 is moved to ON, the board indicates that the torque has been applied during a number of flashes (from 1 to 4) of the
DL2 green LED, followed by a 3-s interval. The max torque is indicated with DL2 green LED with fixed light. To increase the torque,
press P1. The DL2 LED changes the number of flashes to indicate the selected torque value. Once the desired torque is selected,
move DIP 1 to OFF to memorise this presetting.
9) ADVANCED PROGRAMMING
If necessary, it is possible to modify the functions of the PP and STOP inputs to obtain OPEN/CLOSE inputs or alternatively OPEN/
Pedestrian inputs; proceed as follows:
1) Move all DIPs to OFF
2) Move DIP1 to ON
3) to change the Step/Step input to Open, move DIP 2 to ON
4) to change the STOP input to Close, move DIP 3 to ON and DIP 4 to OFF
5) to change the STOP input to Pedestrian, move DIP 4 to ON and DIP 3 to OFF
6) move DIP 6 to ON. The LEDs will flash alternatively for approx. 10 secs.
7) after 10 seconds, the LEDs will flash simultaneously and the new input functions will be stored.
8) move the dips to OFF
9) move the DIPs back to the desired settings
10) PRE-WARNING ACTIVATION/DEACTIVATION (DIP1:ON)
As soon as DIP1 is to ON, the DL1 red LED indicates whether the pre-warning flashing is activated.
The pre-warning function can be activated or deactivated with P2 key.
LED DL1 On: Activated pre-warning, the indicator lamp switches on for approx. 3 seconds before the motor starts.
LED DL1 Off. Pre-warning is deactivated.
11) RADIO SELF-LEARNING (DIP1:OFF)
The radio receiver in this product is compatible with the new ARC (Advanced Rolling Code) transmitters which, thanks to 128-bit
encryption ensure superior copy-security. Storing new ARC transmitters is quite similar to that of normal rolling code transmitters
with HCS coding, but be aware that:
1) ARC transmitters and Rolling Code HCS can not be stored in a single receiver.
2) The first transmitter memorized determines the type of transmitters to be used later. If the first transmitter memorized is ARC,
you can not store Rolling code HCS transmitters, and vice versa.